me & my BIG ideas: The Happy Planner DIY Washi Labels
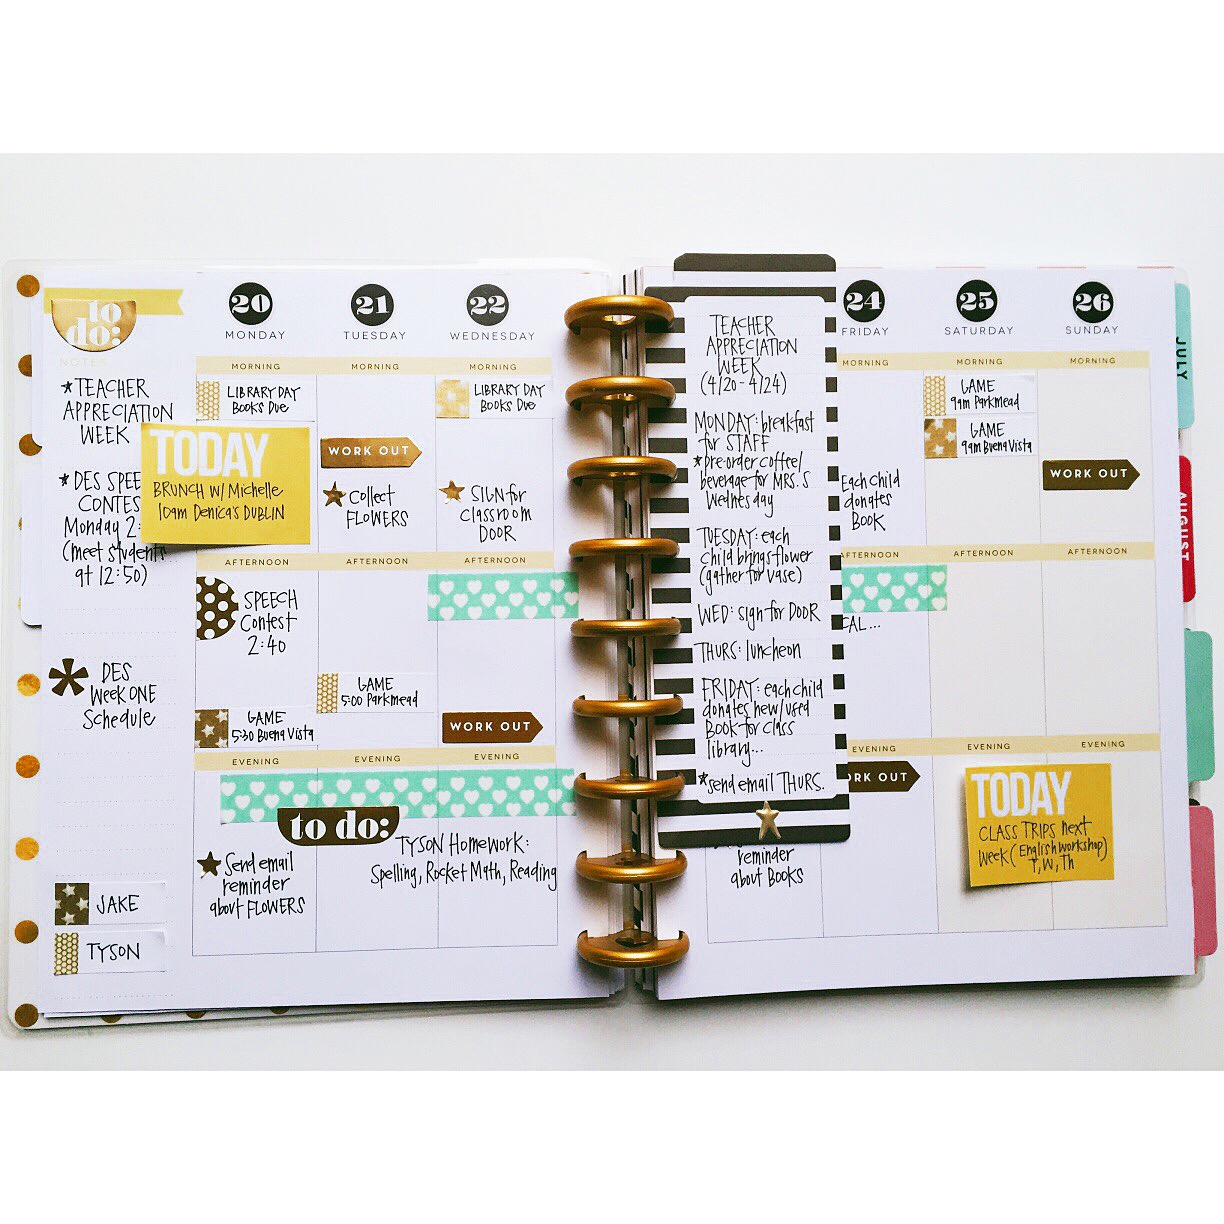
Posted: May 18, 2015 Filed under: Uncategorized 1 CommentSurviving two boys playing baseball in two different Little League divisions will go down as one of my greatest parenting feats to date. In order to help keep different practice times, game times, and game sites straight, I color coordinate each kiddo’s weekly activities using washi tape and labels. I typically pick a color theme for each week and washi accordingly. The labels are removable, so should a game or practice be cancelled, I can simply remove the label or move it to a different day.

The washi tape labels are super easy to make. All you need is a paper trimmer, scissors, labels, and washi tape.
1. I trim the labels to size using the paper trimmer. I eyeball it, mostly trimming to cut off the rounded edges.
2. Run the piece of washi tape down one edge. Leaving room to write.
3. Cut labels apart.
4. Plan away…super easy.
Some examples of how I have used various washi labels in my me & my BIG ideas The Happy Planner:

Happy Planning!!
Planner Love: me & my BIG ideas
Posted: March 18, 2015 Filed under: Uncategorized Leave a comment
I like to color coordinate my boys’ activities each week/month. I love the ease of removable label stickers: makes it easier in case something is canceled or rescheduled. I don’t lose my mind over crossing something out or peeling paper off. To keep up with the number of activities, I started to use washi tape as the color label system. I trimmed the label stickers down to fit each square, ran the washi tape down the side, and then cut out each label. Fast, easy, and endless color/pattern possibilities. Absolutely love the me & my BIG ideas The Happy Planner!! Only a few more short weeks until you all can get your hands on these planner paper pretties!!
me & my BIG ideas: The Happy Planner
Posted: March 6, 2015 Filed under: Uncategorized Leave a commentOh how I love this planner system by me & my BIG ideas!! Cute stickers, home planning extension packets, blank monthly extension packets to extend the life of your planner or use it immediately…so many fun new things coming SOON!! I thought I would share how I am currently using the planner. I set up the blank monthly pages for a March start and took out the 2016 months to make it a 2015 planner. I laminated a little note Ty left me as a bookmark. I also laminated one of my favorite pieces of mambi paper to use as a bookmark as well. Washi tape helps denotes events that last multiple days: homework assignments, Marks travels, early dismissals at school, conference week, etc. The blank monthly extension packet comes with everything you need to set up your calendar: circle number stickers and monthly label stickers:

Each little arc circle has a sweet little heart cut out. Such a fun detail:
Project Life 2014: Weeks 29, 30, and 31
Posted: November 19, 2014 Filed under: Uncategorized Leave a commentWeek 29
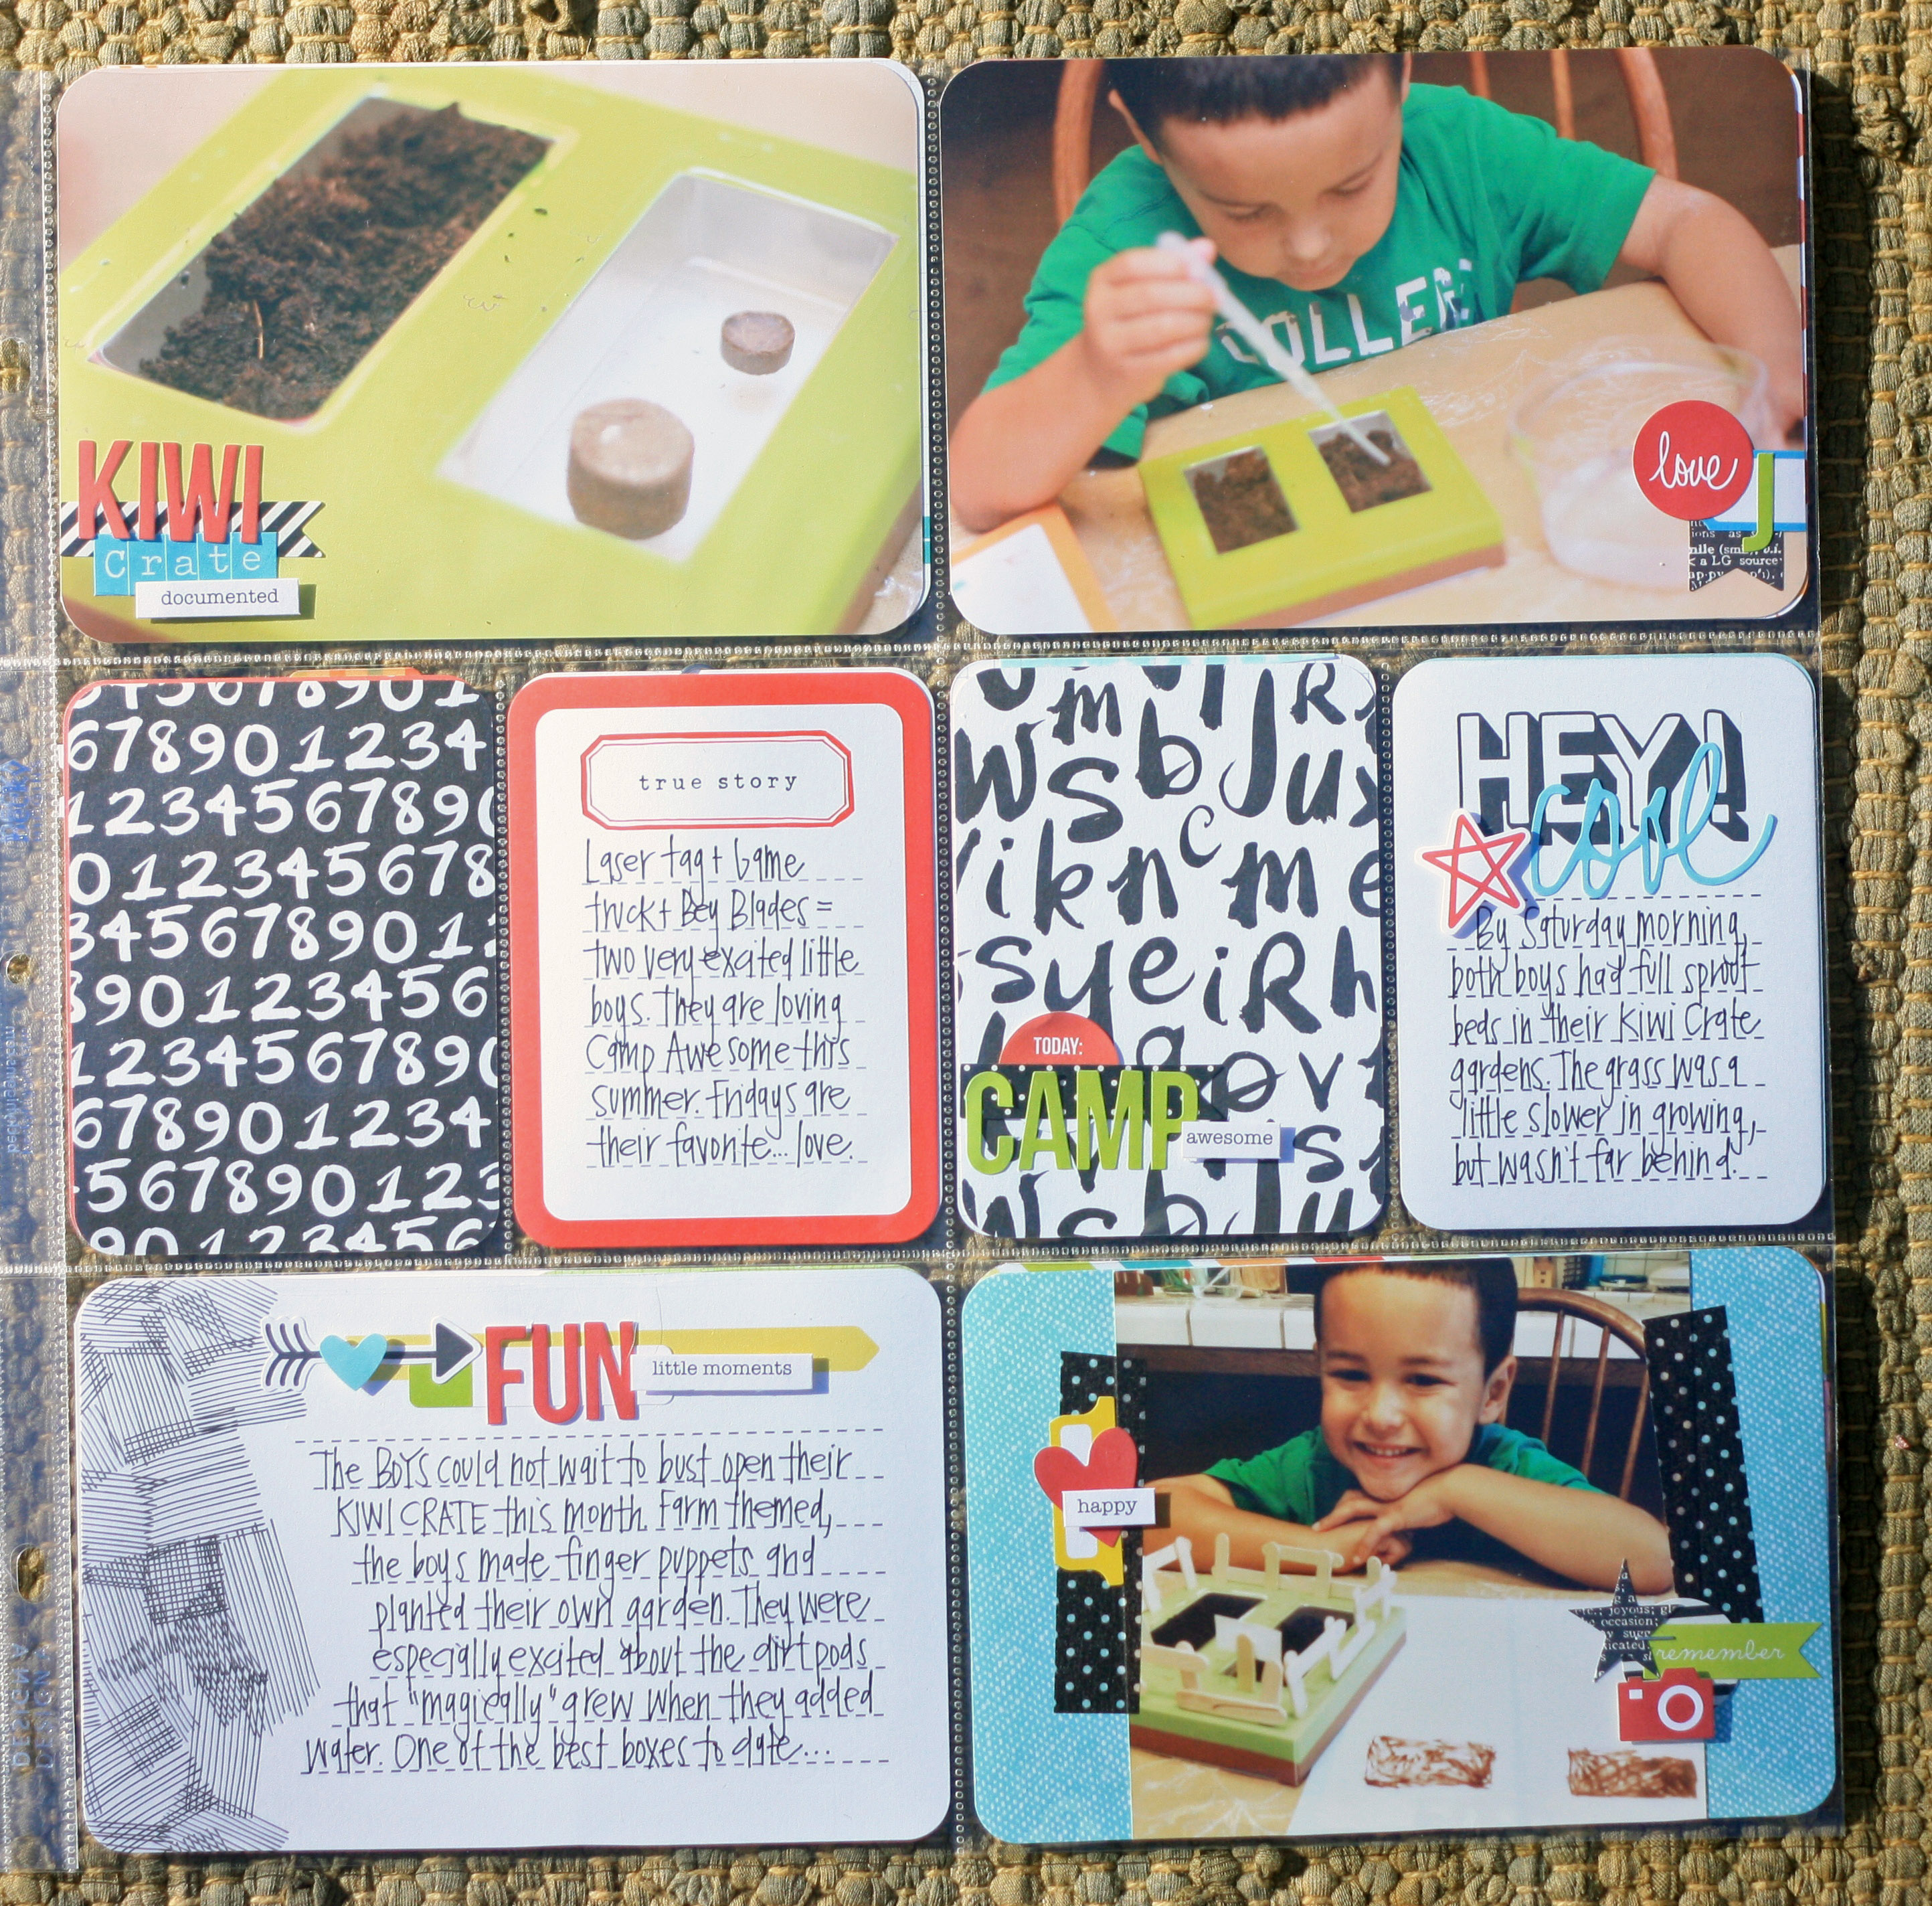
One of my favorite kits: the Plus One Mini Kit combined with Simple Stories stickers. One color scheme, a couple different embellishments = a faster, more streamlined approach.

I don’t use a lot of alpha stickers, but the “DECLUTTER” card opened the alpha sticker food gates. You will be seeing a lot of them in the next few weeks.

Keeping it simple, letting the pictures tell the story, and trying to journal more…
Week 30
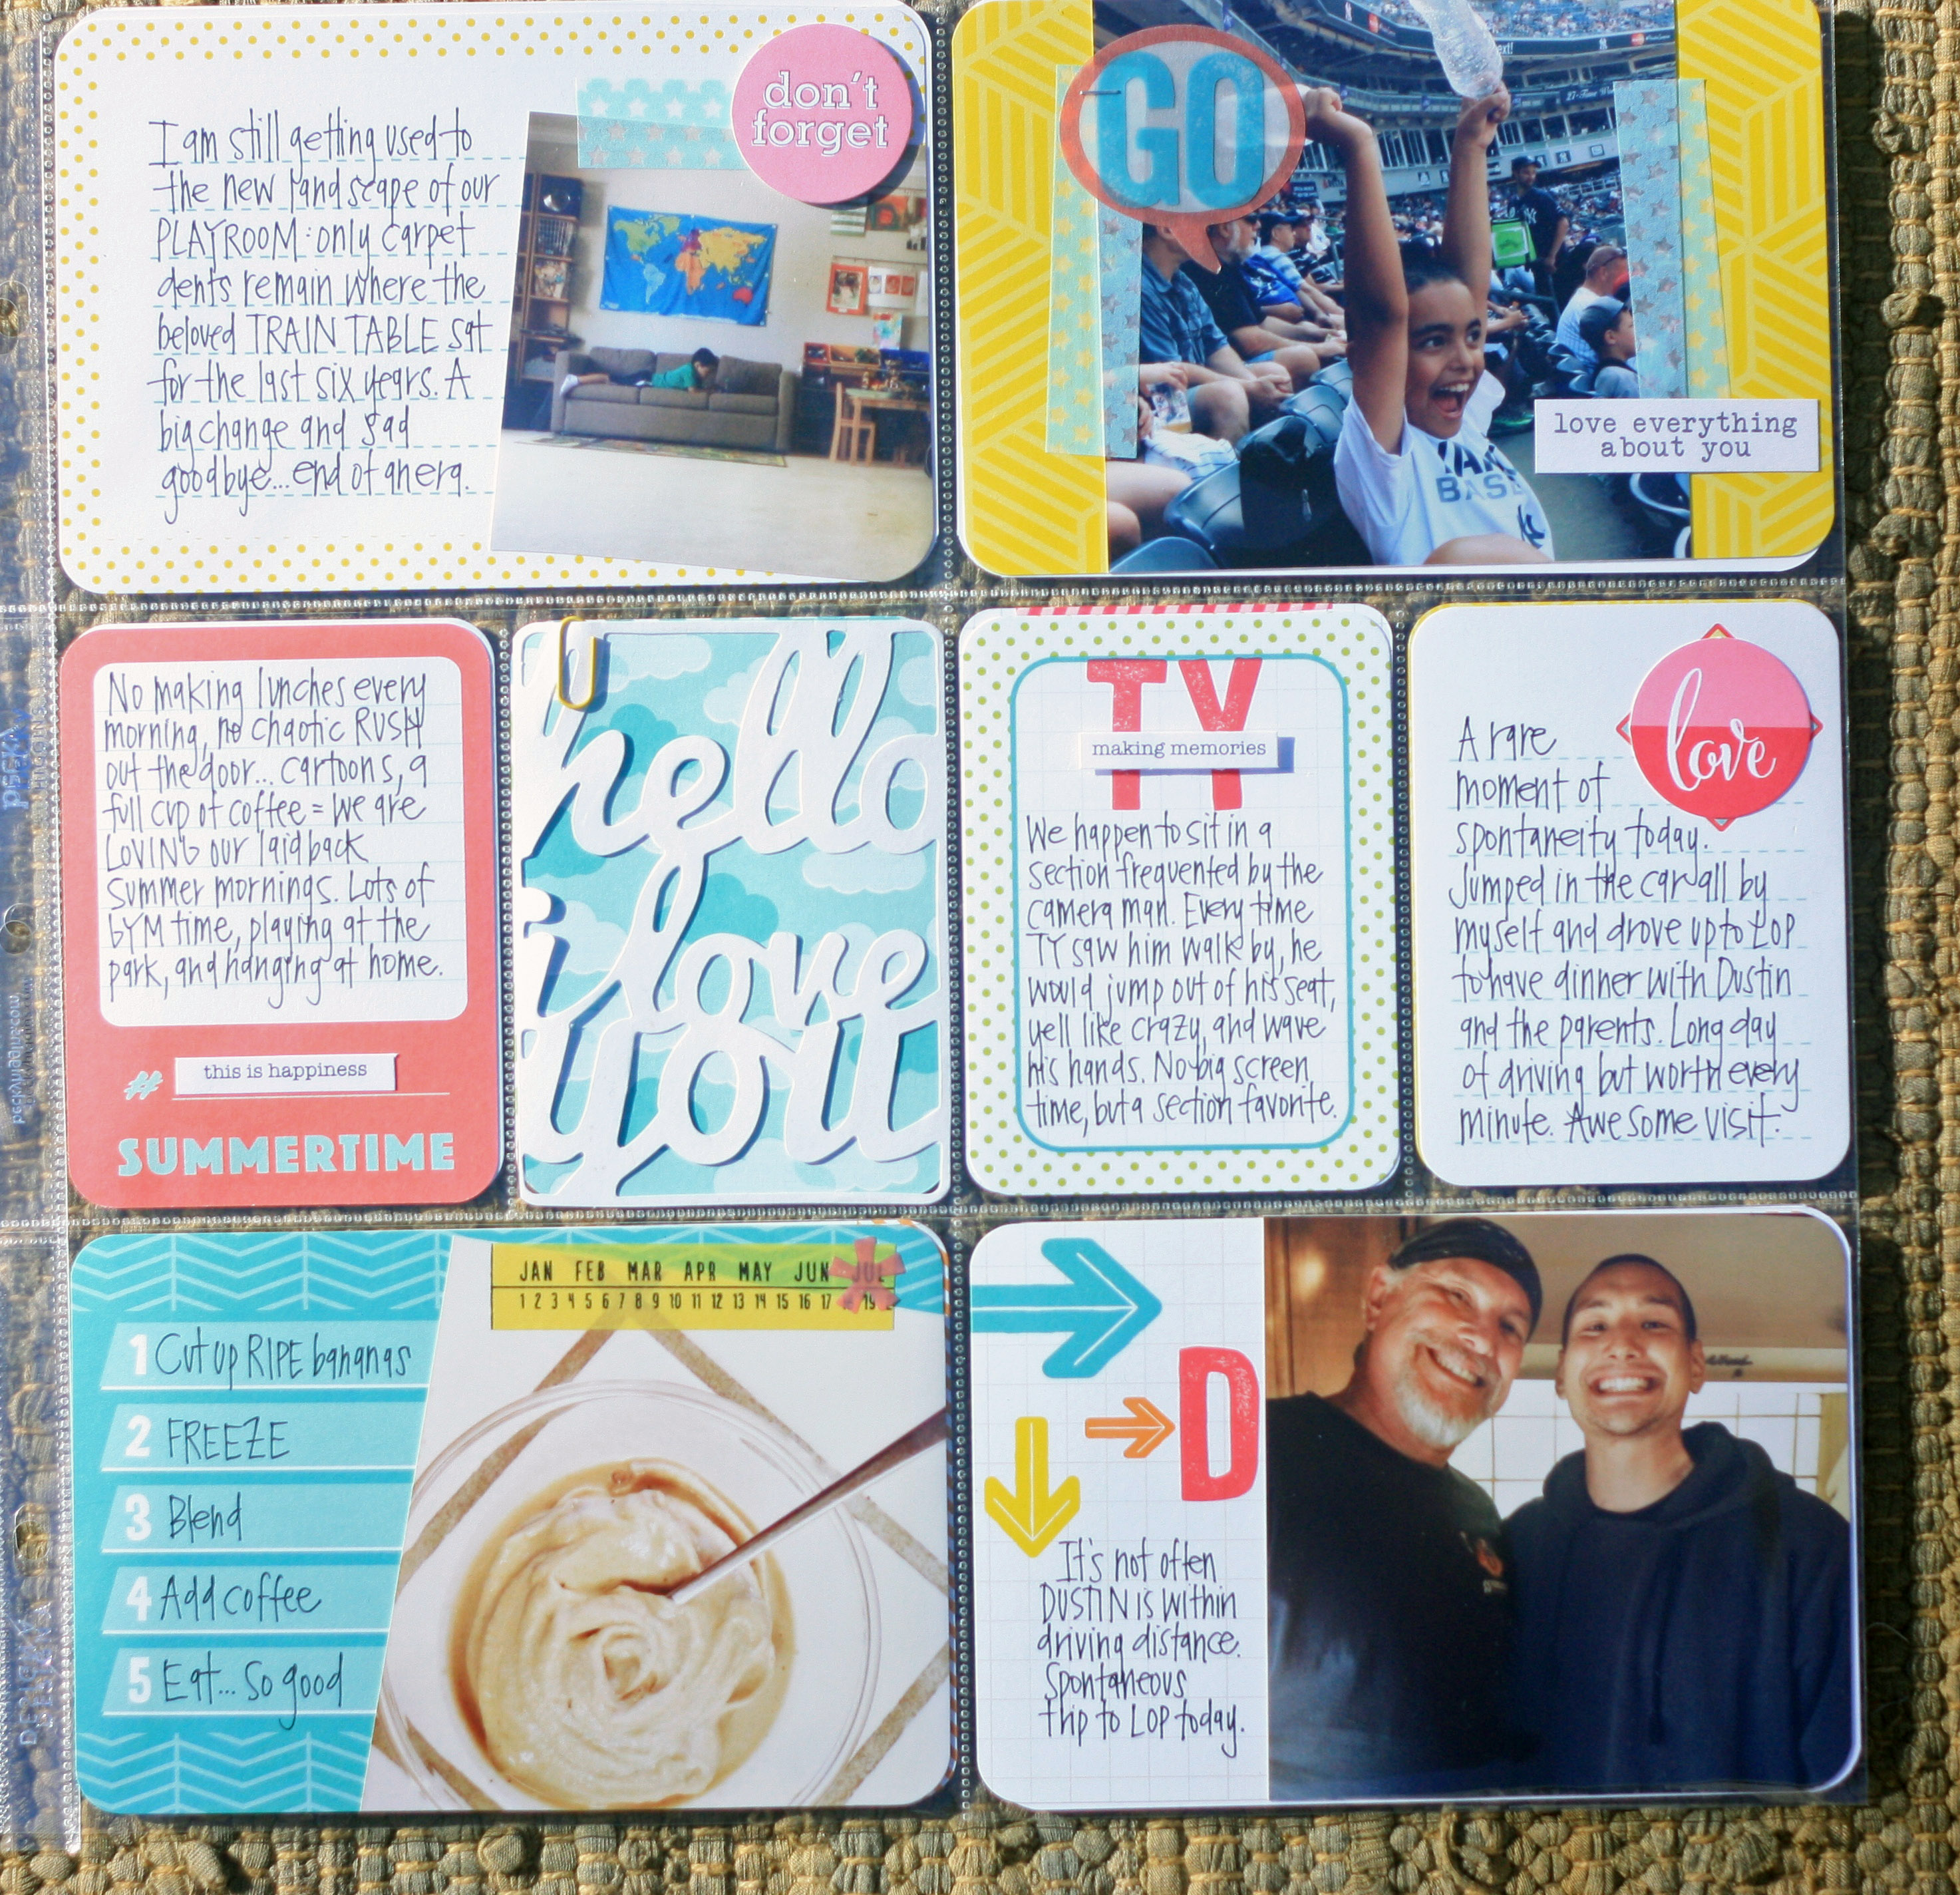
If you know me well, you know that using pink, in this quantity, is a huge step outside of my comfort zone. I loved the bright colors in this kit…and embraced the presence of the pink.


Week 31
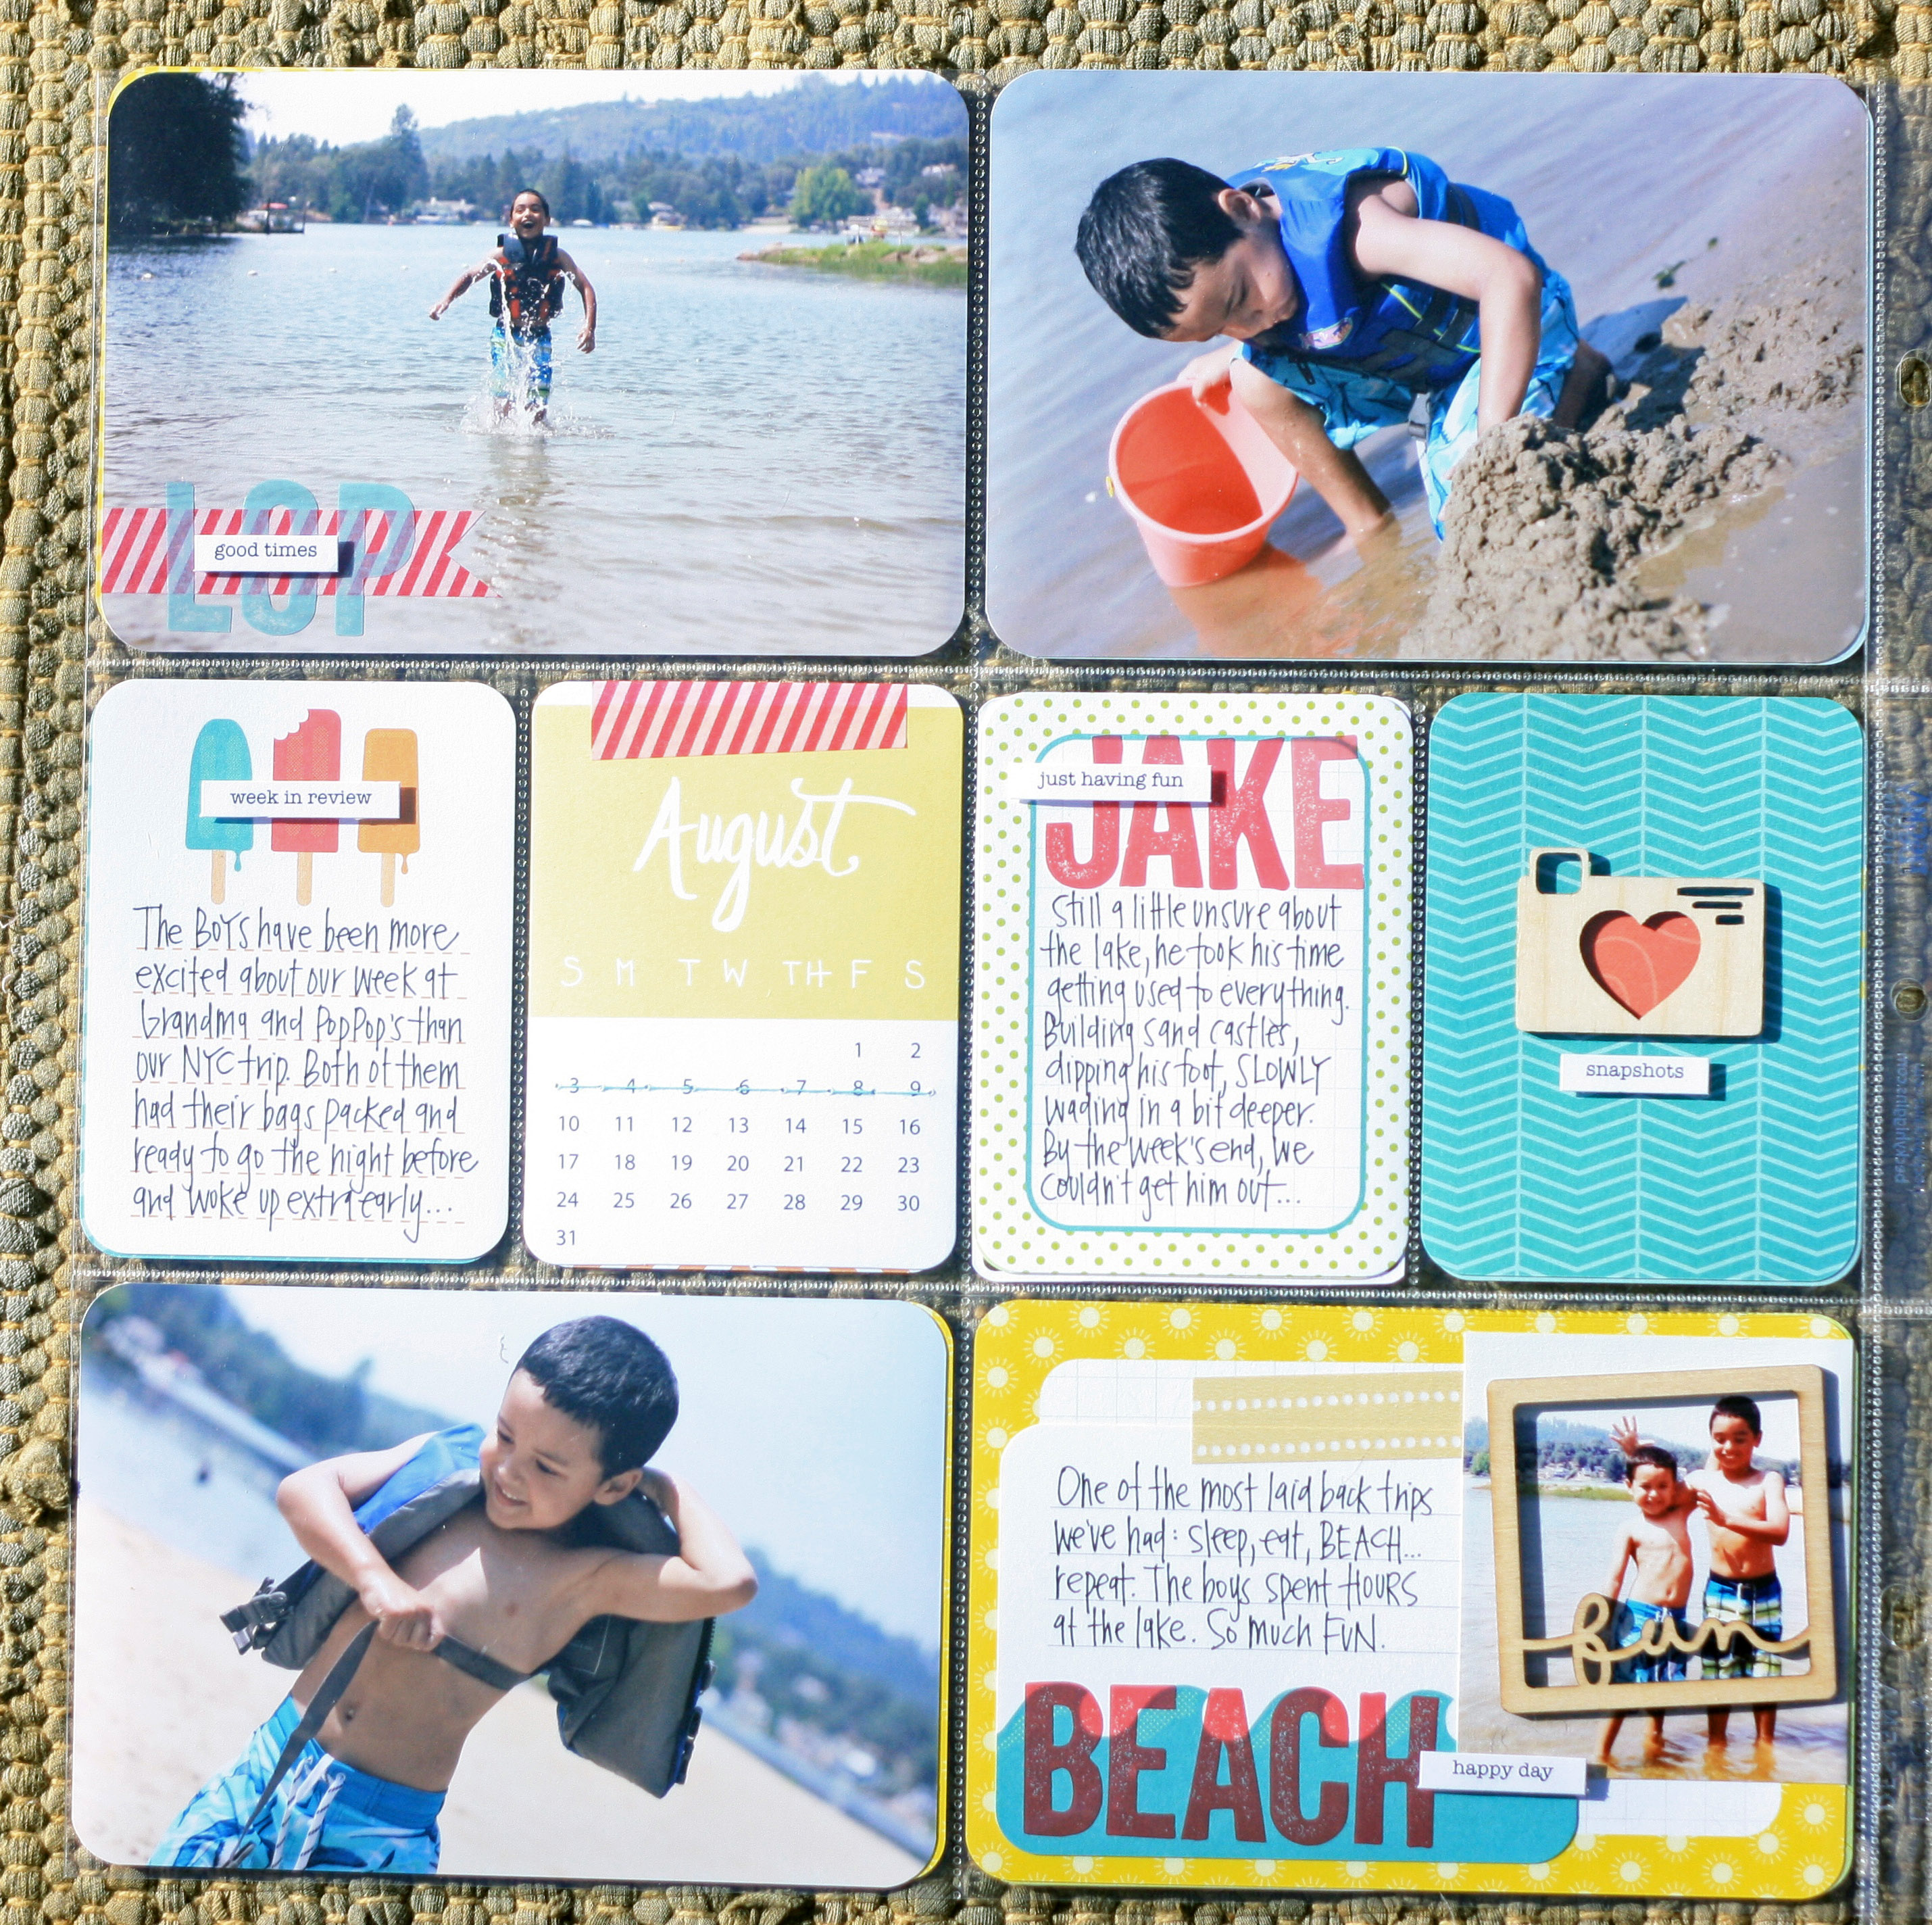
In an effort to catch up, I have started to place journal cards in pockets along with the photos in two week chunks. Allows me to keep the embellishments consistent and work across two spreads v changing up the whole routine each week. I may go back to my weekly change up next year, but for now, this process is working well for me…

Sometimes everything just comes together…capturing our happy place and sharing one of my favorite childhood memories with the boys. Love that our days at the Lake are becoming one of their favorite summer traditions:

Project Life 2014: My Workspace
Posted: August 13, 2014 Filed under: Project Life, Uncategorized 2 Comments I have received a few questions on Instagram about my Project Life organization and workspace and thought I would share a few pictures. I don’t have an office or permanent workspace, so everything is more or less portable as I work in the dining room. It overlooks the boys’ playroom so it’s perfect.
 I like to have everything out and visible, or as past experience has proven, it doesn’t get used. In my immediate workspace: a bamboo silverware tray that houses my favorite core kits, roygbiv’d by kit. A black wire silverware tray that houses random cards and all my sub kit cards in roygbiv order. Next to those, a white wire tray that houses most of my washi tape, again roygbiv’d.
* Bamboo tray and white wire silverware tray are from TJ Maxx
* Black wire silverware tray and wire cupcake stand are from Cost Plus
 Behind the card trays is a wire cupcake stand that I use to hold date stamps, more washi, and extra embellishments. I have all my favorite, or current, embellishments in a white muffin tin. Super simple set up, everything can be moved to the garage if need be. I also have two raskog carts: one houses all my sticker embellishments and the other all my design team goodies. Hope that helps!!
* Raskogs and antonius organizers: Ikea
* White muffin tin is actually a paint tray from Lakeshore Learning
Project Life Giveaway: Winner
Posted: April 9, 2013 Filed under: Uncategorized Leave a commentAnnnnd apparently, it’s only Tuesday. Heh. I will still honor the winner. And improve my giveaway hosting skills in the future…
 Louise, if you could message me your information, I’ll send the cards out tomorrow. Enjoy!! Happy Project Life-ing…I hope you’ll share your creations.


