Project Life: Week 17
Posted: June 19, 2015 Filed under: Project Life Leave a comment
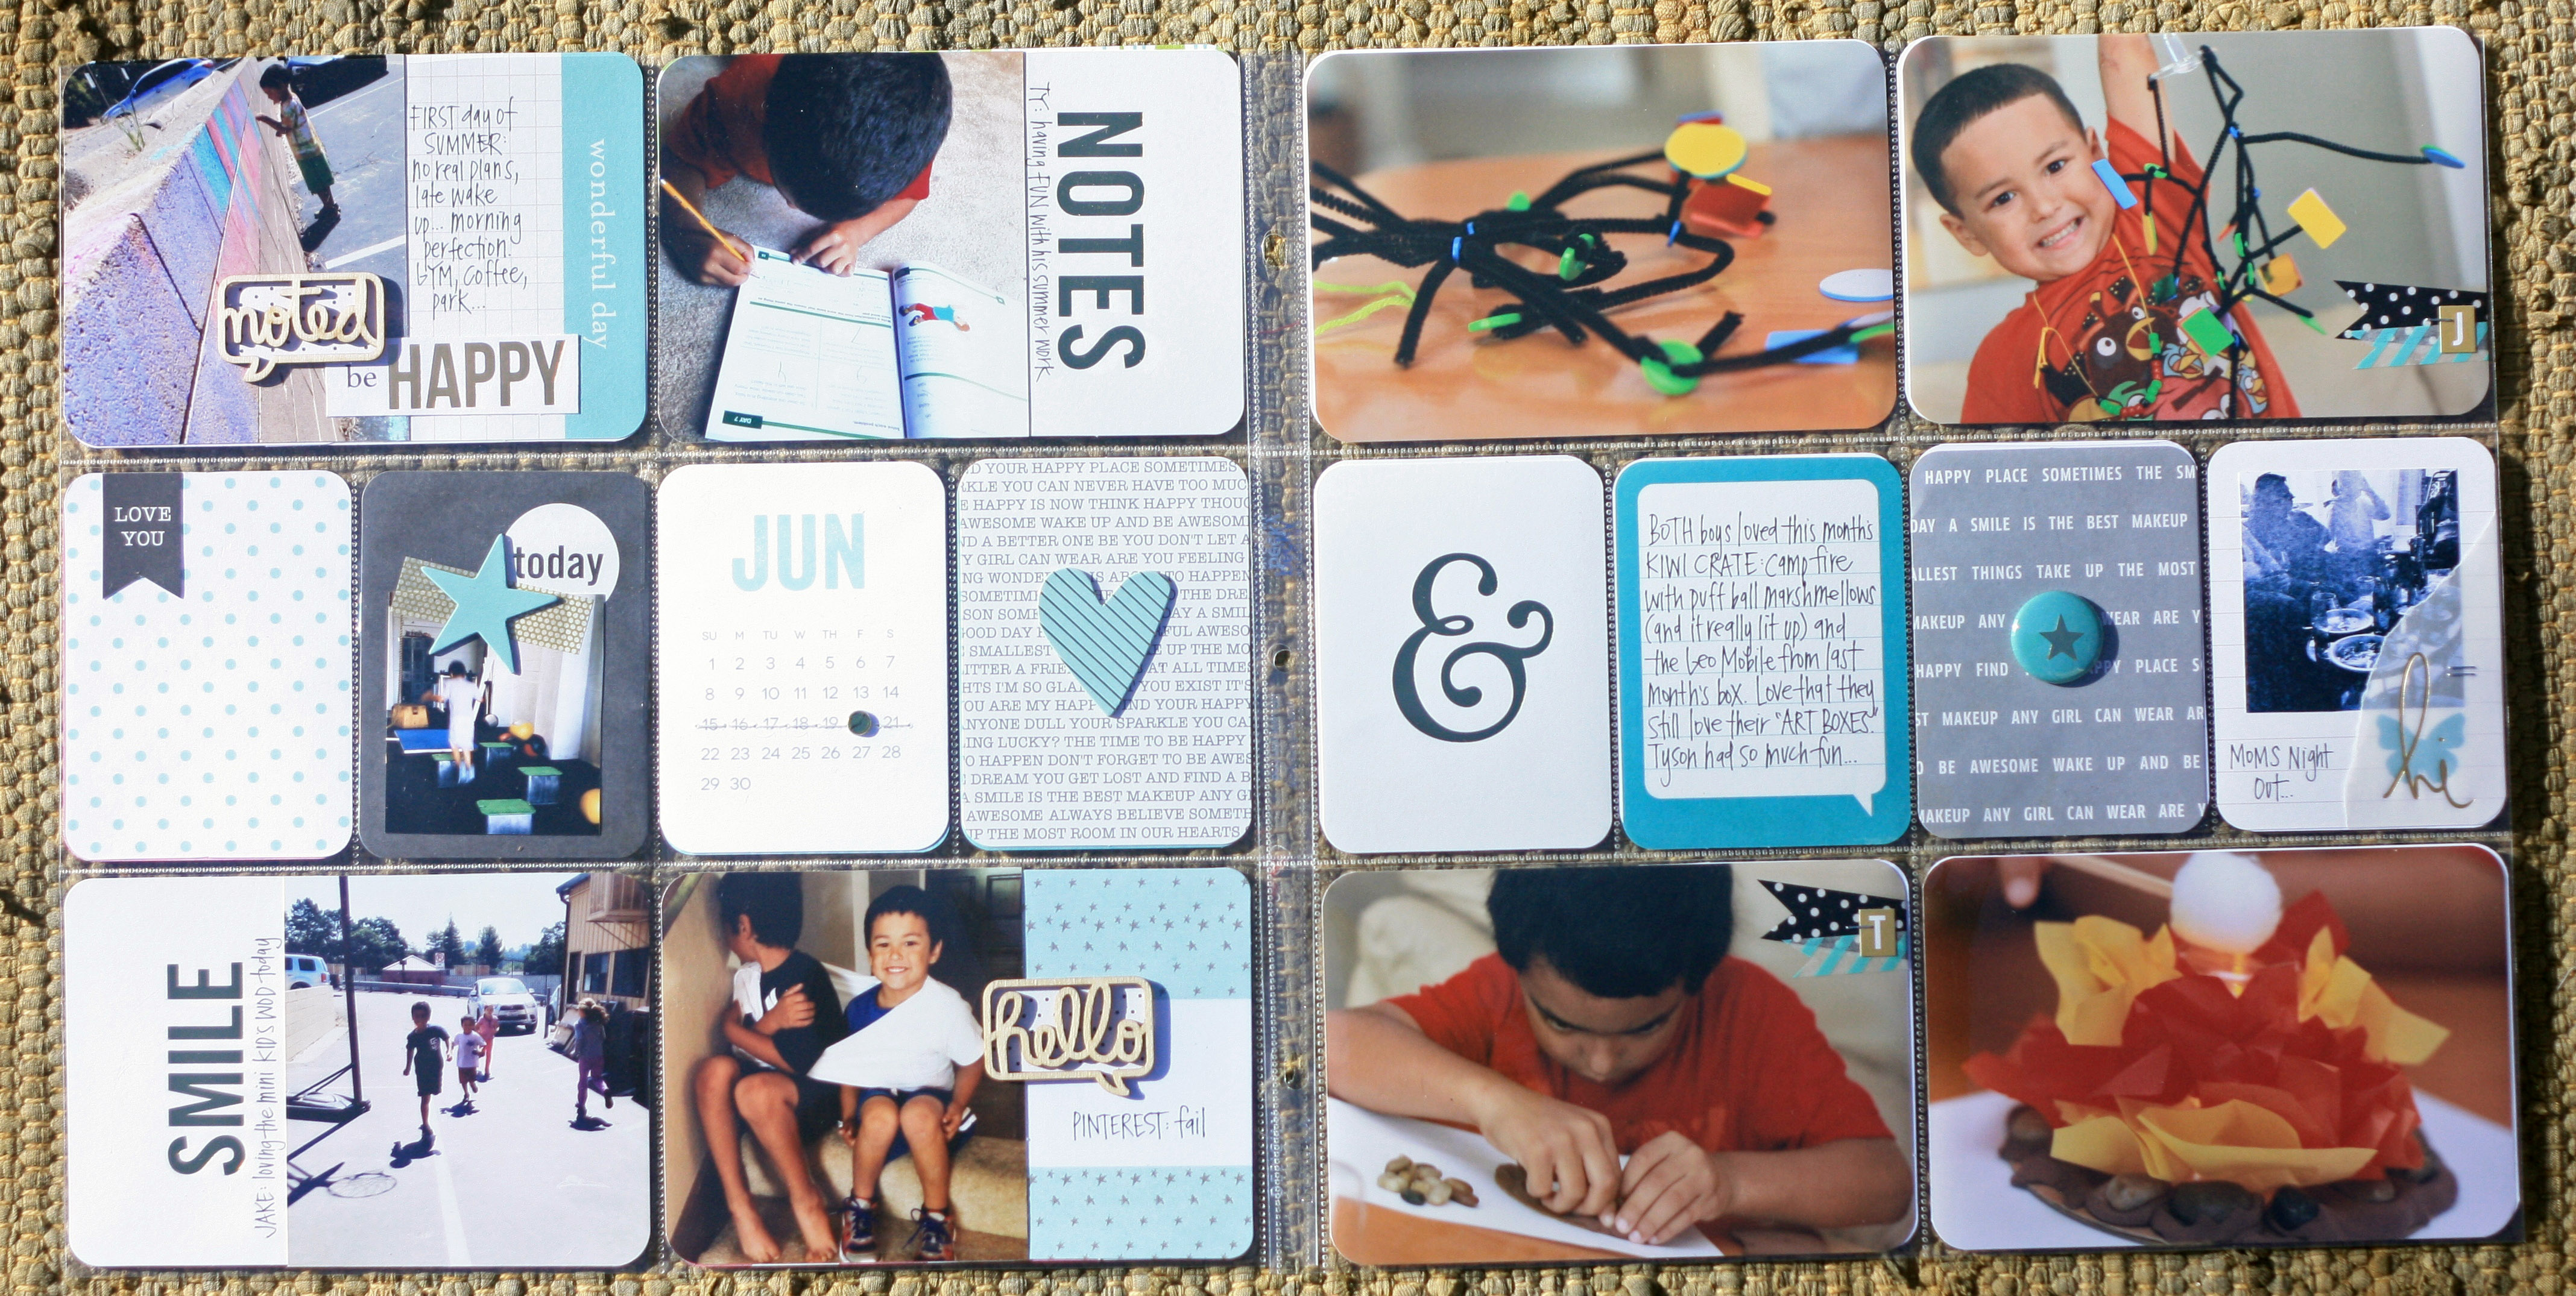
I am really hoping to take some time this summer and update my Project Life photos. For now, here is Week 17. I rarely use the same core kit two weeks in a row; however, this new Stampin Up Project Life kit is one of my all time favorites. I absolutely LOVE it. A week of baseball, Teacher Appreciation shenanigans, a rare date night, and more baseball ❤

Summer Bucket List 2015
Posted: June 14, 2015 Filed under: Planner Love, Project Life, Scrapbooking 1 Comment
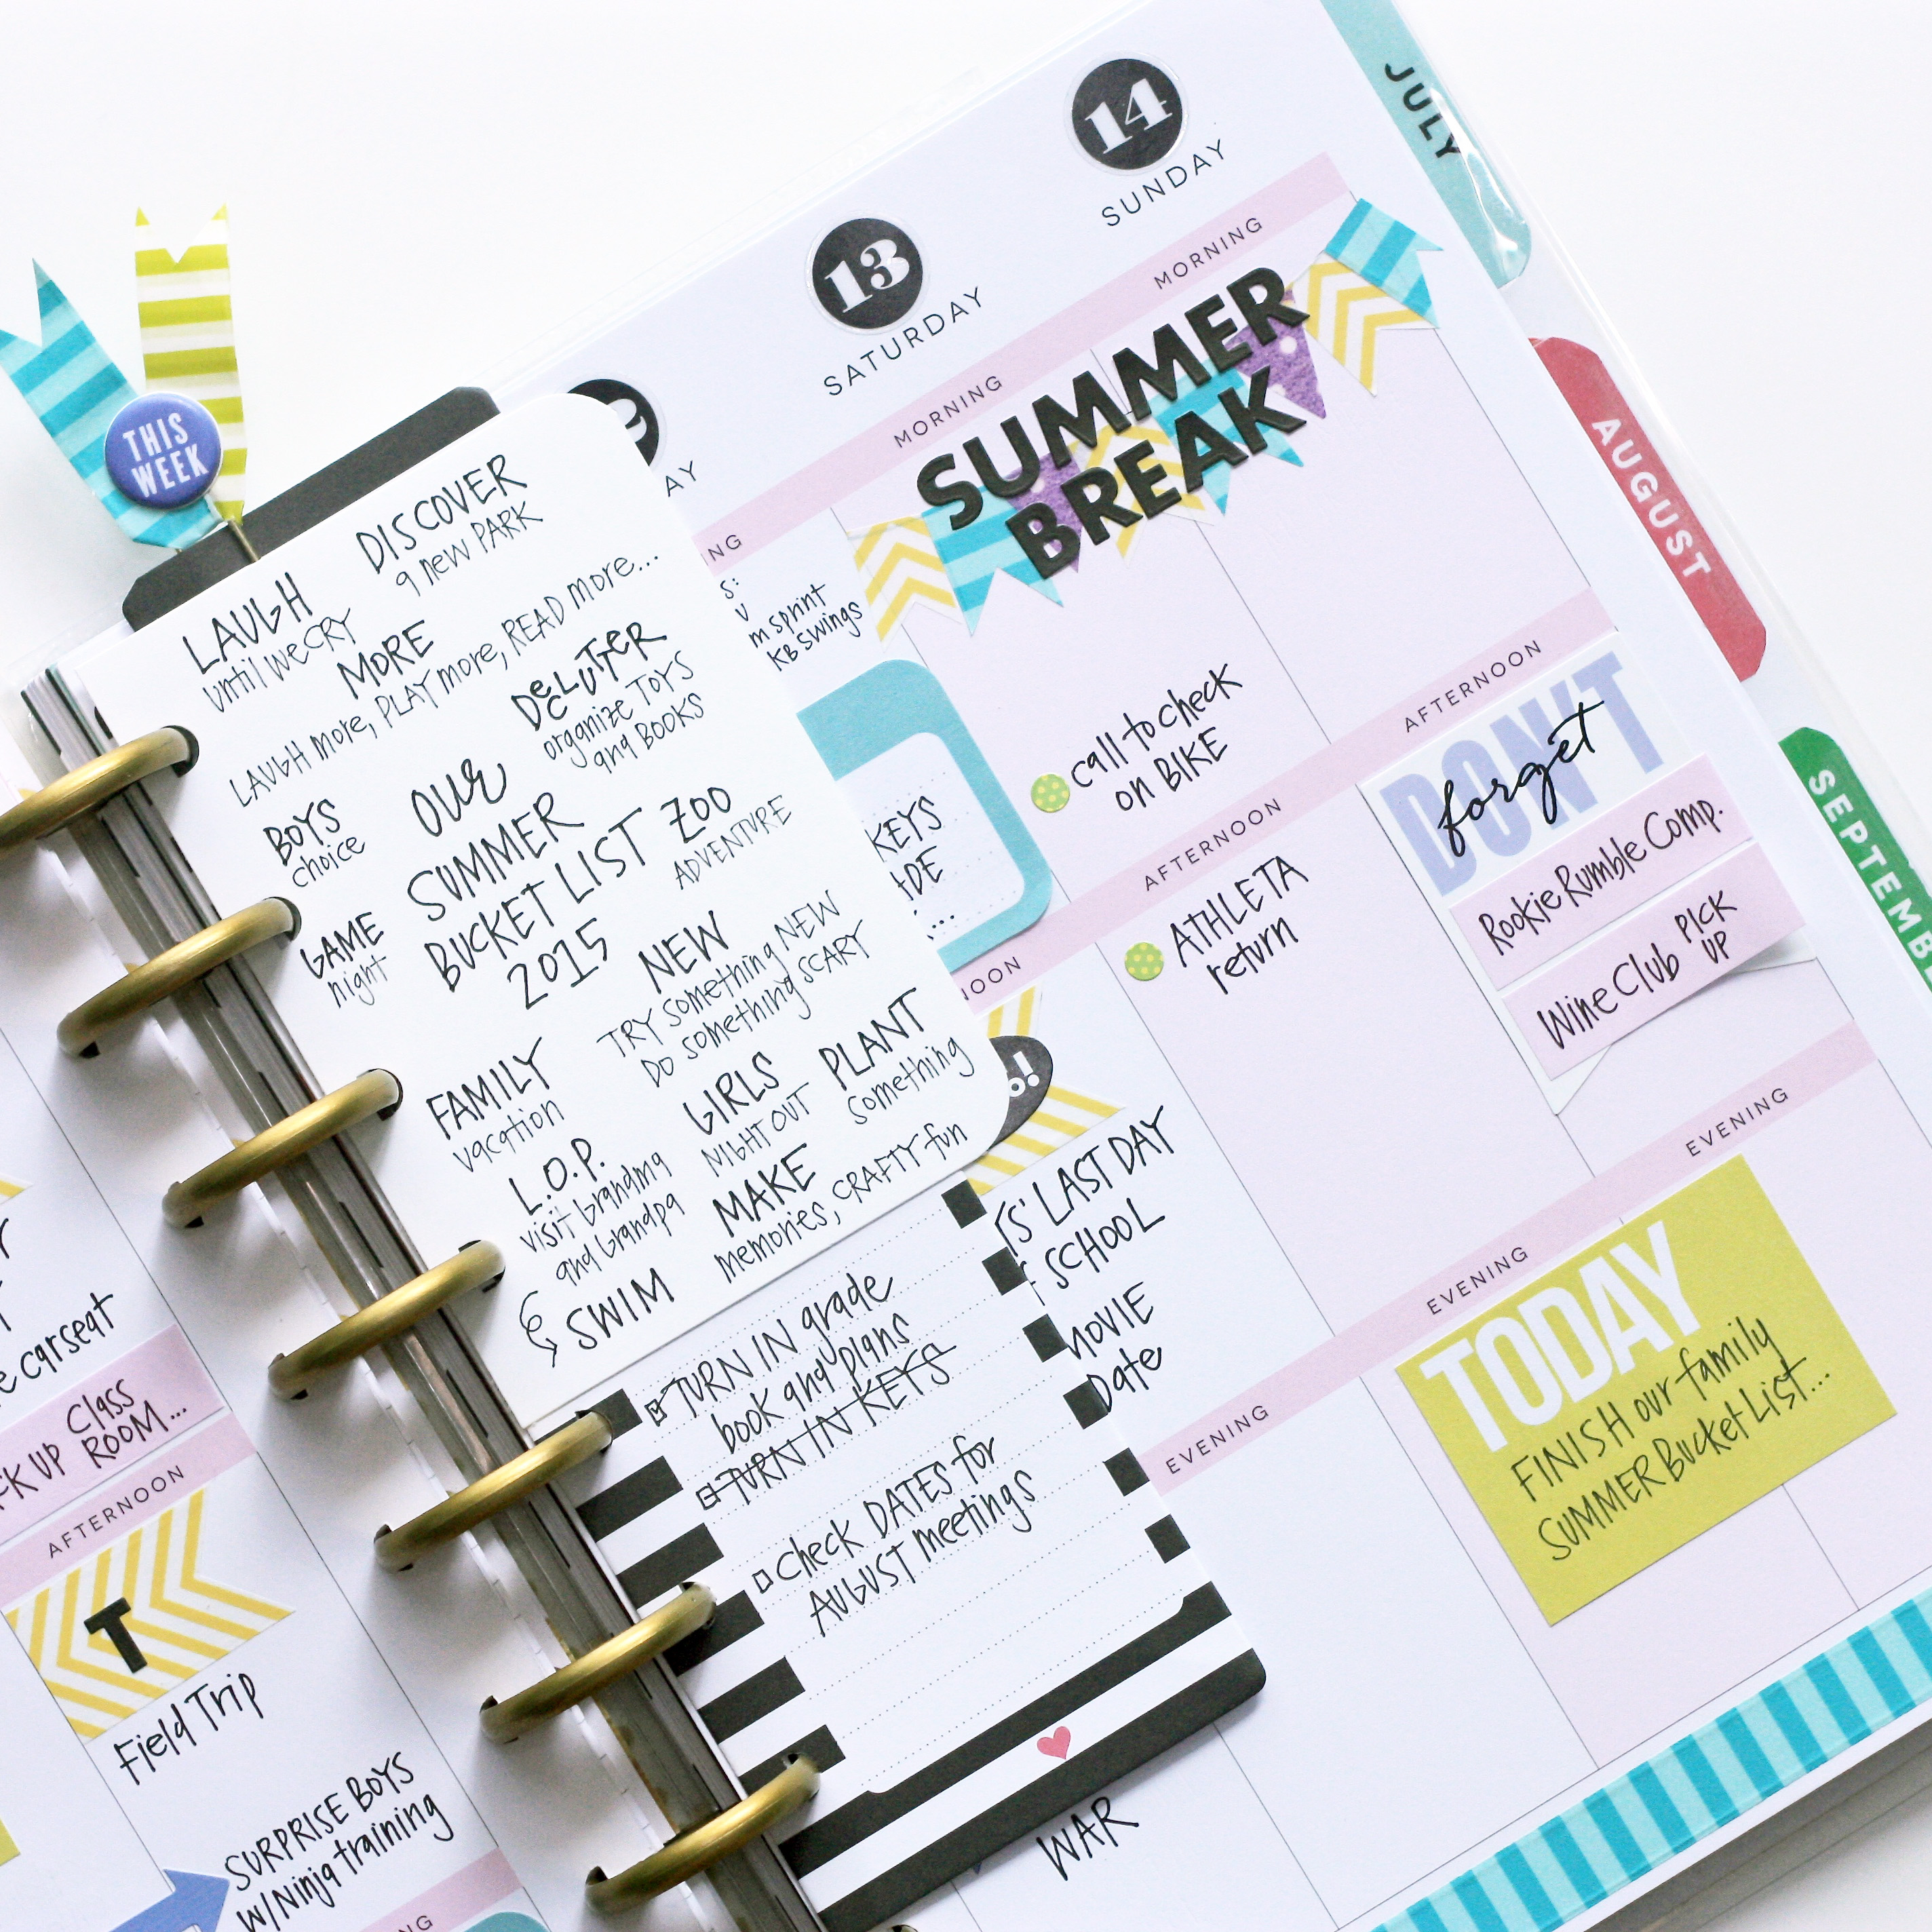
Constructing our family Summer Bucket List has become one of my favorite summer traditions. This year, I went with a texture and chalkboard theme. I plan to use the clips to attach photos of our adventures. There is a small envelope in the bottom corner housing a few of our activities that didn’t fit in the clipped tagged area. Looking forward to a summer of fun, laughter and adventure. I also made a small portable version of our bucket list to carry with me in my me & my BIG ideas The Happy Planner. I love summer ❤
Project Life 2015: Week Eight
Posted: March 23, 2015 Filed under: Arts and Crafts, Project Life, Scrapbooking 1 CommentI typically place photos into sleeves as I print them. Then, as I find time, I go back and add the journaling and embellishing. As I sat down to work on Week 8, I noticed I hadn’t placed any photos on the left side. Not a single one. I immediately considered the week a wash; however, I had a few stacks of the boys’ school work and artwork sitting behind me and I decided to use the scanning app on my phone. I scanned the pieces of work, printed them on 4×6 matte paper, and LOVE the result. In fact, it might just be one of my most favorite Project Life layouts to date. Kid-made art makes my heart happy…
 I loved the frame journal card and knew I wanted to work with it, but the pink background didn’t match my color scheme. I cut out the frame, printed this scanned picture as 1 x 1.5-ish, and it turned out super cute. I plan to do something like this monthly to help alleviate the stacks and stacks of kid work I keep (and have no idea what to do with).
December Daily 2014: Moments 11 through 20
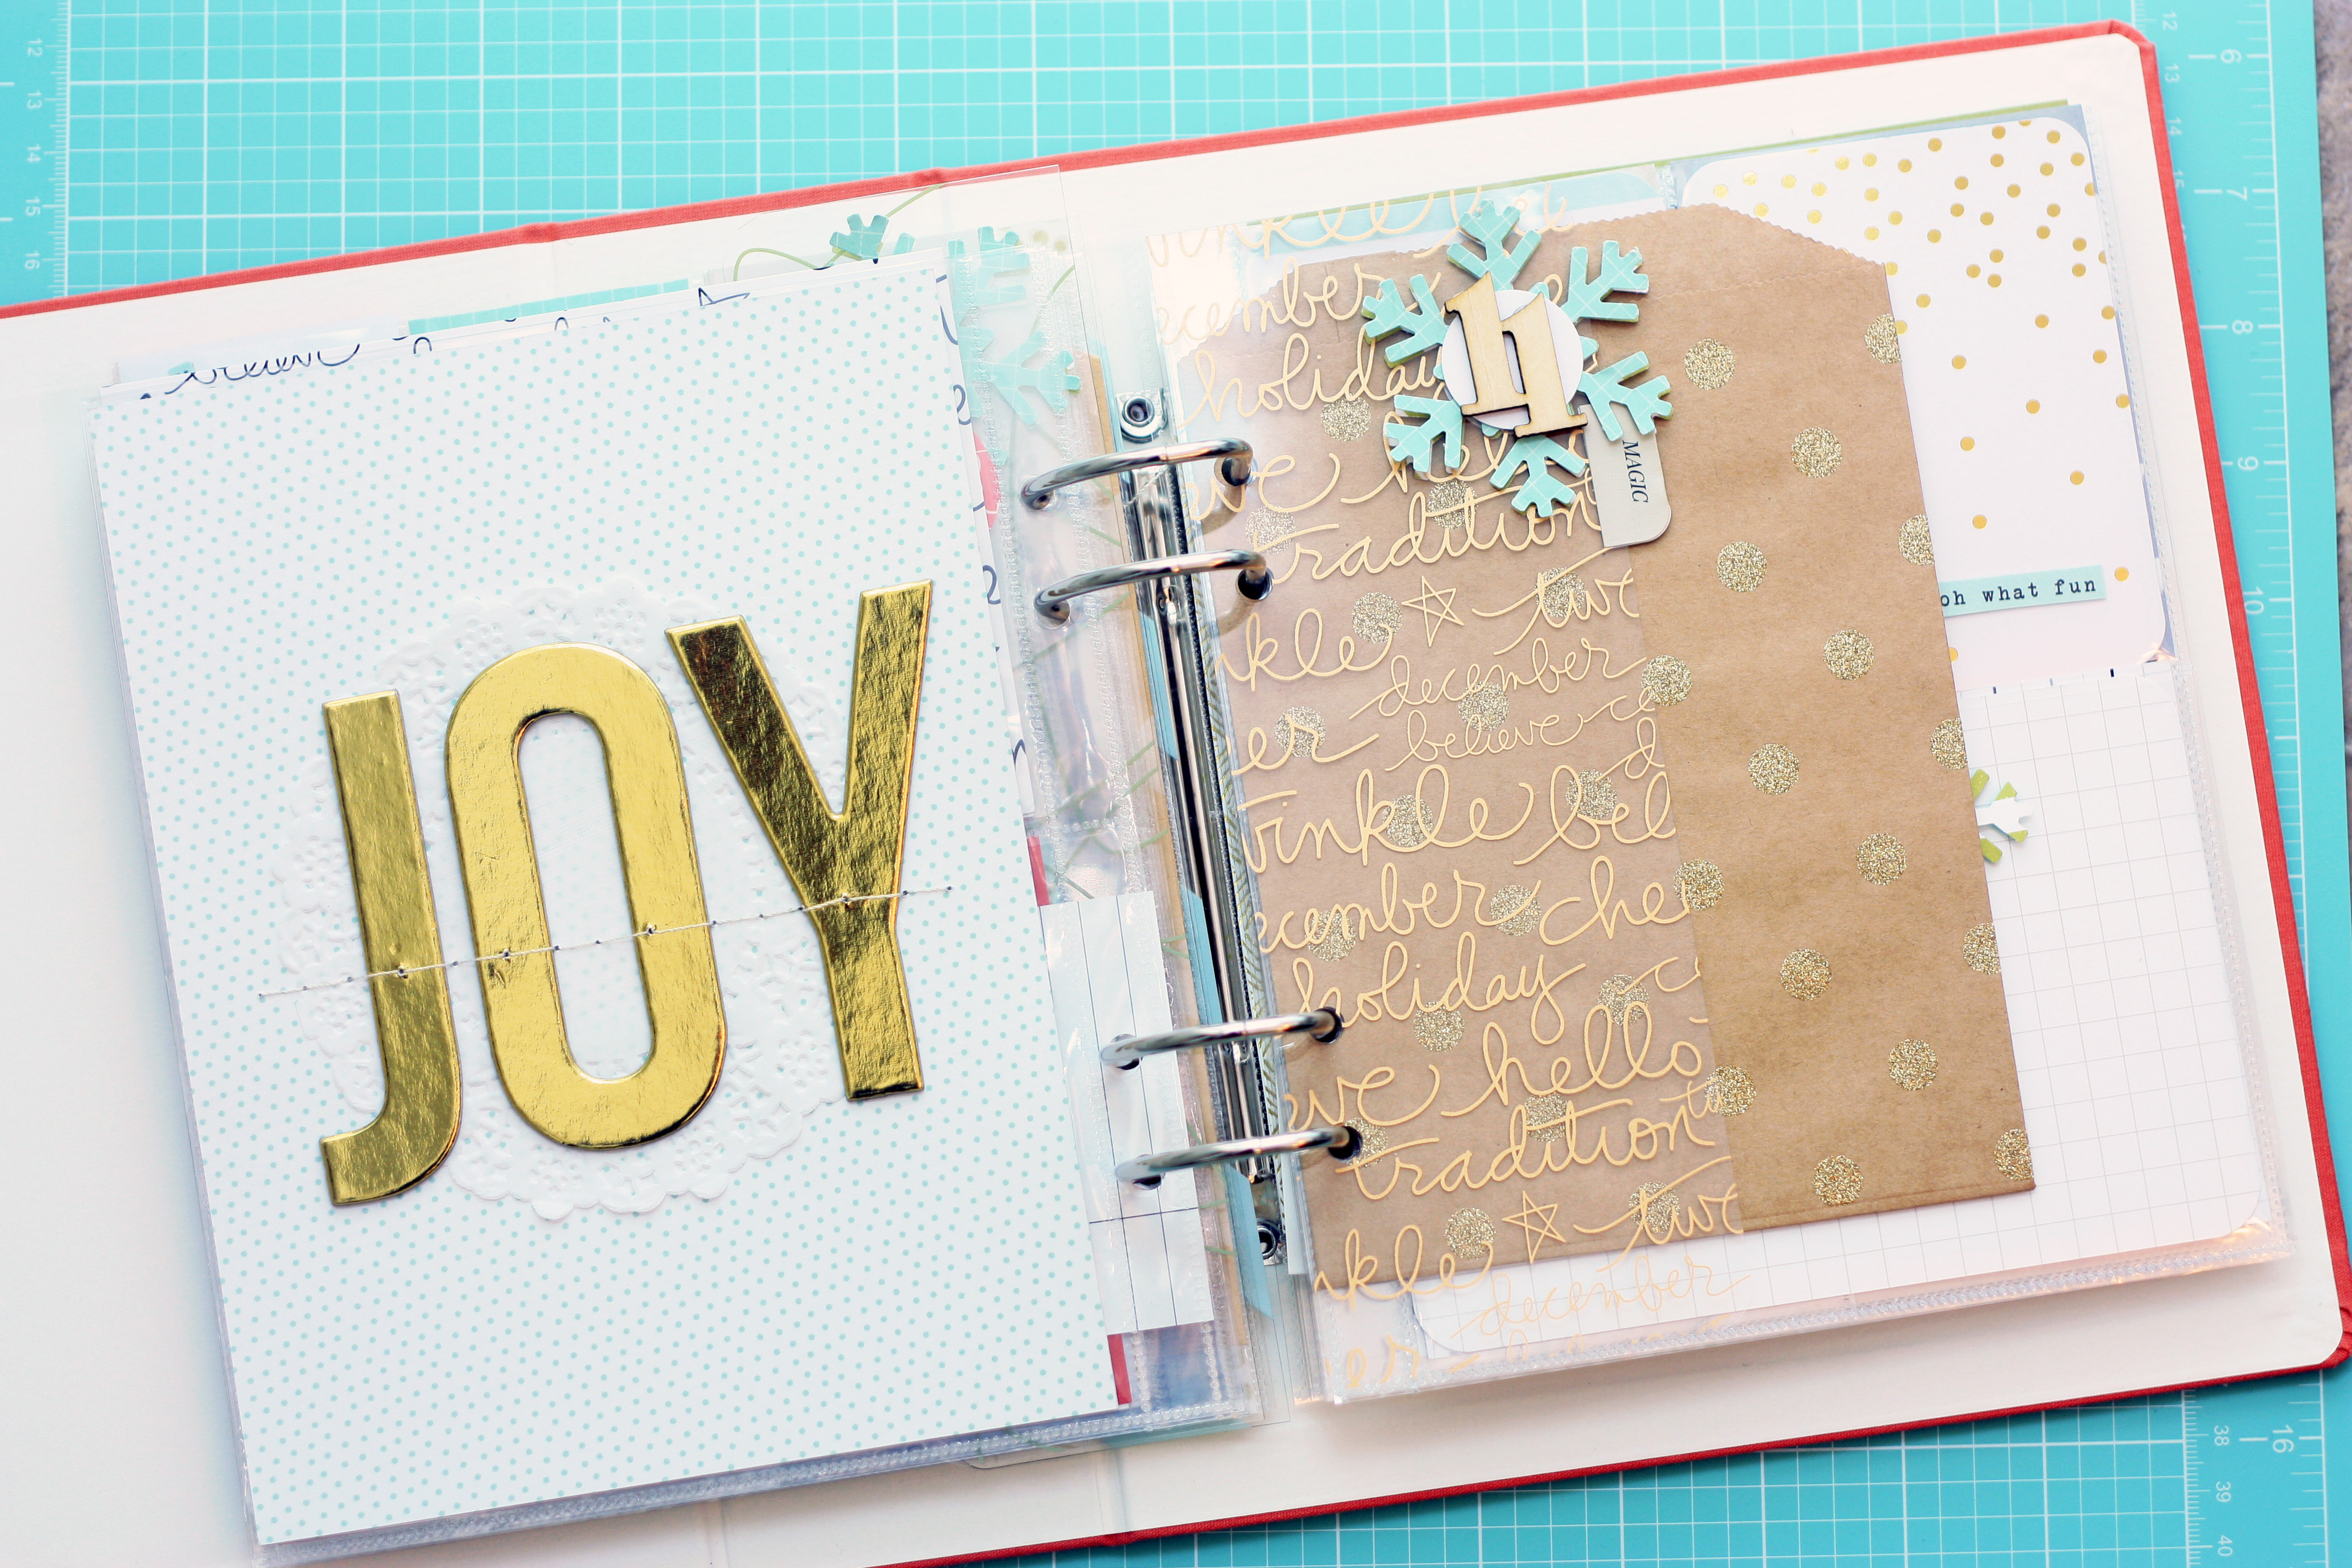
Posted: November 30, 2014 Filed under: December Daily, Project Life, Scrapbooking 1 CommentMoment 11: Not sure what I’ll put here, but it will go inside or on top of the bag…loving the blue/gold/wood veneer combination.
 Moment 12: will likely put cards/notes from my students in the bag or possibly a photo/journal card for a separate moment…lots of flexibility within the album.
 Moments 13 and 14: I plan to add photos of the boys’ class parties…
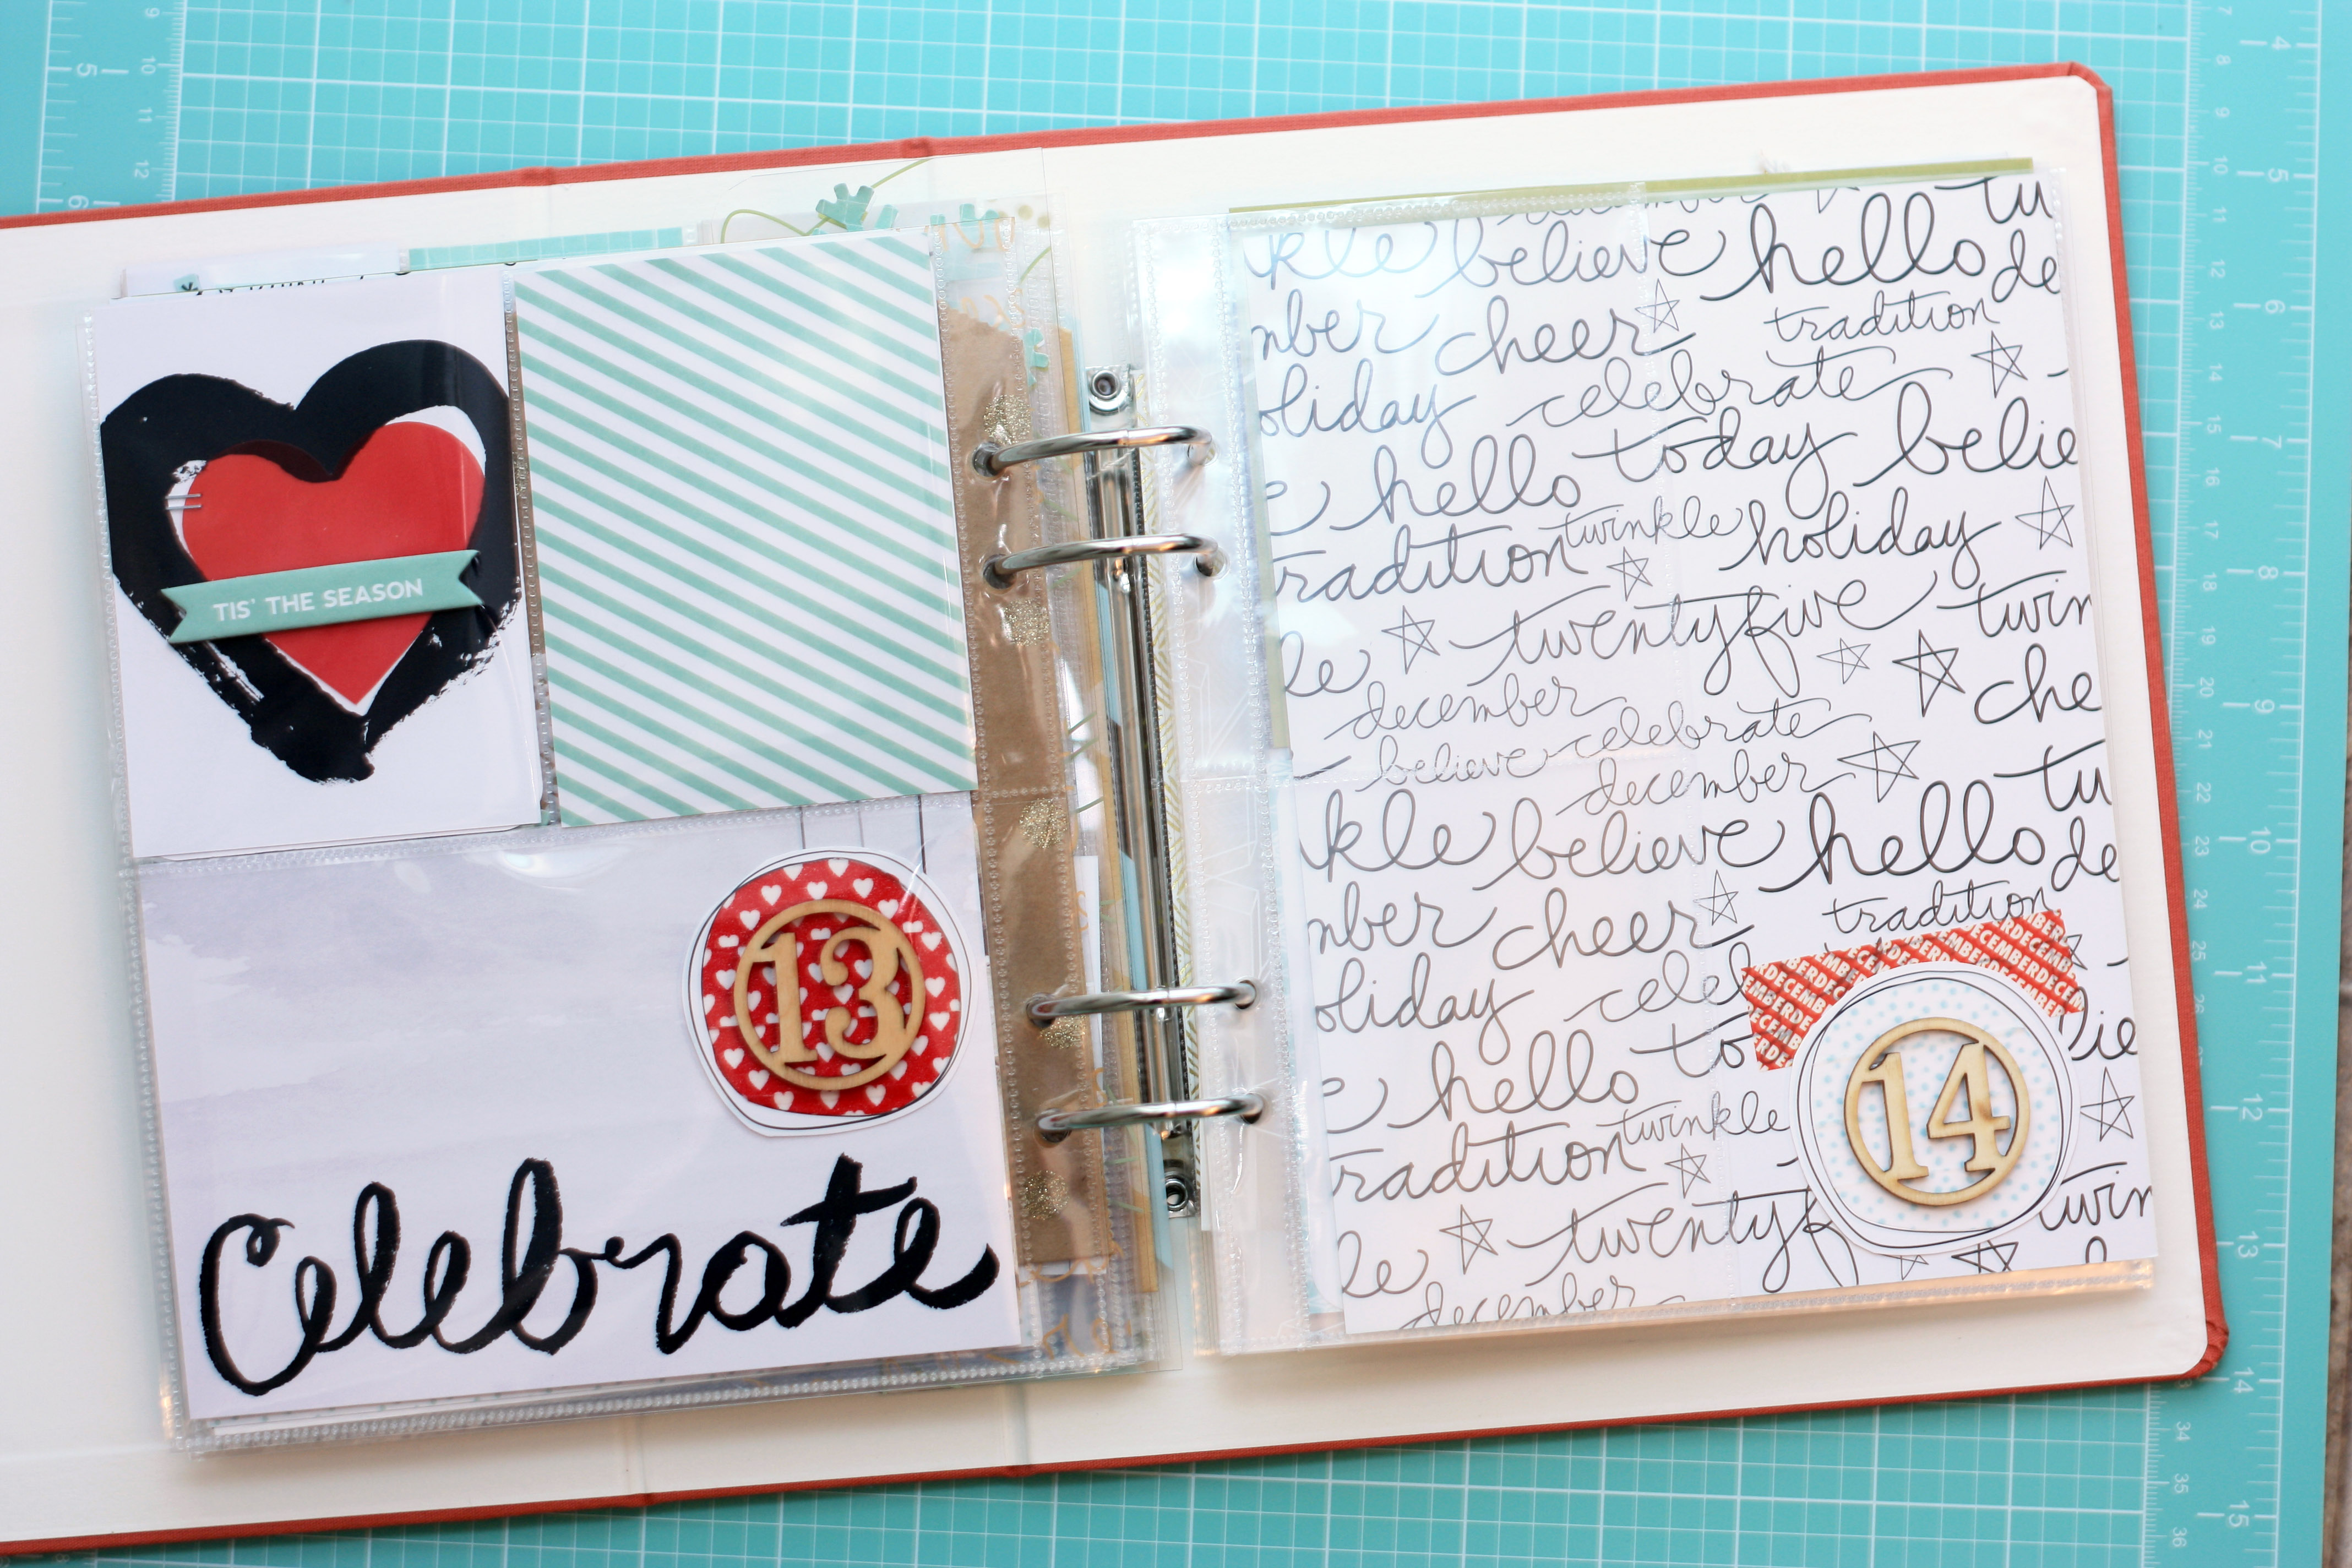 Moment 15: the boys’ handwritten notes, drawings, and words really complete the album for me. I have incorporated cards in order to keepsake their thoughts/memories…
 Moment 16: more of the boys’ artwork/words…
 17: space to journal/add photos…not sure what will go here quite yet.
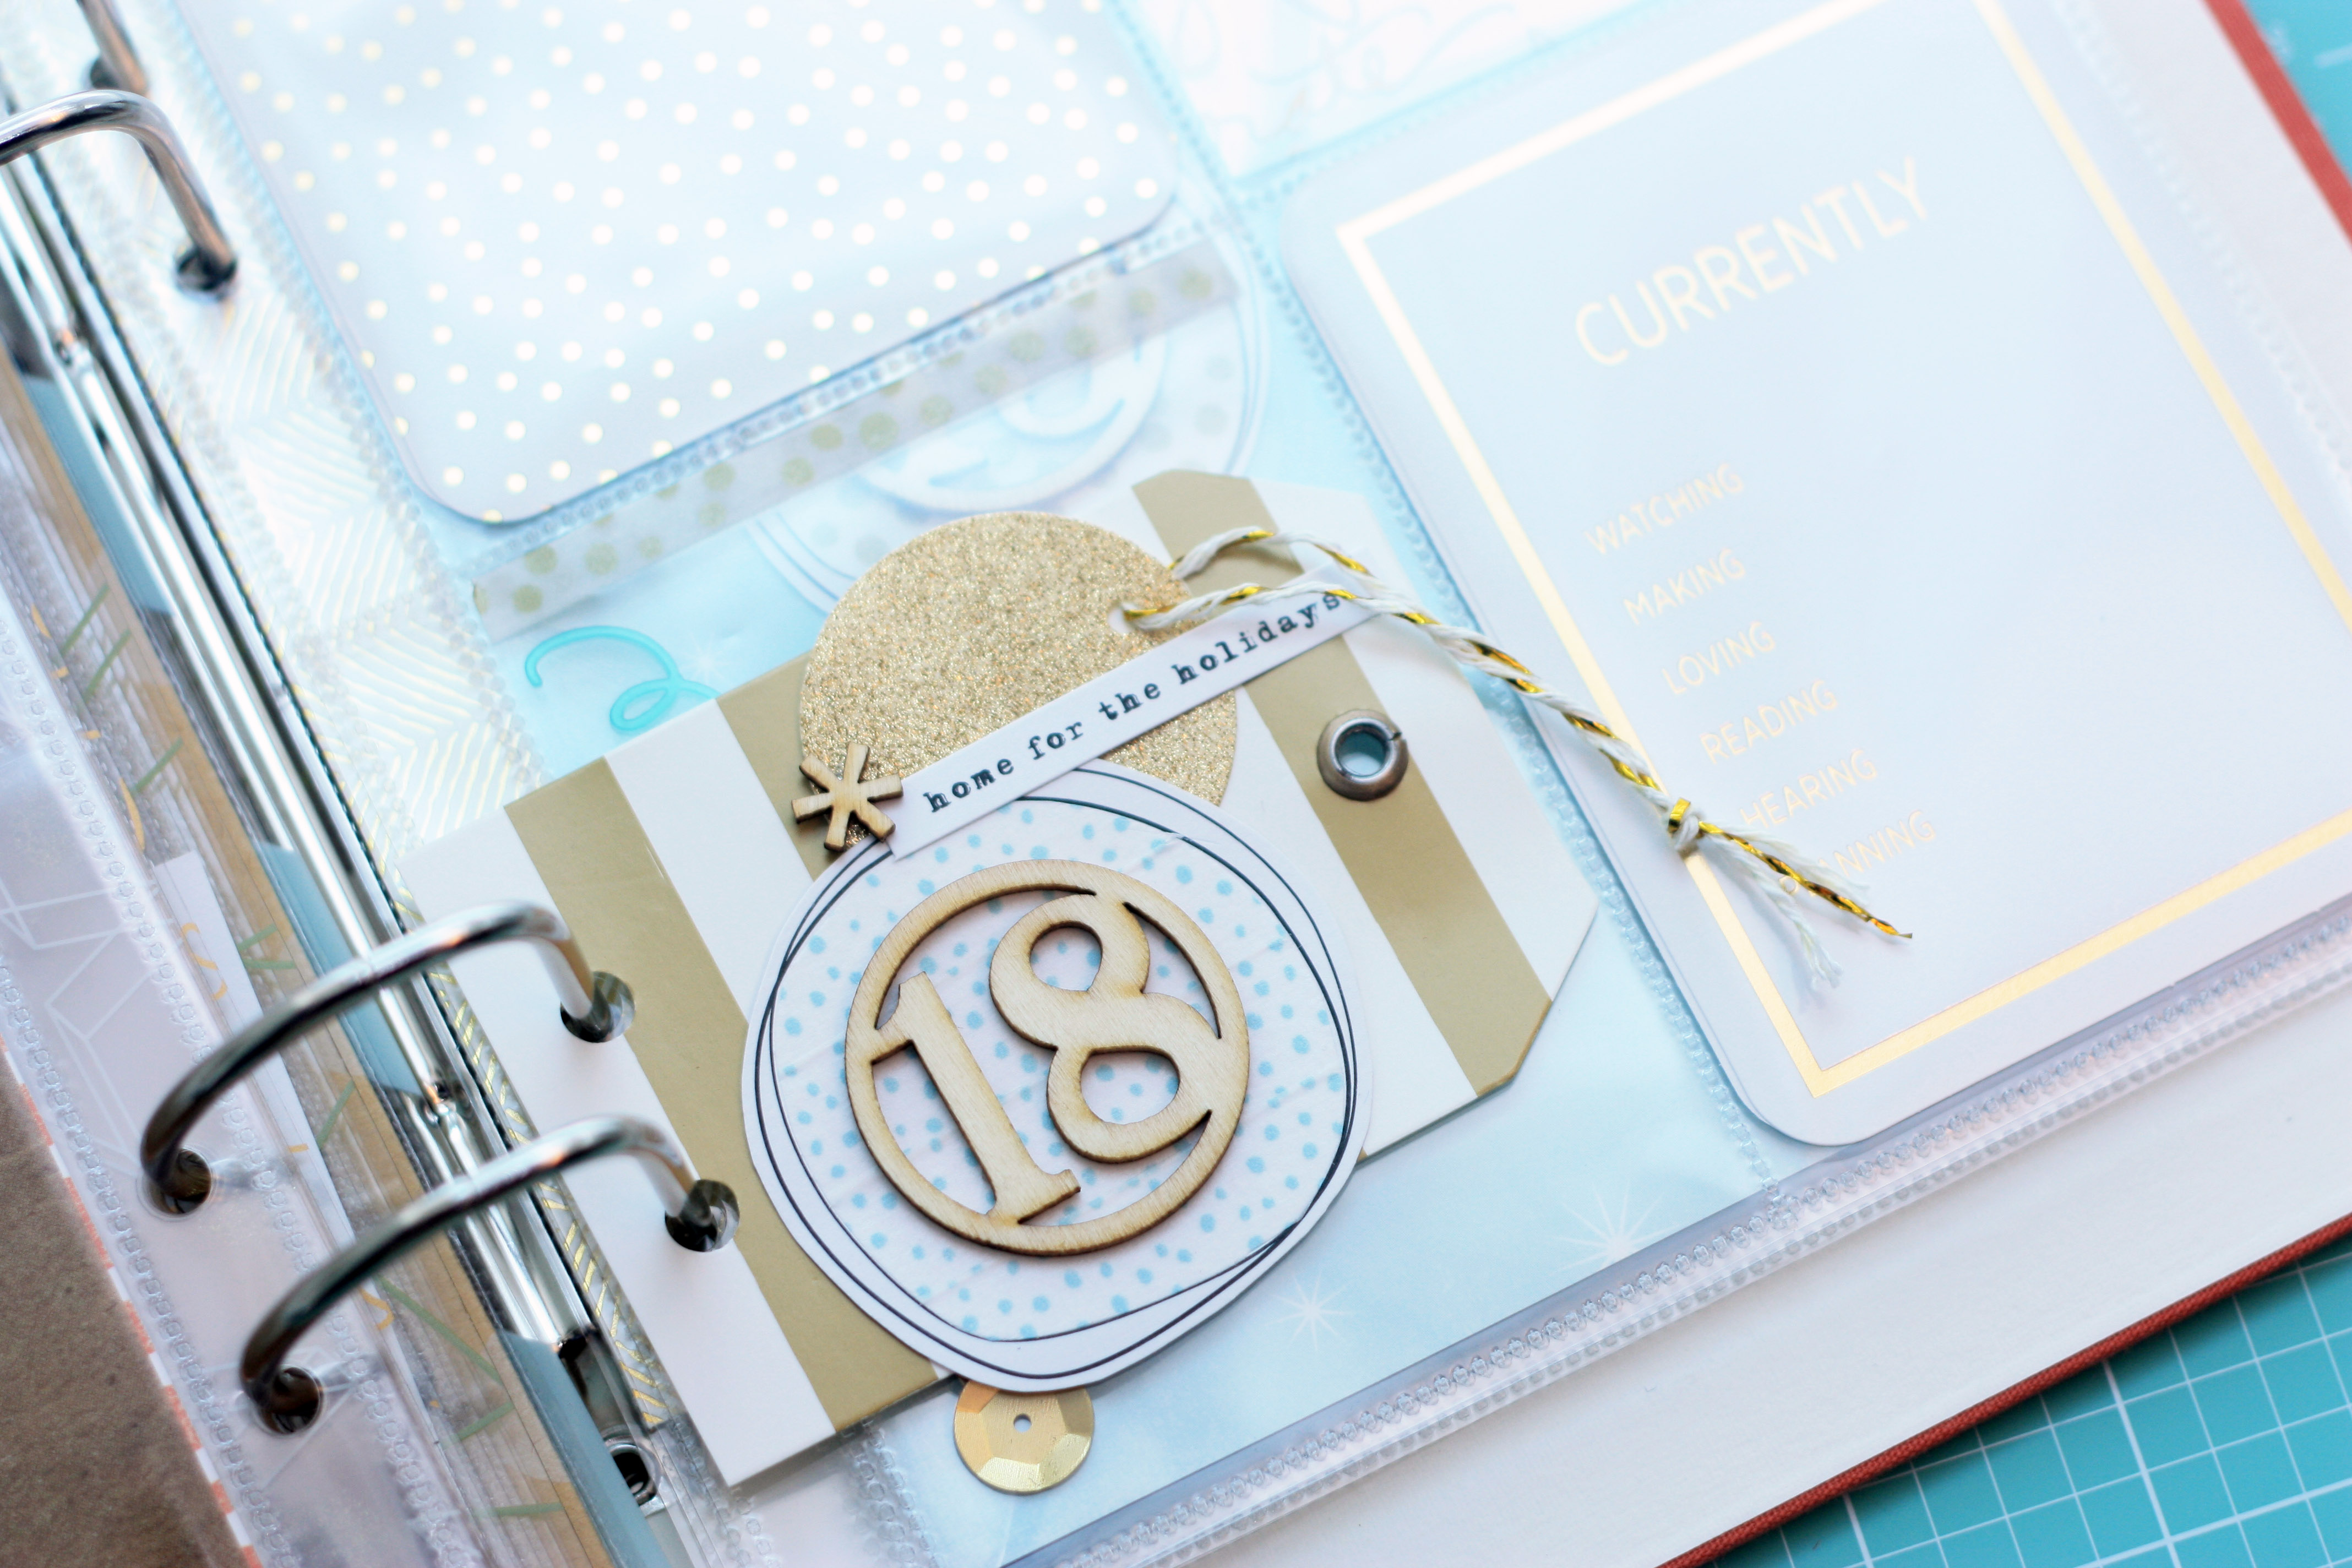
 Moment 18: space to add a photo and journal what we are doing “currently”…
 Really inspired to use my washi tape stash for this project and loving the outcome:
 Moment 19: will likely use for the boys’ schoolwork and/or Santa Letter. You can also see the backside of the confetti pocket. I found it a lot easier to use an Exacto knife, slice along the top border, place the goodies inside, and use washi tape to close. Half the time it takes to hand stitch a pocket closed and almost the same final look.
 Moment 20: entirely devoted to the boys’ artwork and words.

December Daily 2014: Moments 1 through 10
Posted: November 29, 2014 Filed under: December Daily, Project Life, Scrapbooking Leave a commentI thought I would take some time to share my December Daily foundation pages. For the most part, beyond the placement of the numbers and pocket pages, I have no real plan set in stone. Instead of daily moments, I will focus on overall moments throughout the month: if one day produces three moments, awesome, if another produces zero, that is okay as well.
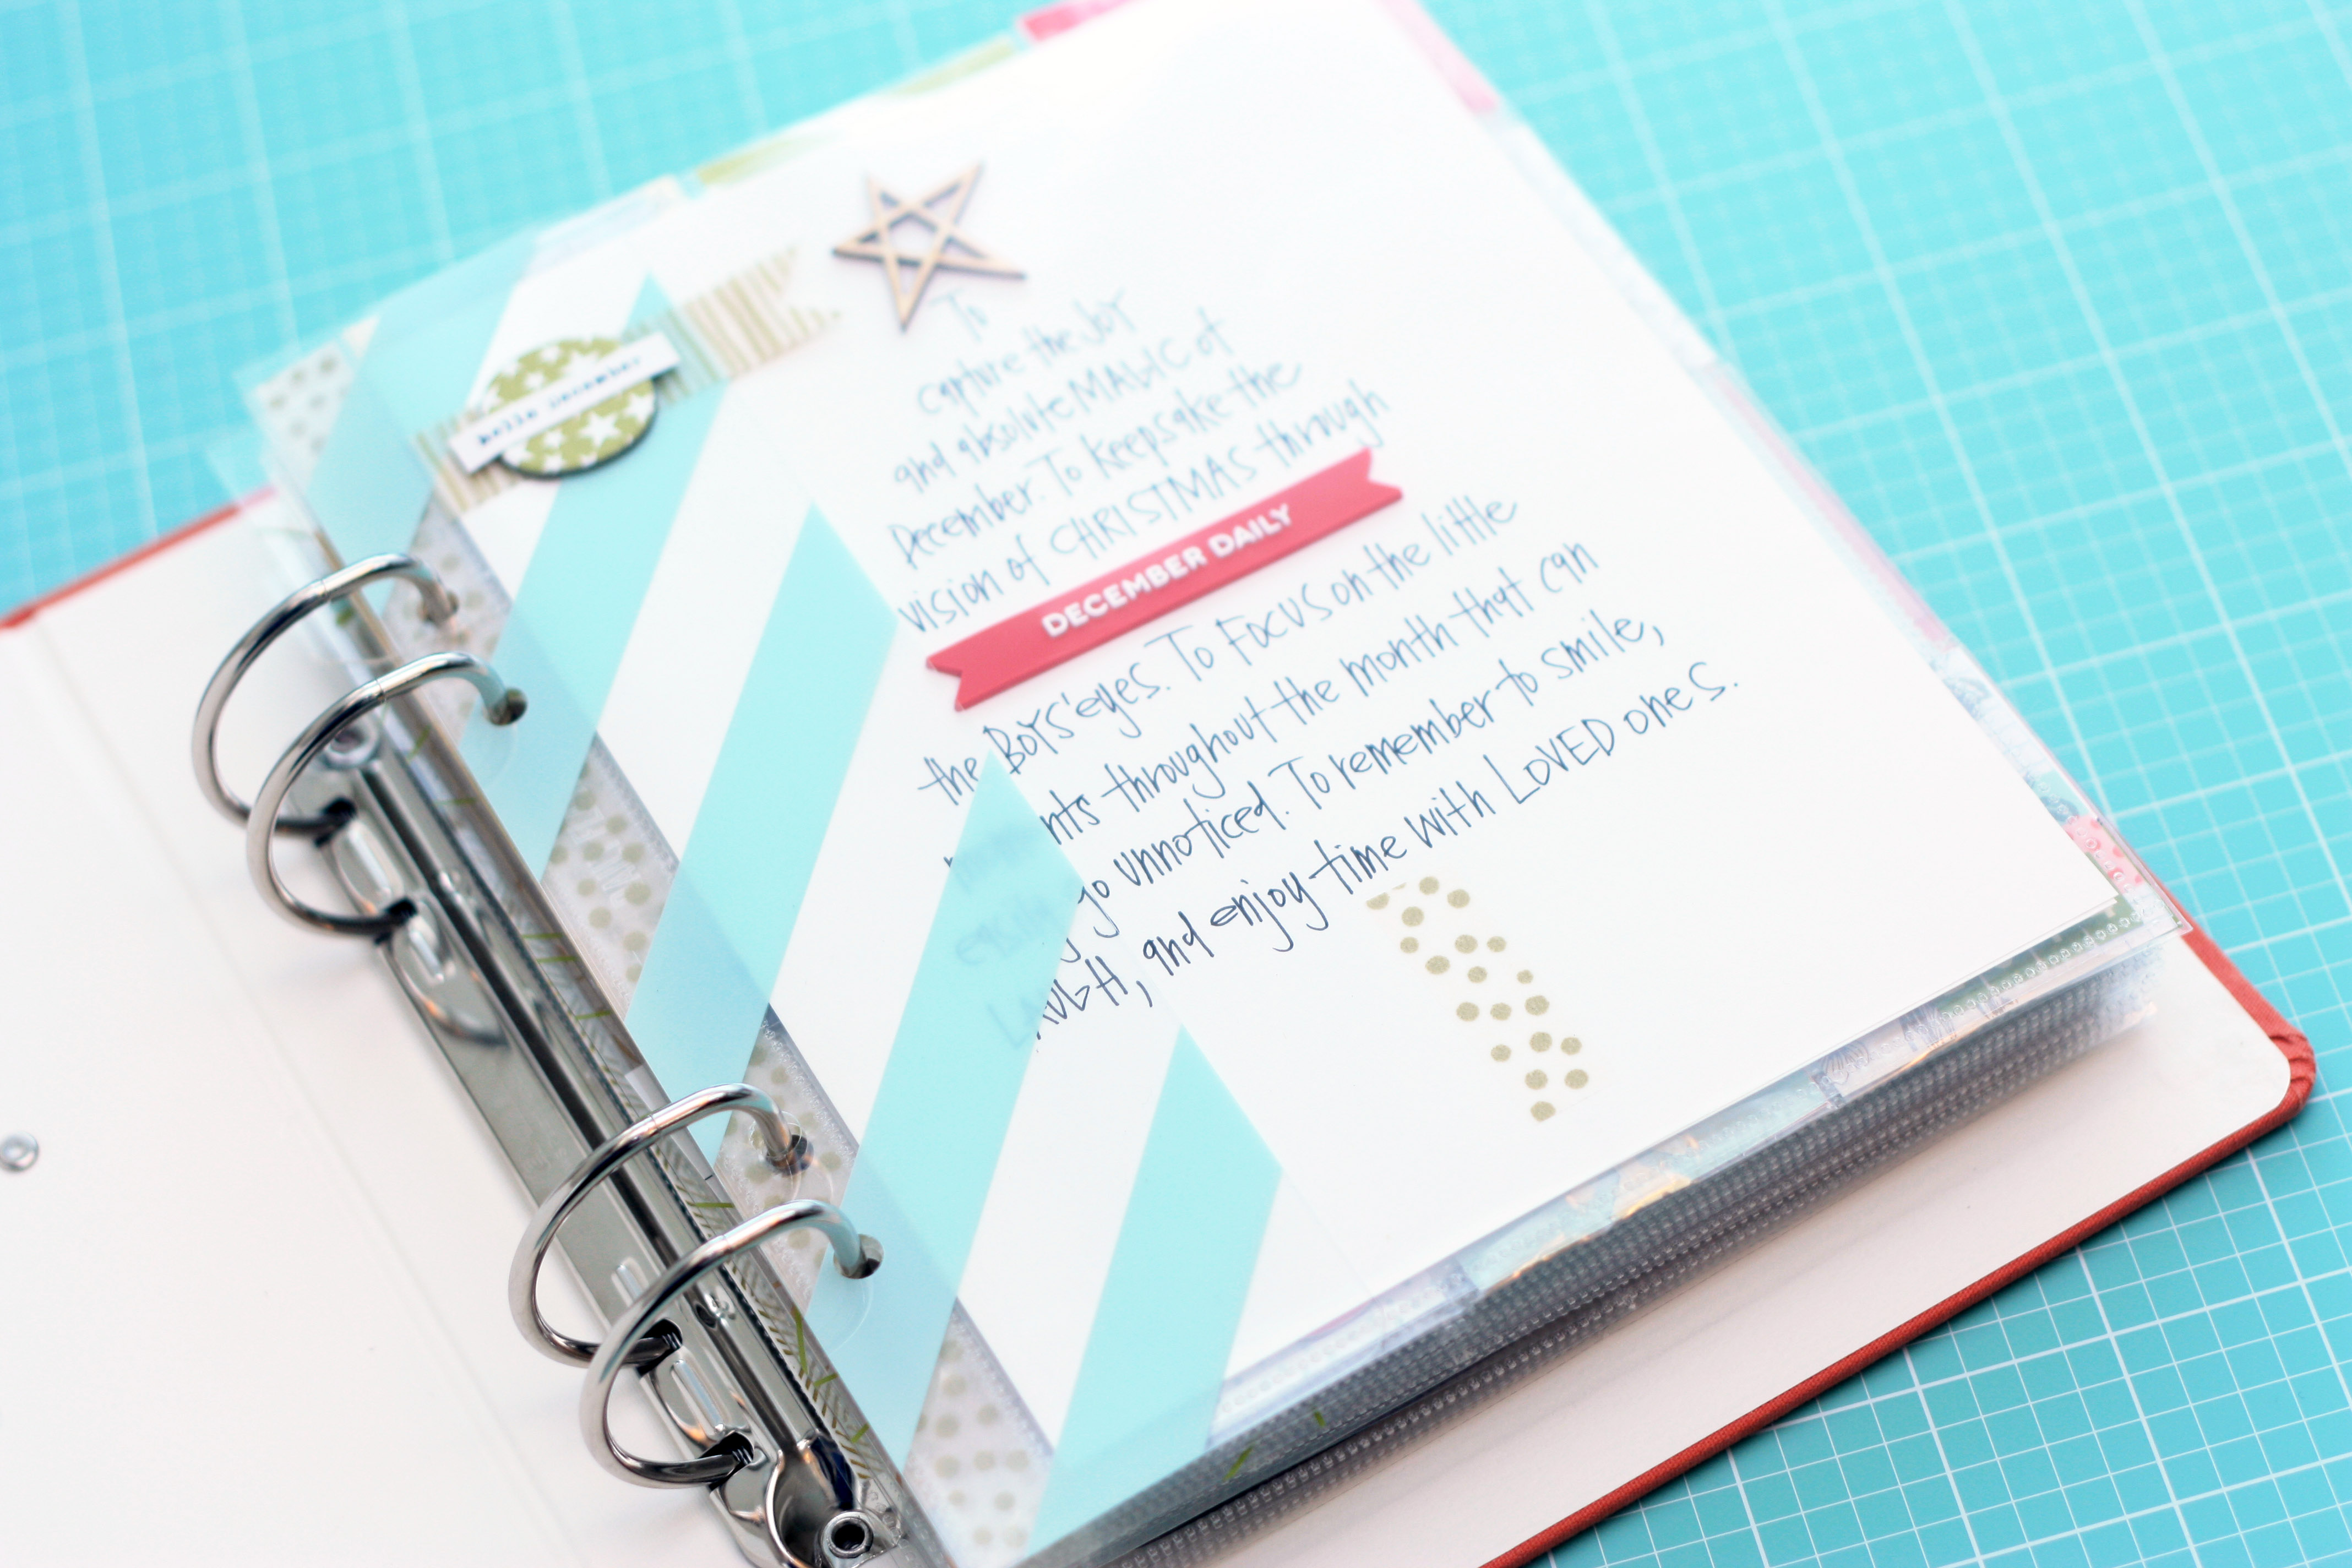
My opening pages focus on my WHY of the project:

As you will see throughout the album, I am using a mixture of pre-made journal cards, the ones that came with the Ali Edwards December Daily Kit and handwritten, list/journal type pages. For the opening WHY page, I loosely made lines with a pencil. Journaled my why, erased the pencil lines, and added embellishments. Simple but love the outcome.

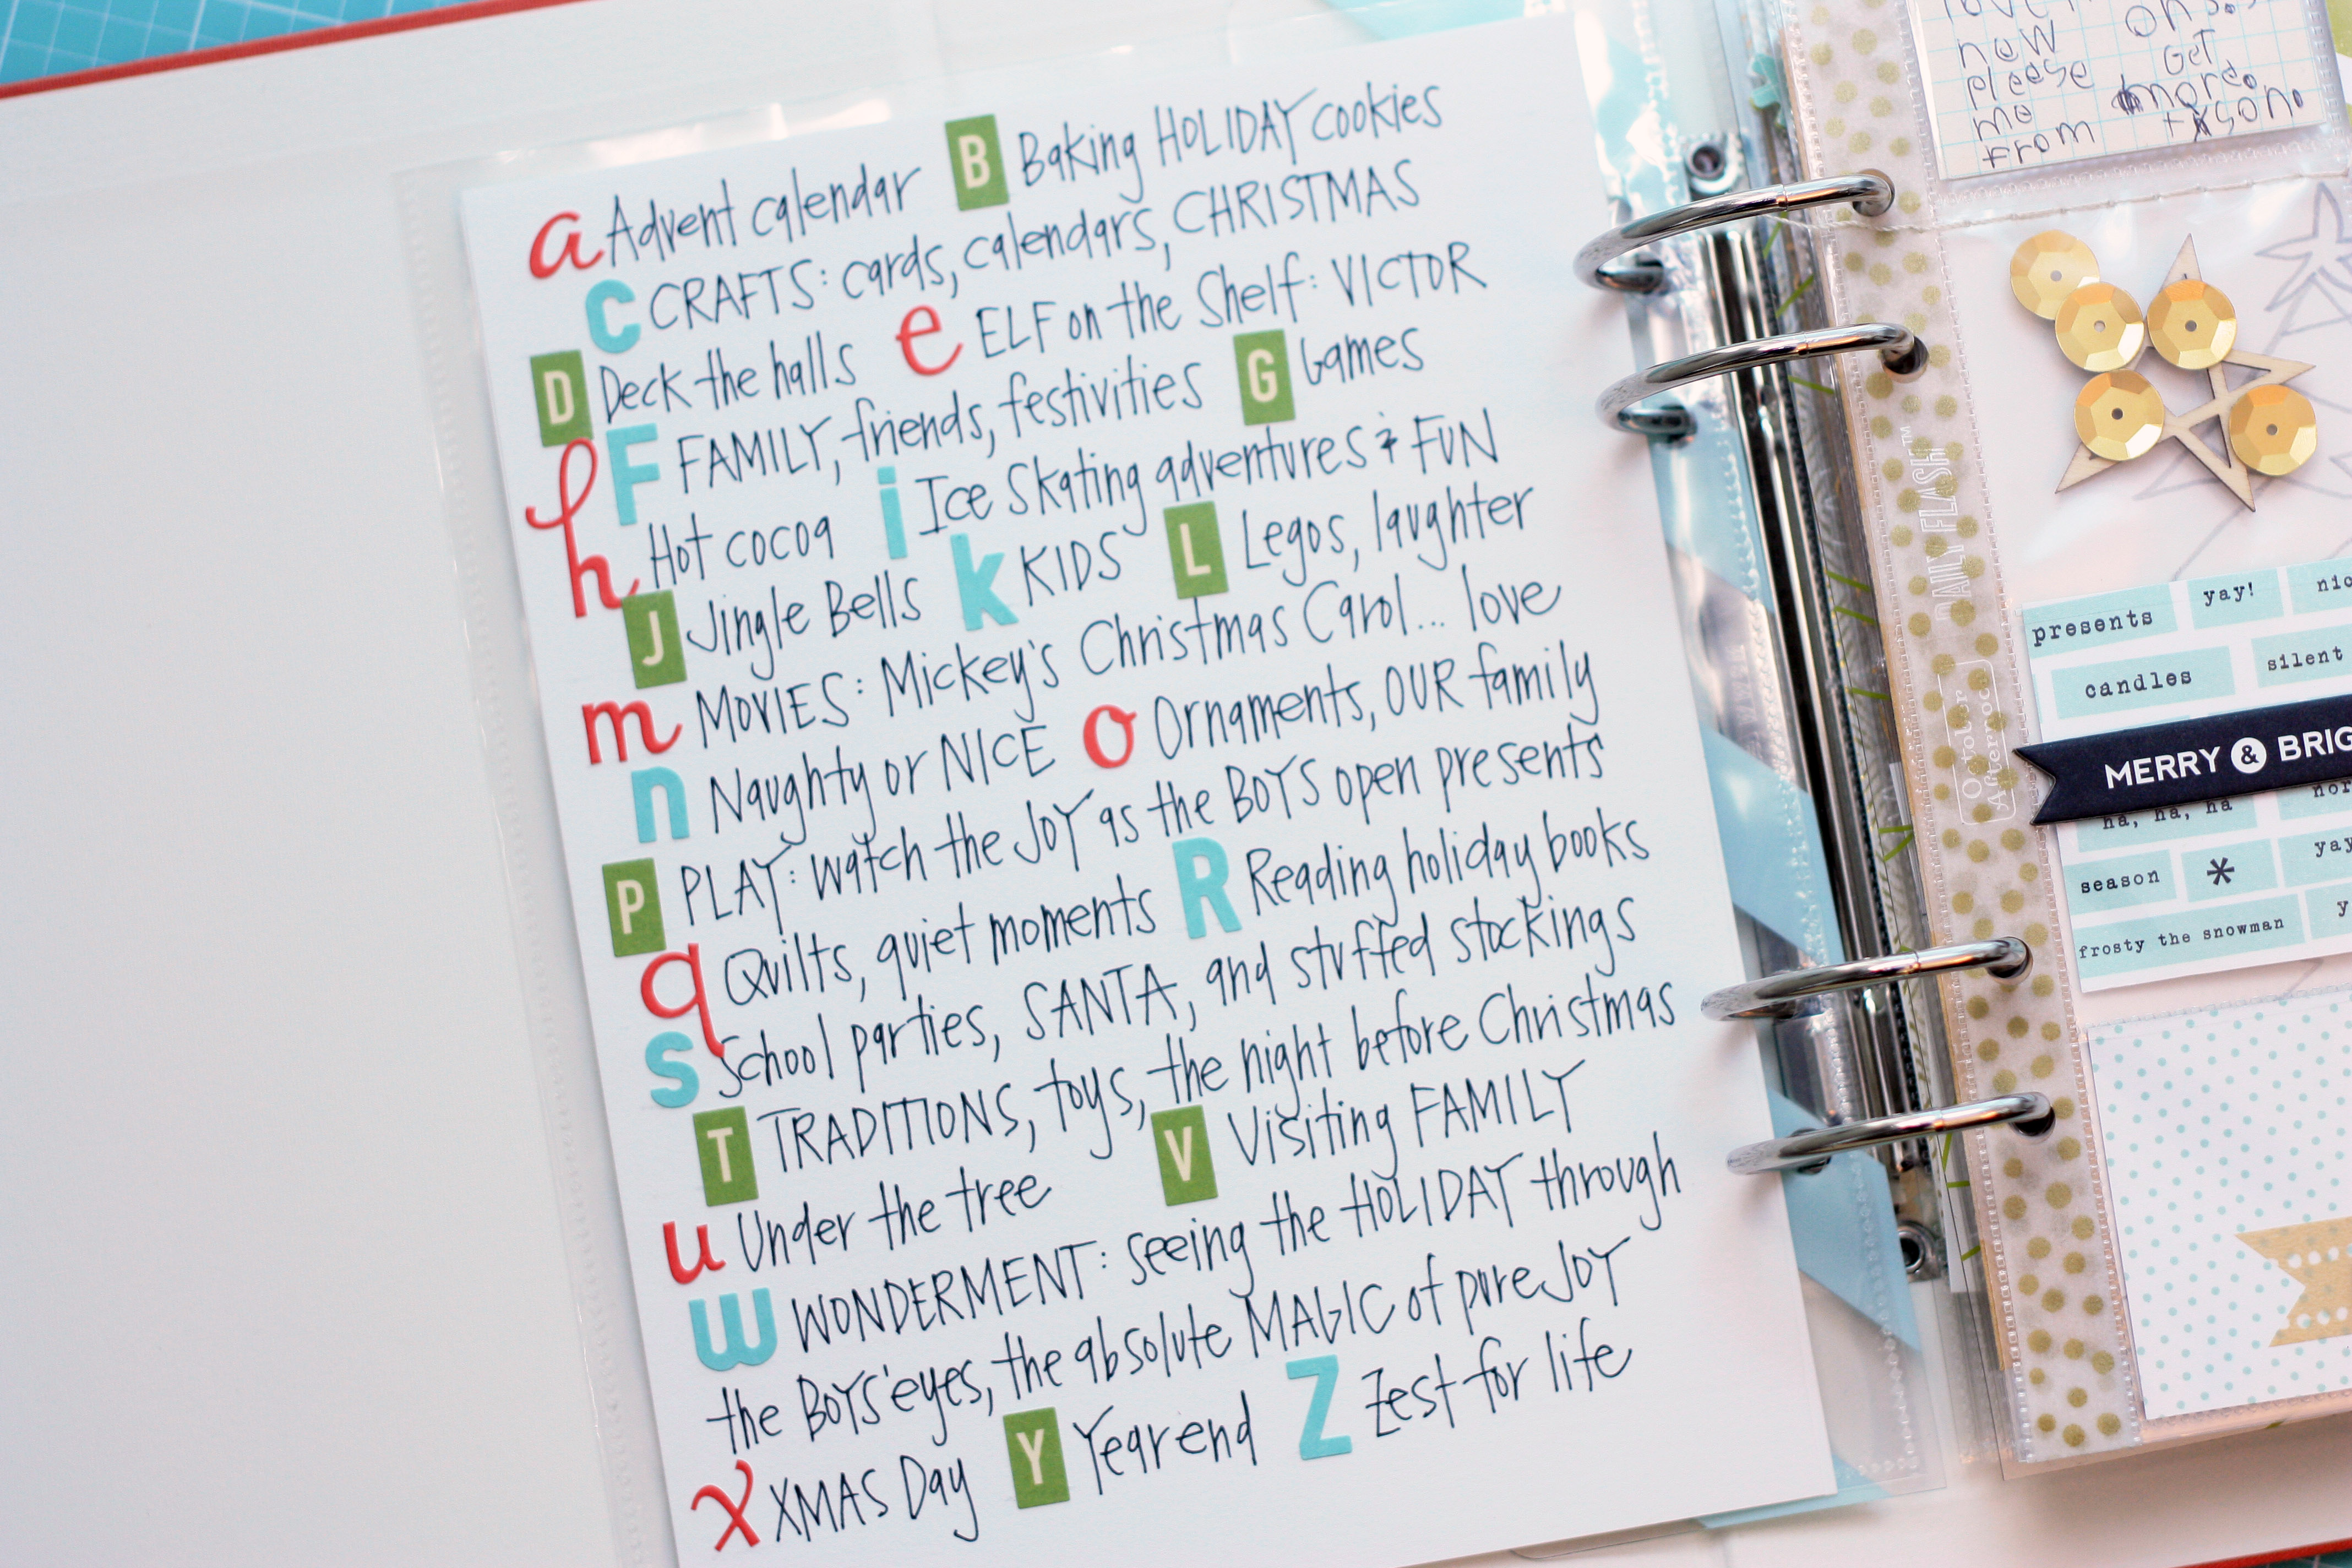
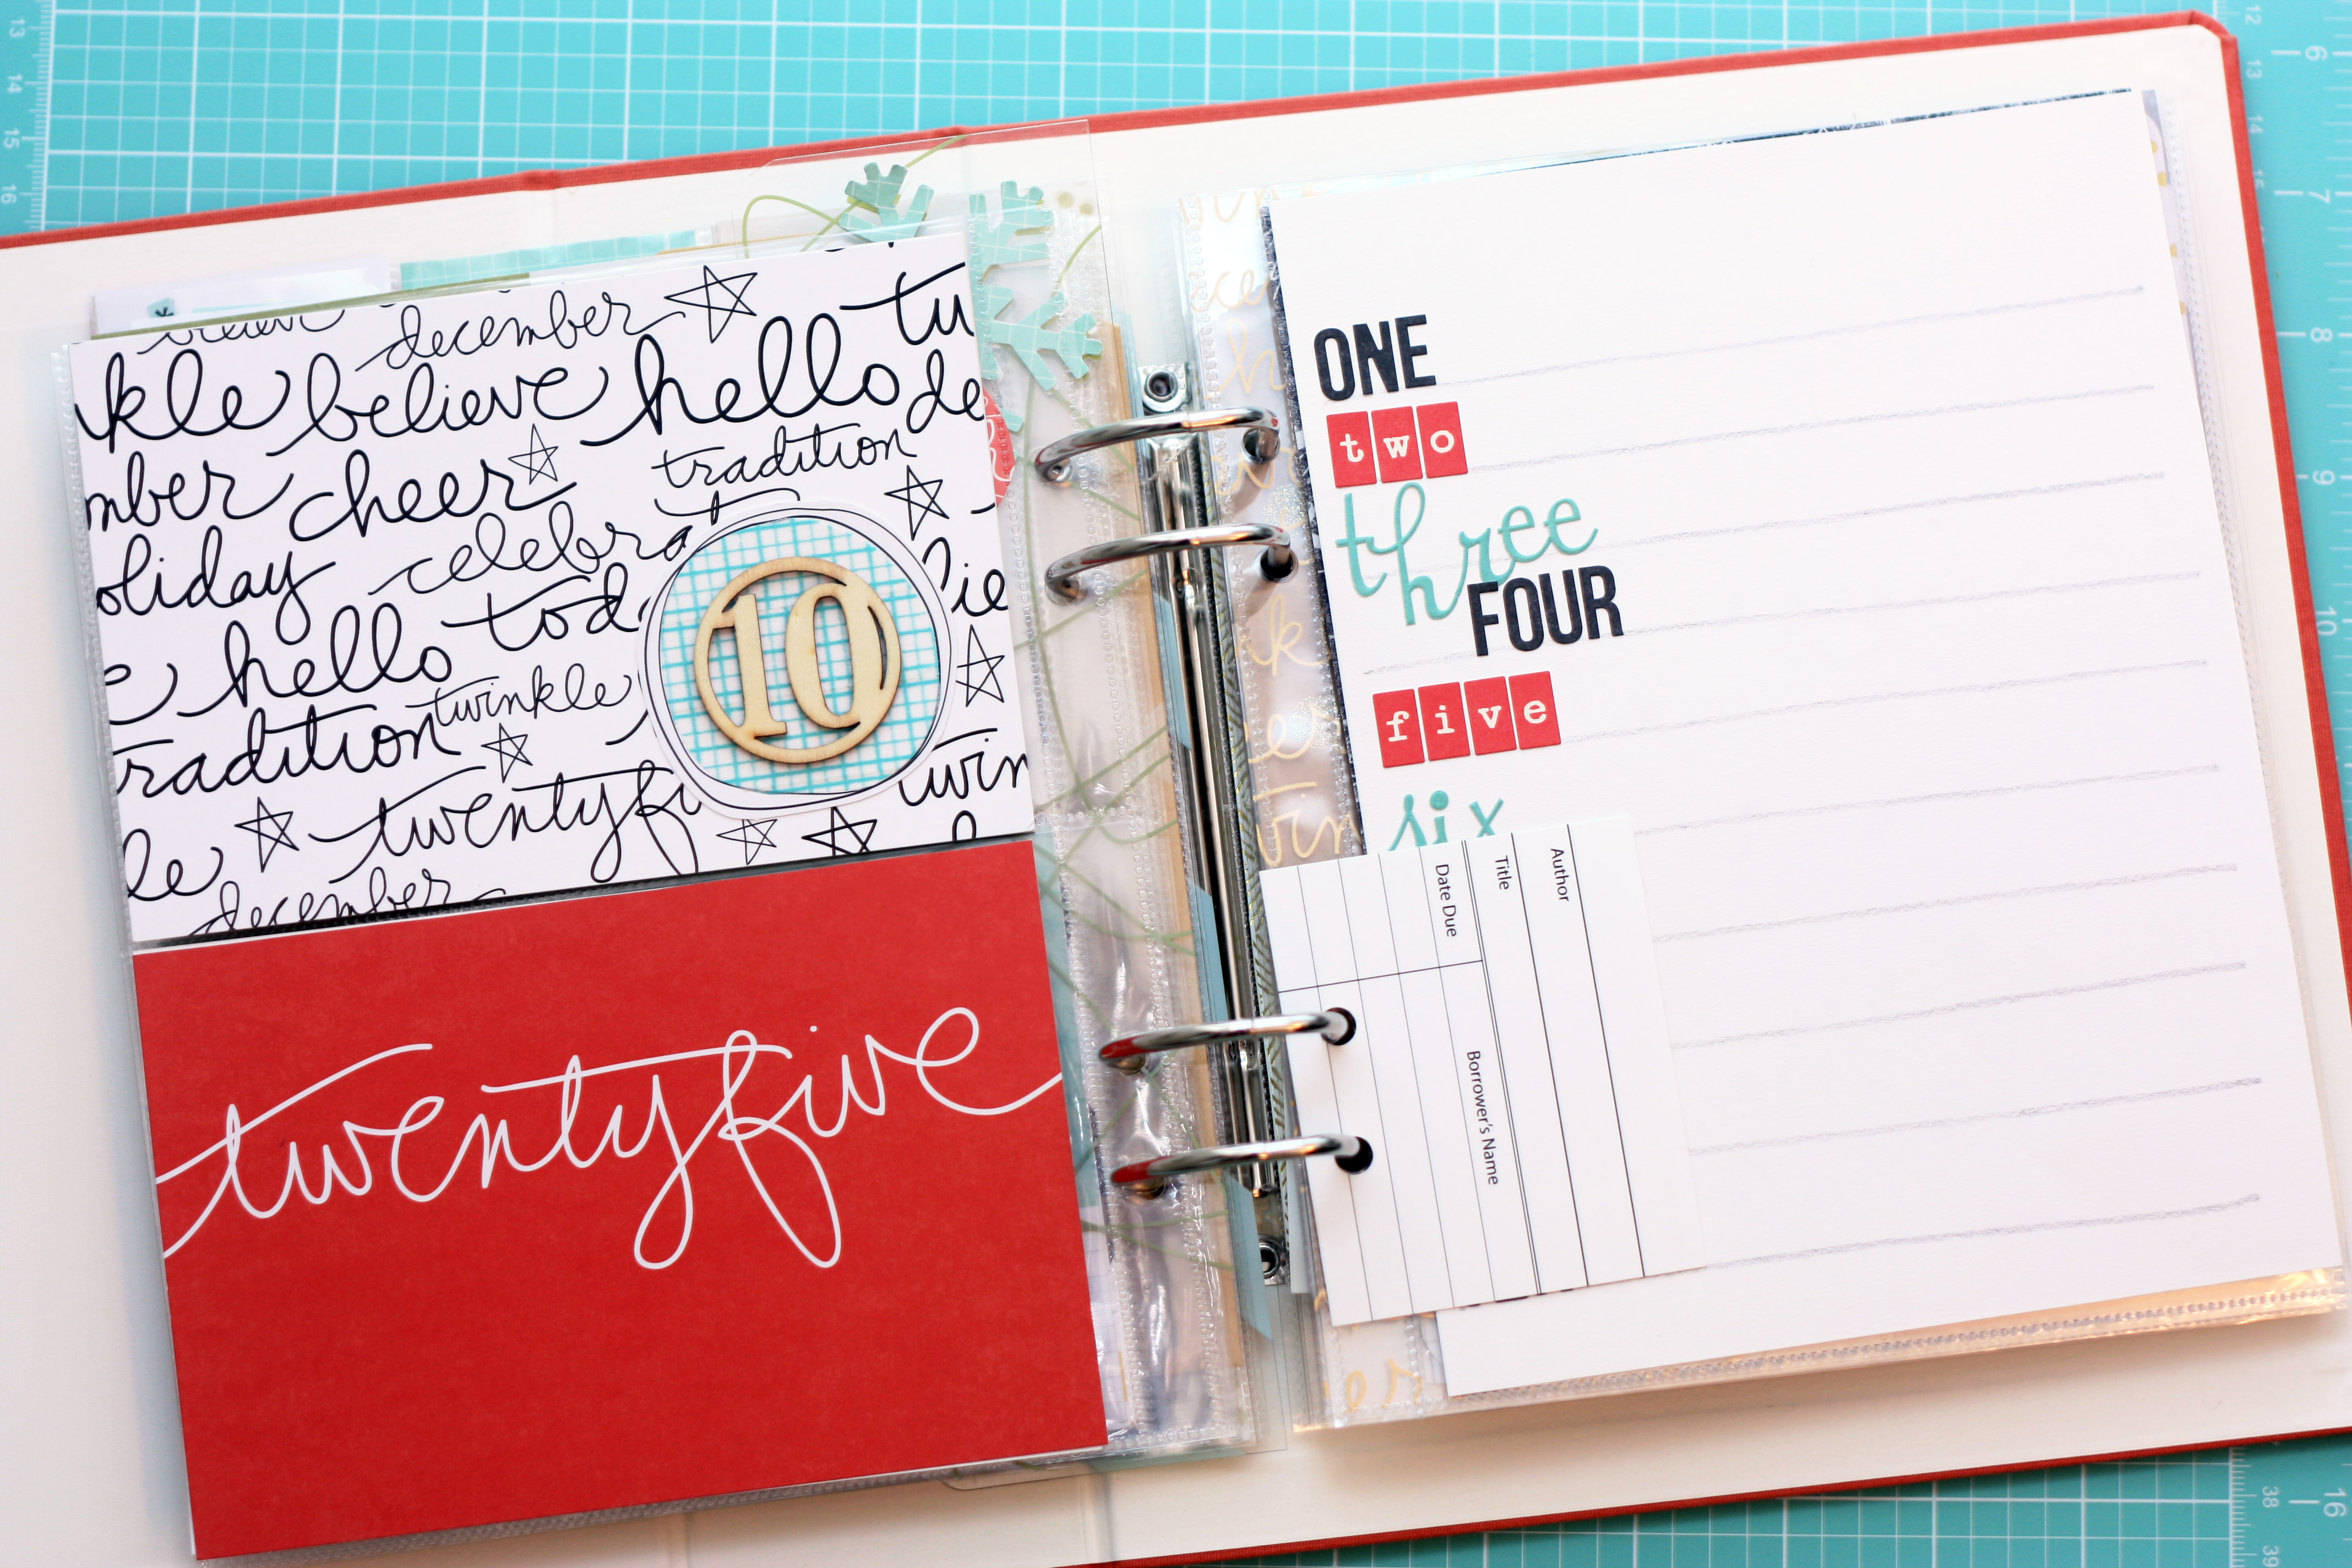
I started to list all of the items/photos/moments I hope to capture in December. As I was doing so, I decided to turn the list into a filler page. A fun, colorful, alphabet page followed…

Moment 1: will focus on our tree. Ty’s drawing will serve as a reminder to take a black and white photo of our set up. I will use the drawing in the album elsewhere in the end.
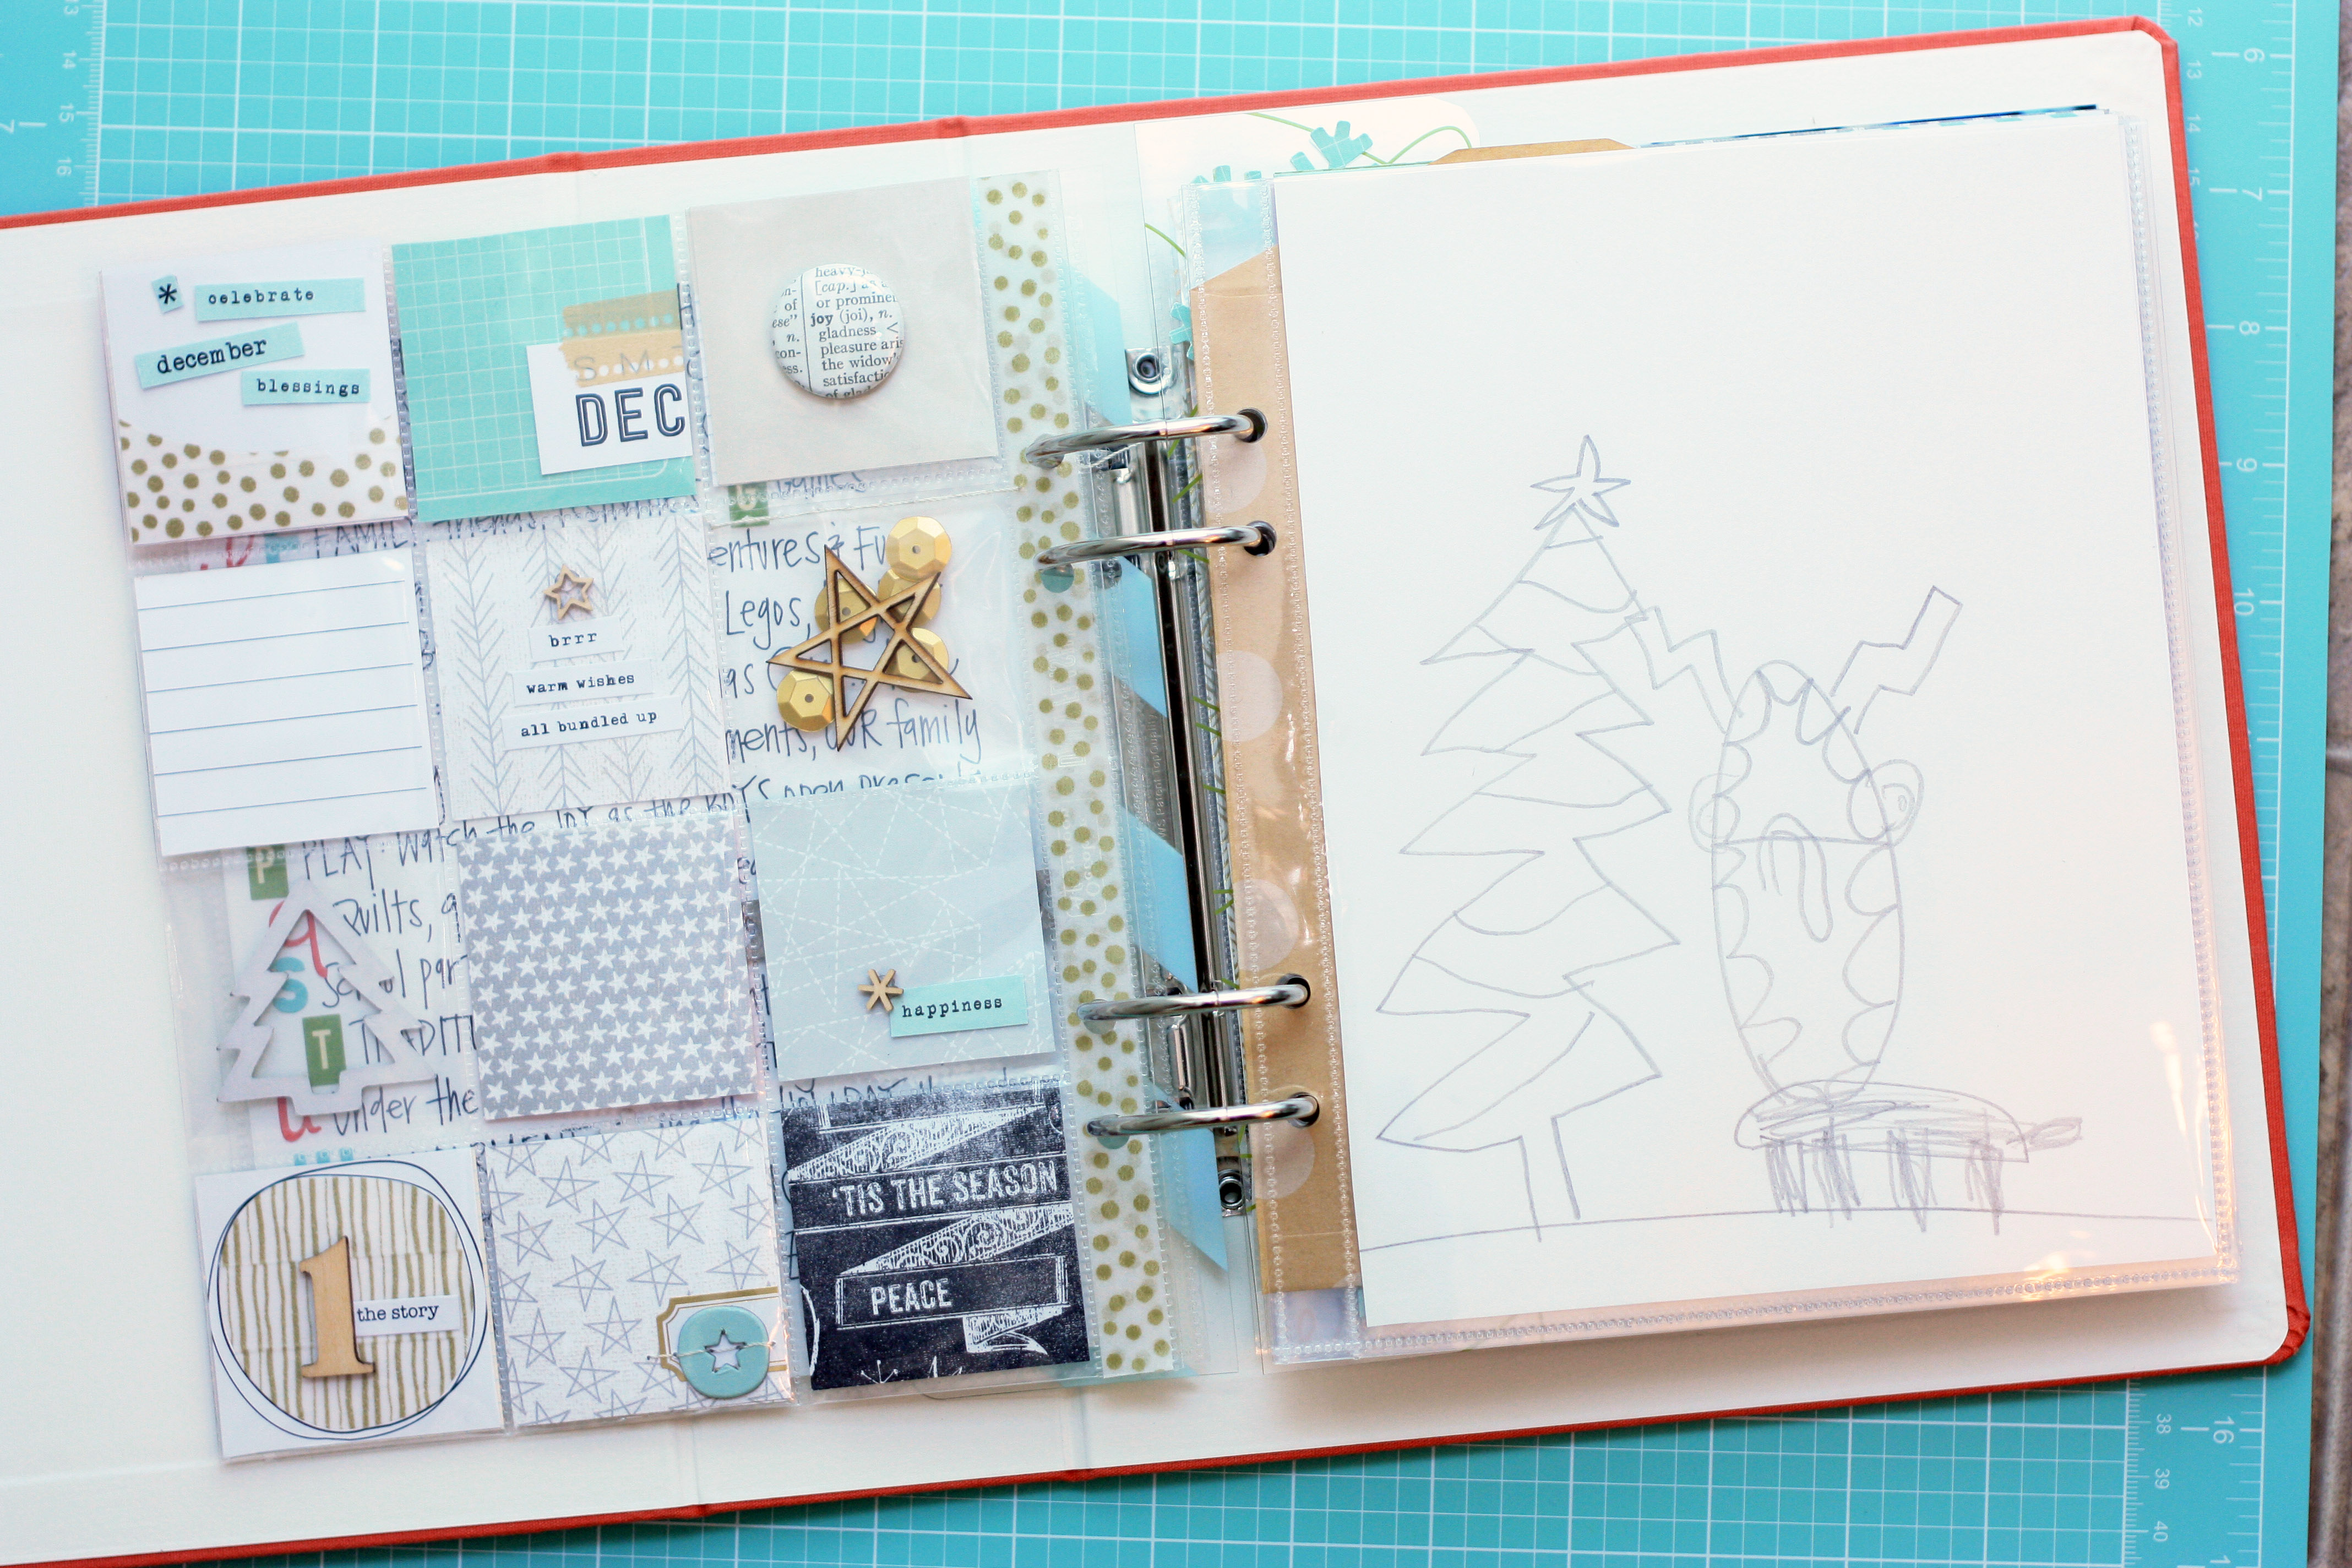
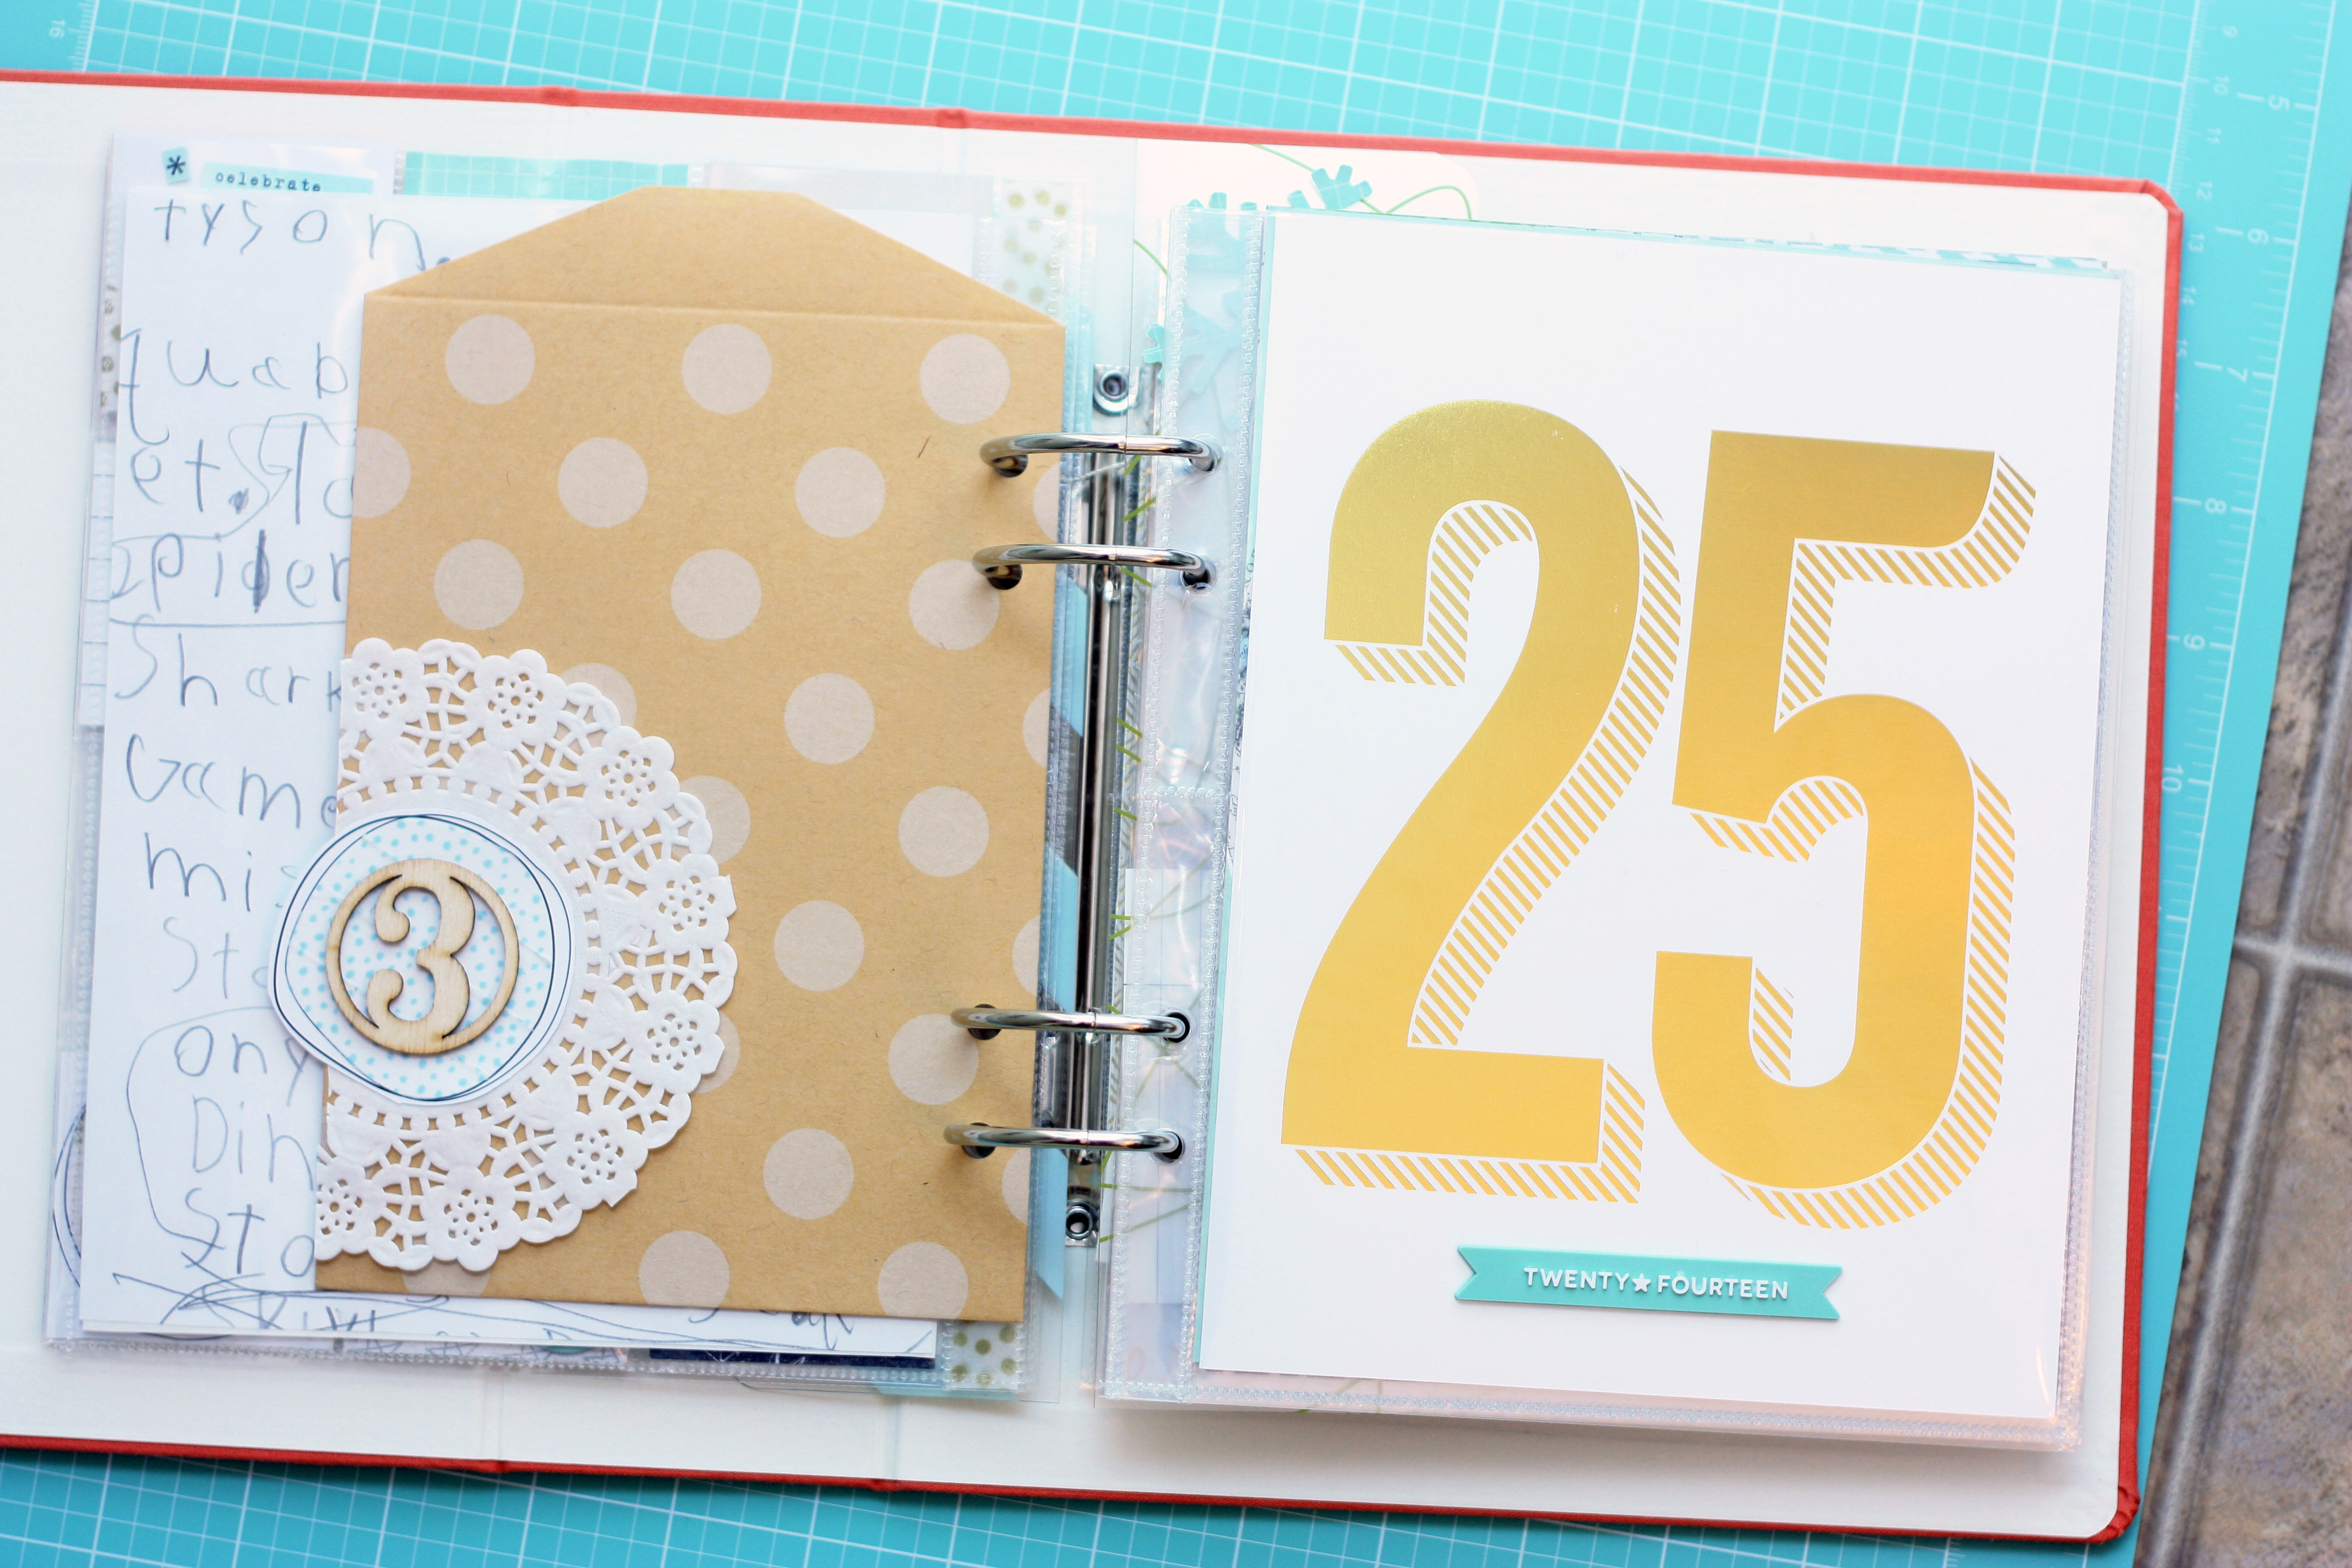
Moment 2: will focus on the boys’ multiple lists and letters to Santa. I will place them in the bag…

Moment 3: undecided. Will be receipts or tags maybe? They will go in the bag with possible journaling outside…
Moment 4: love how the boys’ wrap each other’s gifts. I plan to incorporate photos of their wrap jobs here.
 Moment 5: a good example of the loosely penciled in lines. I didn’t want them perfect. I will journal and then erase them. I plan to list our favorite holiday shows and movies here.

Moment 6: undecided, but this year’s December Daily inspired me to finally use up some of my washi tape stash…
 Moment 7: forgot to photography…will add later.
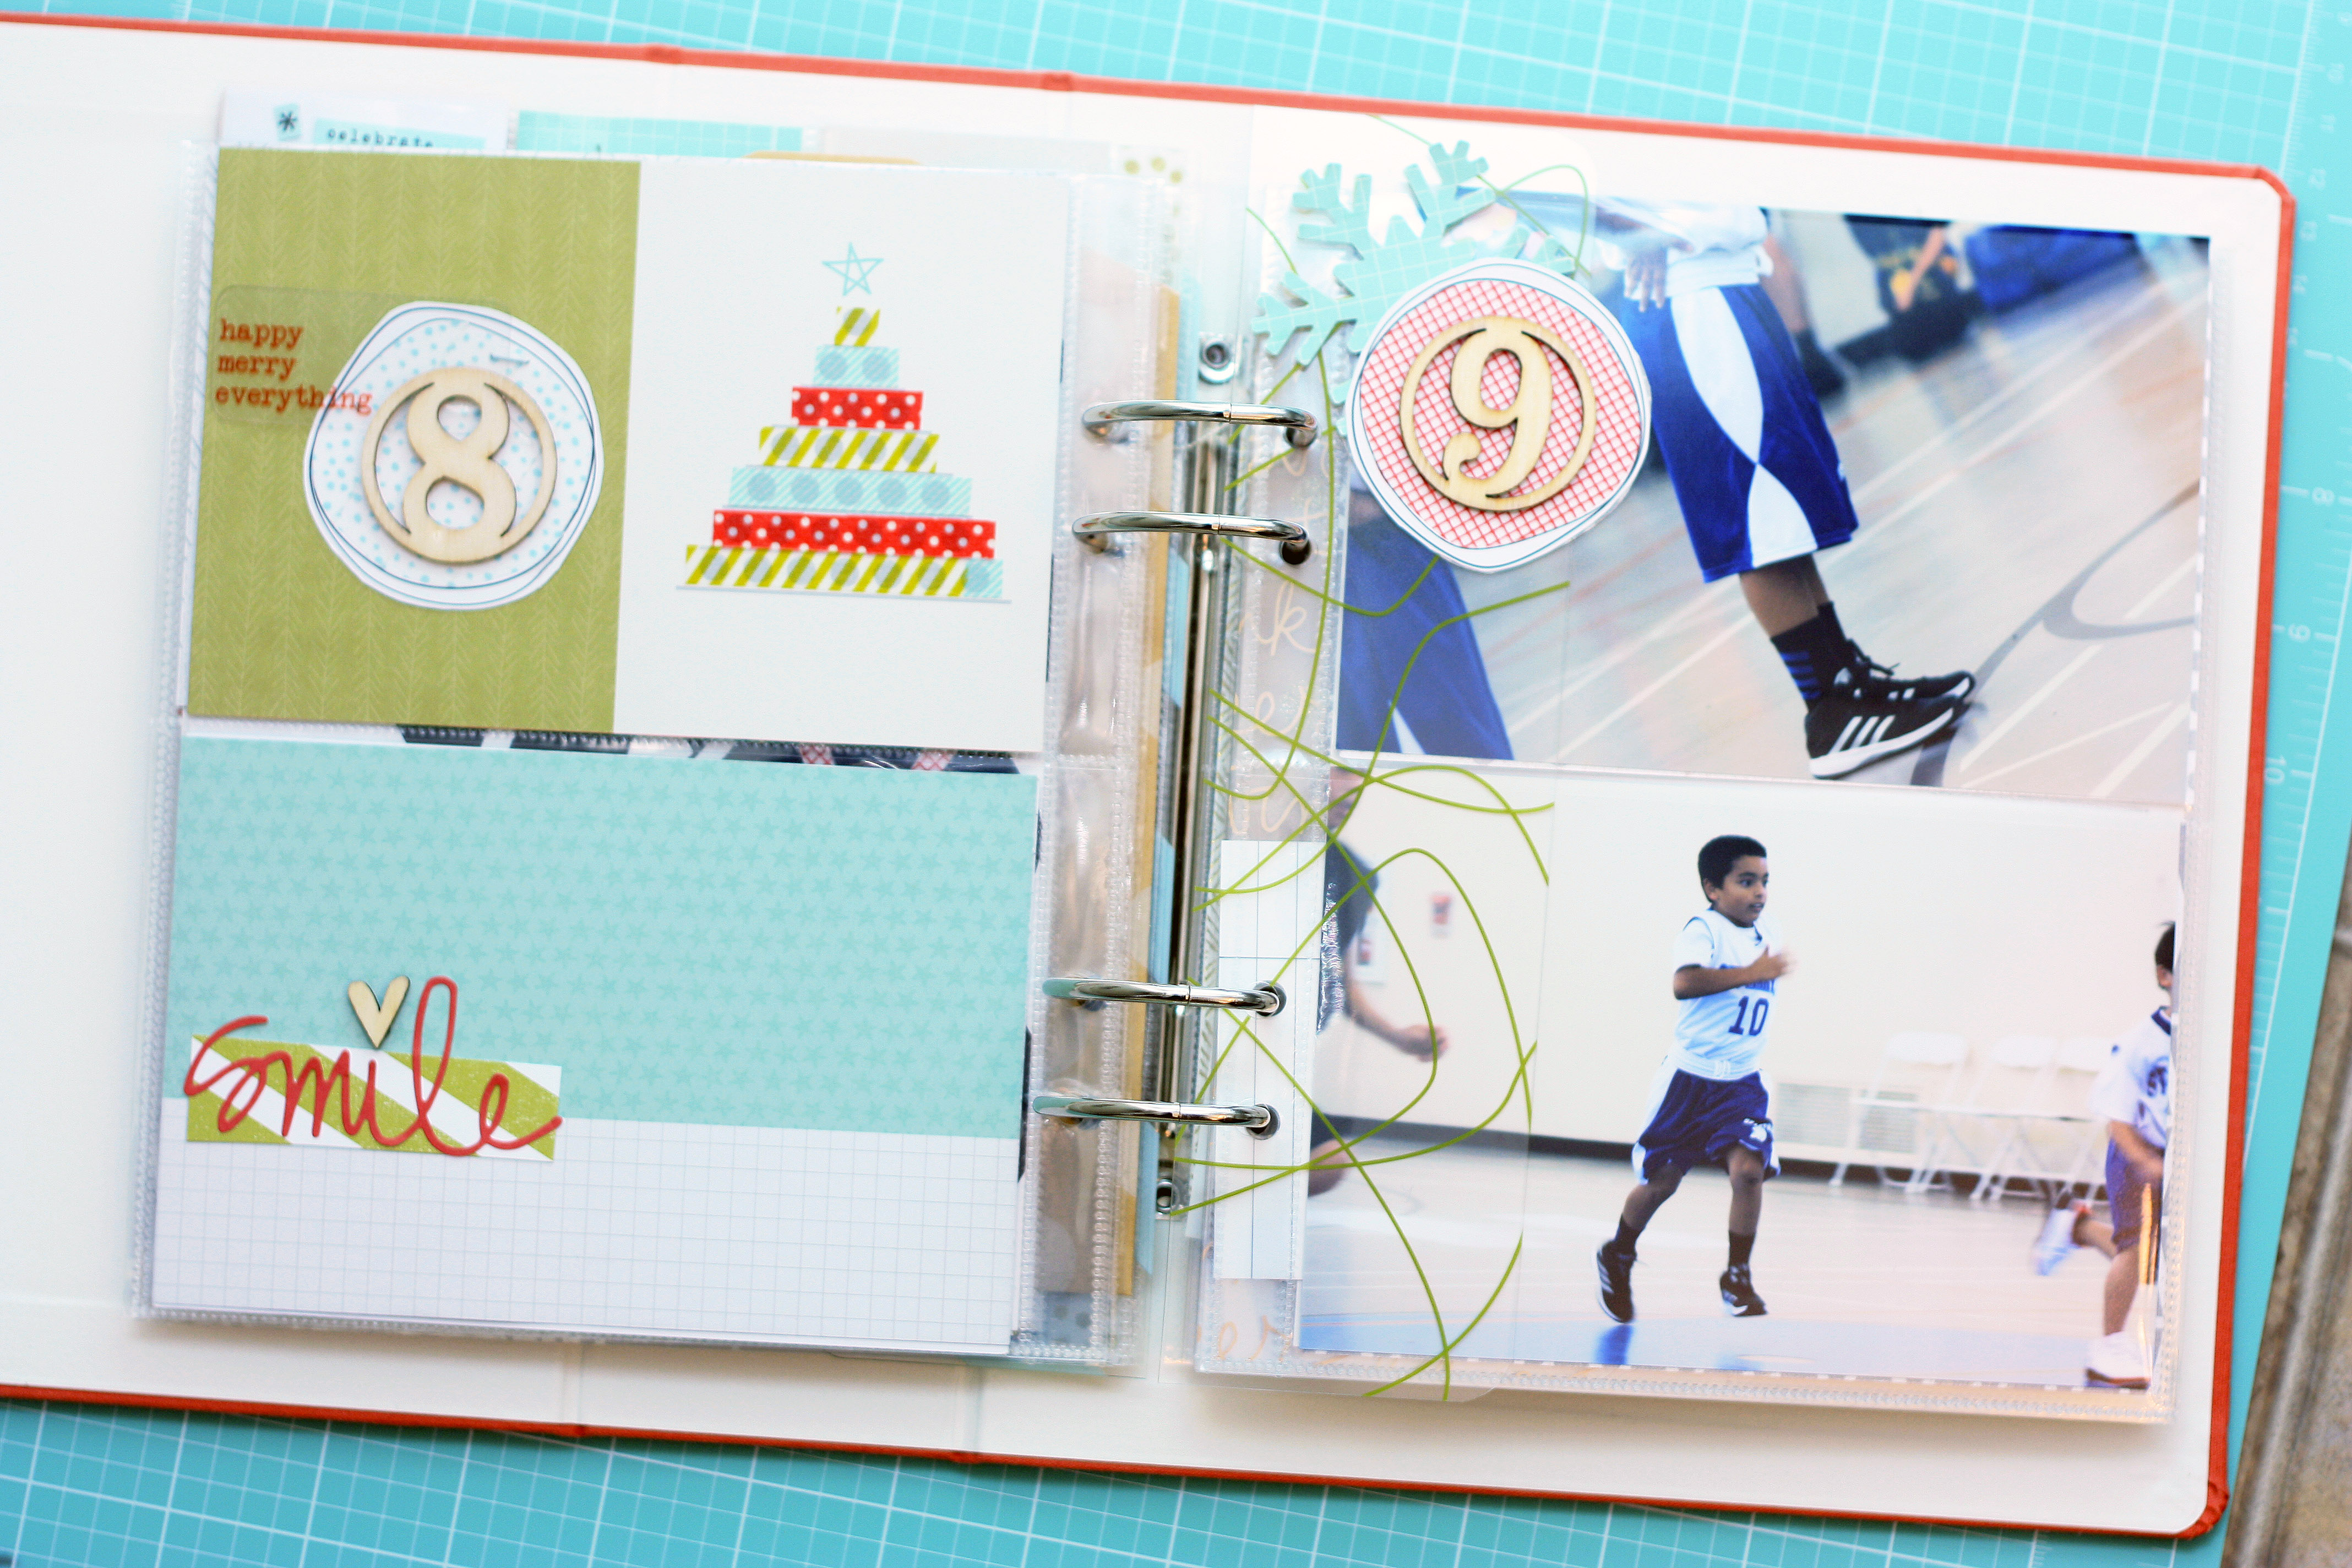
Moments 8 and 9 will focus on the boys’ basketball. The 9 is adhered to a clear Project Life page divider. Loved the hint of green it offered to keep with the blue/green/red color scheme of the double page layout.
Moment 10: another list, this time our favorite family holiday books.
Project Life 2014: Week 28 With me & my BIG ideas
Posted: November 18, 2014 Filed under: Project Life | Tags: me & my BIG ideas Leave a comment This week’s Project Life layout was inspired by one of my favorite me & my BIG ideas paper pads. Combined with simple thick handwritten lines and journaling, it was a quick, fun layout to make.
 Sometimes a weekly layout highlights one or two main events from the week. This week, both boys attended basketball camp: Tyson’s second year and Jake’s first. I wanted to capture both of their experiences and tell two different stories.

Carrying over a similar square + journal line theme to make the whole layout cohesive:
Love, love, love this paper pad…inspired to make more of my own pocket cards.
Project Life 2014 Week 27: Using Project Life to Document Our NYC Trip
Posted: November 17, 2014 Filed under: Project Life 1 Comment During our week in NYC this past summer, I carried a large envelope in my travel bag. I used it to collect ticket stubs, flyers, receipts: anything that I thought would help make my Project Life layout more interesting. When I got home, I uploaded photos, took out all the collected goodies and went to work…I ended up with a regular weekly layout + 2 inserts.
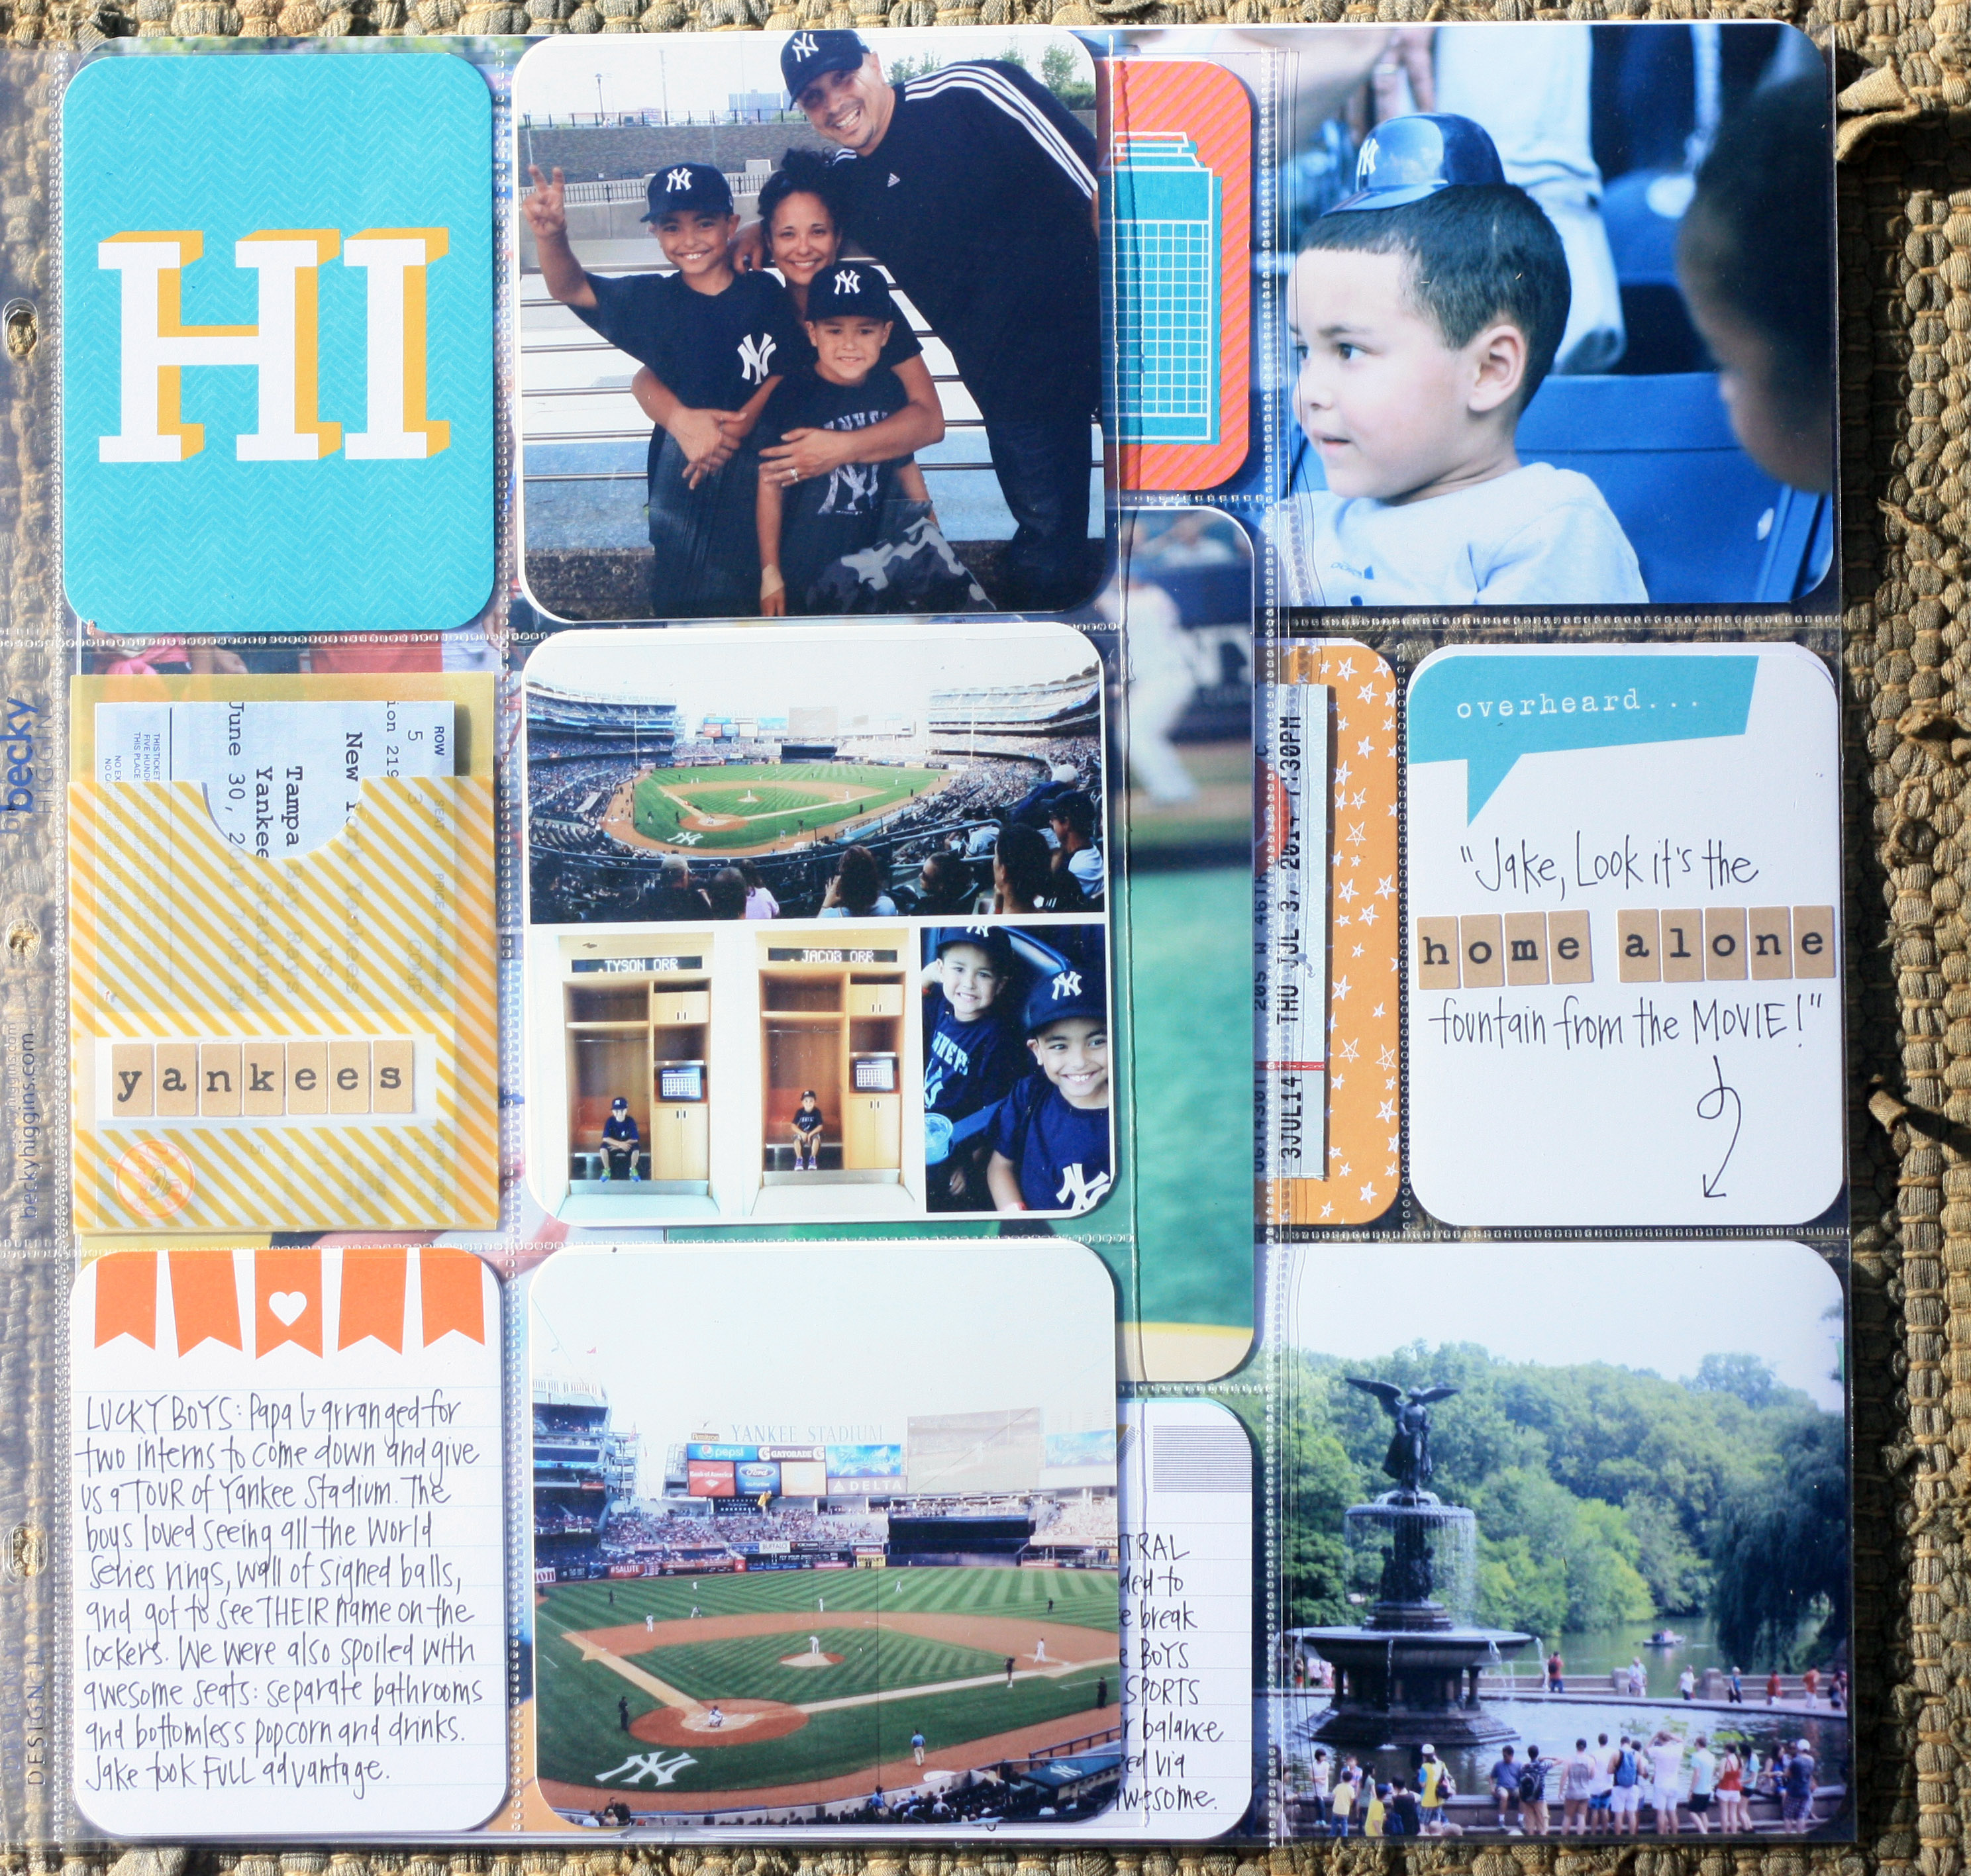
I purposefully used a calendar as my weekly title card to help summarize/document our week. In trying to keep the inserts to a minimum, I knew I’d lose some photo space and all our activities may not make the final cut. However, the calendar card allowed me to capture everything in one spot.
 Right side with inserts. A yellow pocket houses our game tickets and receipts from the boys’ souvenirs.
 Right side without inserts. I tried to find one photo per day to capture our adventure. Lots of ticket stubs. I love ticket stubs: they tell a story all their own.
 A close up of the calendar card. The preview photos from my Costco order were the perfect size:

Project Life 2014: Weeks 24, 25, and 26
Posted: November 16, 2014 Filed under: Project Life Leave a commentWeek 24
Used the new Heidi Swapp Project Life core kit this week. Loved the bright colors and fun fonts:
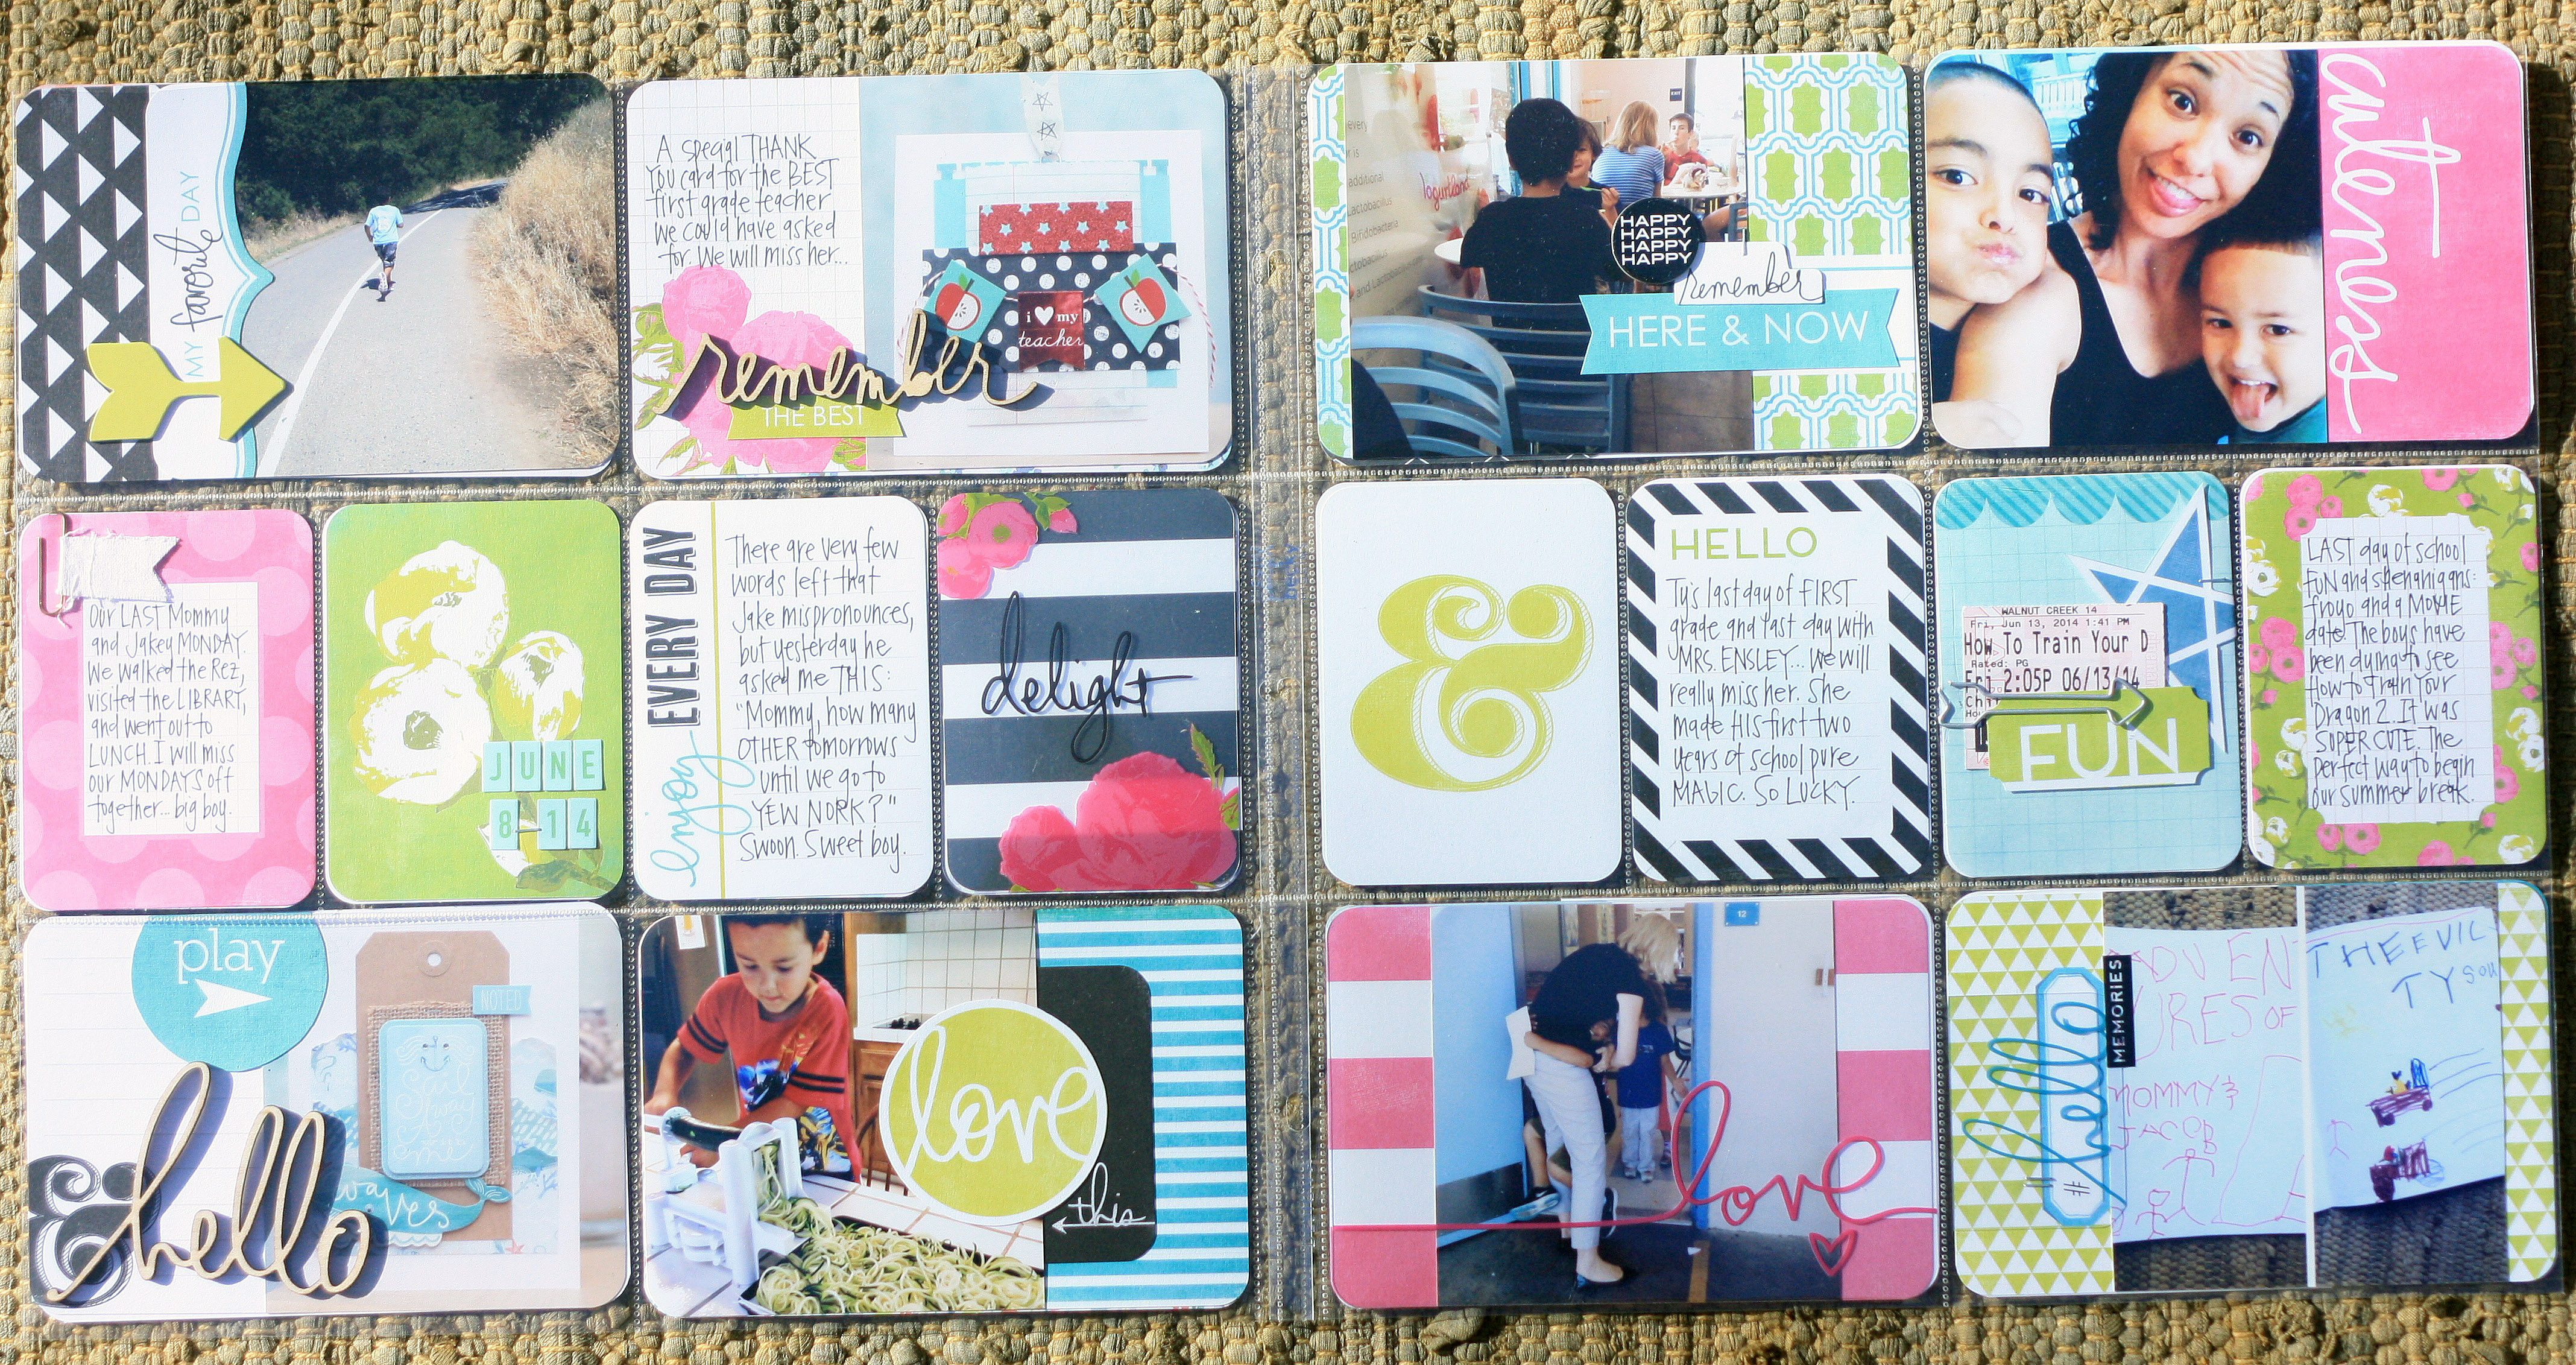 Tyson’s last week of school, Jake’s first week of summer break, and my last few days of the school year:

Keep those movie ticket stubs. One of my favorite non-photo additions to Project Life:
Week 25
Another Heidi Swapp Project Life kit, this time the gold and blue mini kit. Swoon. Love the colors and font so much. Our first official week of summer break: gym time, craft time, and lazy mornings…
 Week 26
Prepping for our NYC trip, new chucks for me, ninja training for the boys…

A Grateful November with me & my BIG ideas
Posted: October 28, 2014 Filed under: Fun Activity, Holidays, Project Life, Scrapbooking | Tags: me & my BIG ideas Leave a comment In the past, the boys and I have done Thankful Turkeys and Grateful Trees for the month of November. This year, I wanted to do something different and something with the whole family. I LOVED the me & my BIG ideas leaves the second I saw them. I also knew I wanted to something where each of us could write down a daily gratitude. We have used popsicle sticks and mason jar before with our Boredom Buster Jar, but I wanted to incorporate them into this project as well. I decided to use mini bags as the focal point, with the intention of trimming them down and transferring to my project life or making them into a gratitude mini album. One bag per person:

And a jar of popsicle sticks and Sharpie waiting for November 1. I love capturing the boys’ handwriting and look forward to having various pieces of their daily moments to keepsake…it can be one sentence, one word, one doodle. Ultimately, I am looking for one memory or gratitude a day from all of us.
 Join me for a Grateful November!!
Project Life 2014: My Workspace
Posted: August 13, 2014 Filed under: Project Life, Uncategorized 2 Comments I have received a few questions on Instagram about my Project Life organization and workspace and thought I would share a few pictures. I don’t have an office or permanent workspace, so everything is more or less portable as I work in the dining room. It overlooks the boys’ playroom so it’s perfect.
 I like to have everything out and visible, or as past experience has proven, it doesn’t get used. In my immediate workspace: a bamboo silverware tray that houses my favorite core kits, roygbiv’d by kit. A black wire silverware tray that houses random cards and all my sub kit cards in roygbiv order. Next to those, a white wire tray that houses most of my washi tape, again roygbiv’d.
* Bamboo tray and white wire silverware tray are from TJ Maxx
* Black wire silverware tray and wire cupcake stand are from Cost Plus
 Behind the card trays is a wire cupcake stand that I use to hold date stamps, more washi, and extra embellishments. I have all my favorite, or current, embellishments in a white muffin tin. Super simple set up, everything can be moved to the garage if need be. I also have two raskog carts: one houses all my sticker embellishments and the other all my design team goodies. Hope that helps!!
* Raskogs and antonius organizers: Ikea
* White muffin tin is actually a paint tray from Lakeshore Learning


