Mother’s Day Fun With me & my BIG ideas
Posted: May 18, 2014 Filed under: Scrapbooking Leave a comment I have loved this paper pad since I first set eyes on it. In particular, this bird…I wanted to do something with it and it wasn’t until I found this unfinished frame that it all came together. I first intended to put it in the bottom right corner, but then realized it would be fun to make a more interactive type frame for my mom. Notably, something that allowed her to change out the photo and showcase BOTH notes that the boys made her.
A think coat of Modge Podge + two pieces of paper from the me & my BIG ideas Mixed Media paper pad + stickers + clothes pin = done.

A quick and easy card using mambo Cards in An Instant rounded out the crafty love for my mama:

Pocket Pages with me & my BIG ideas
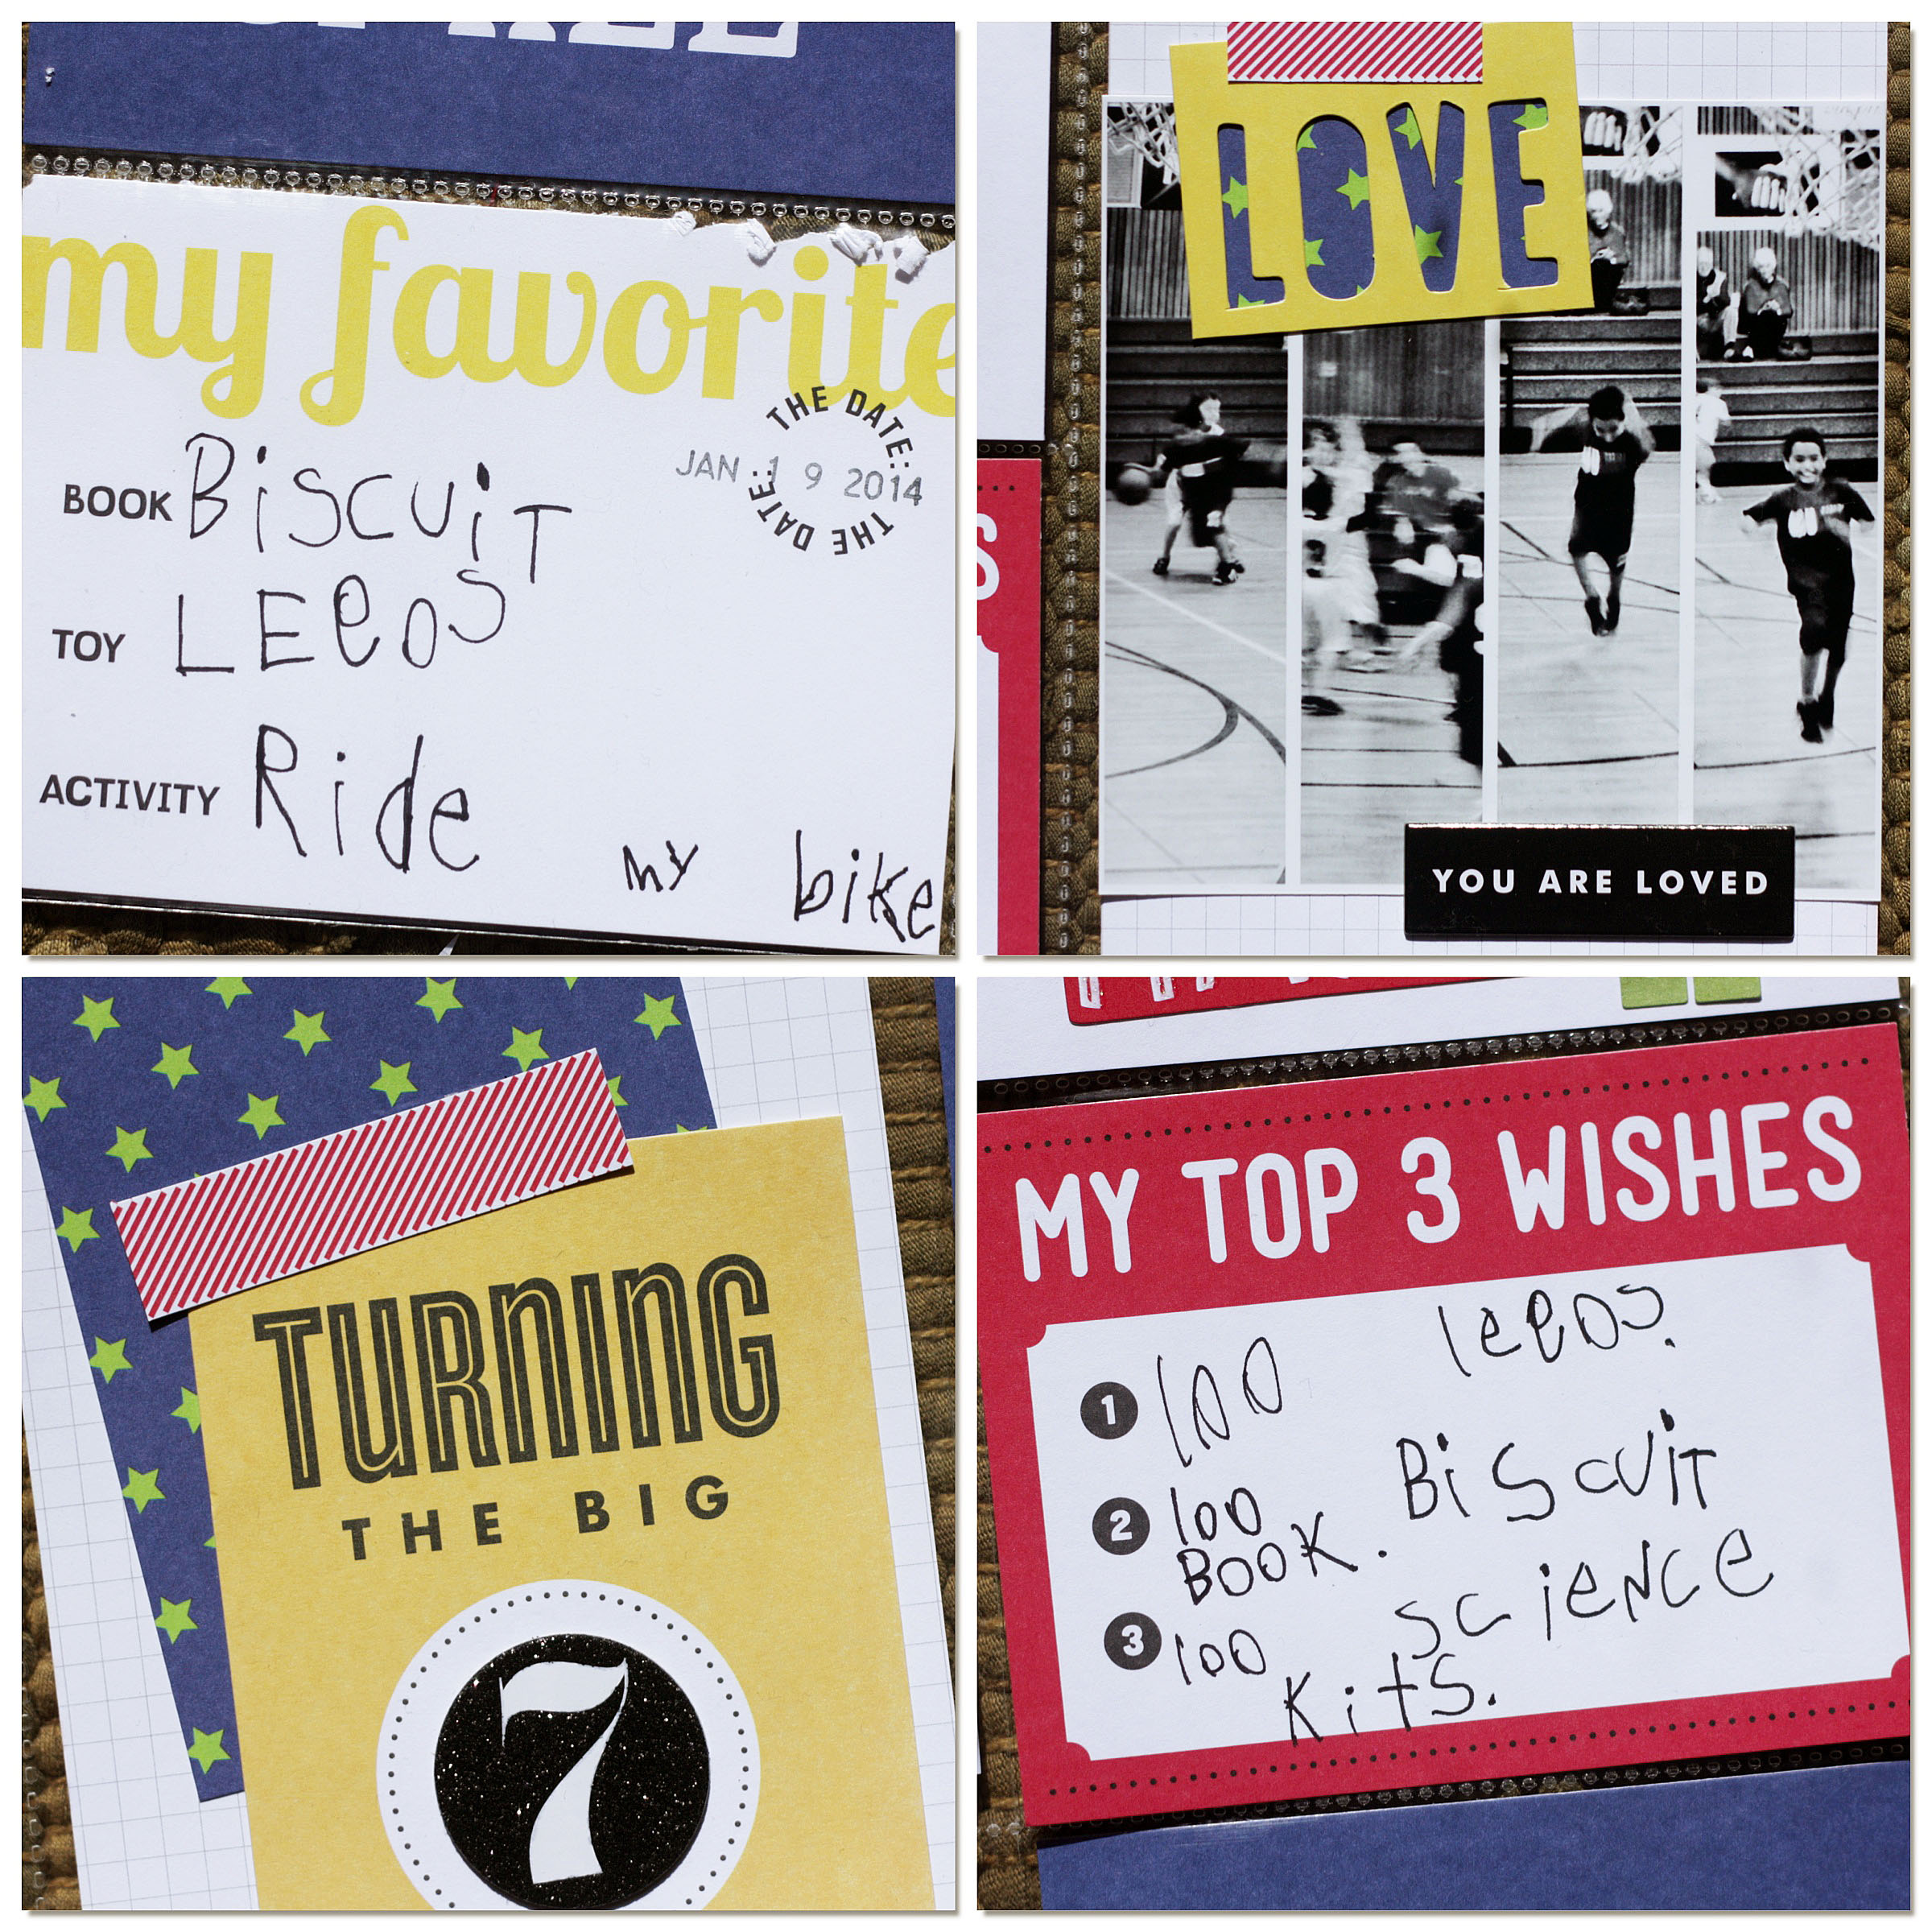
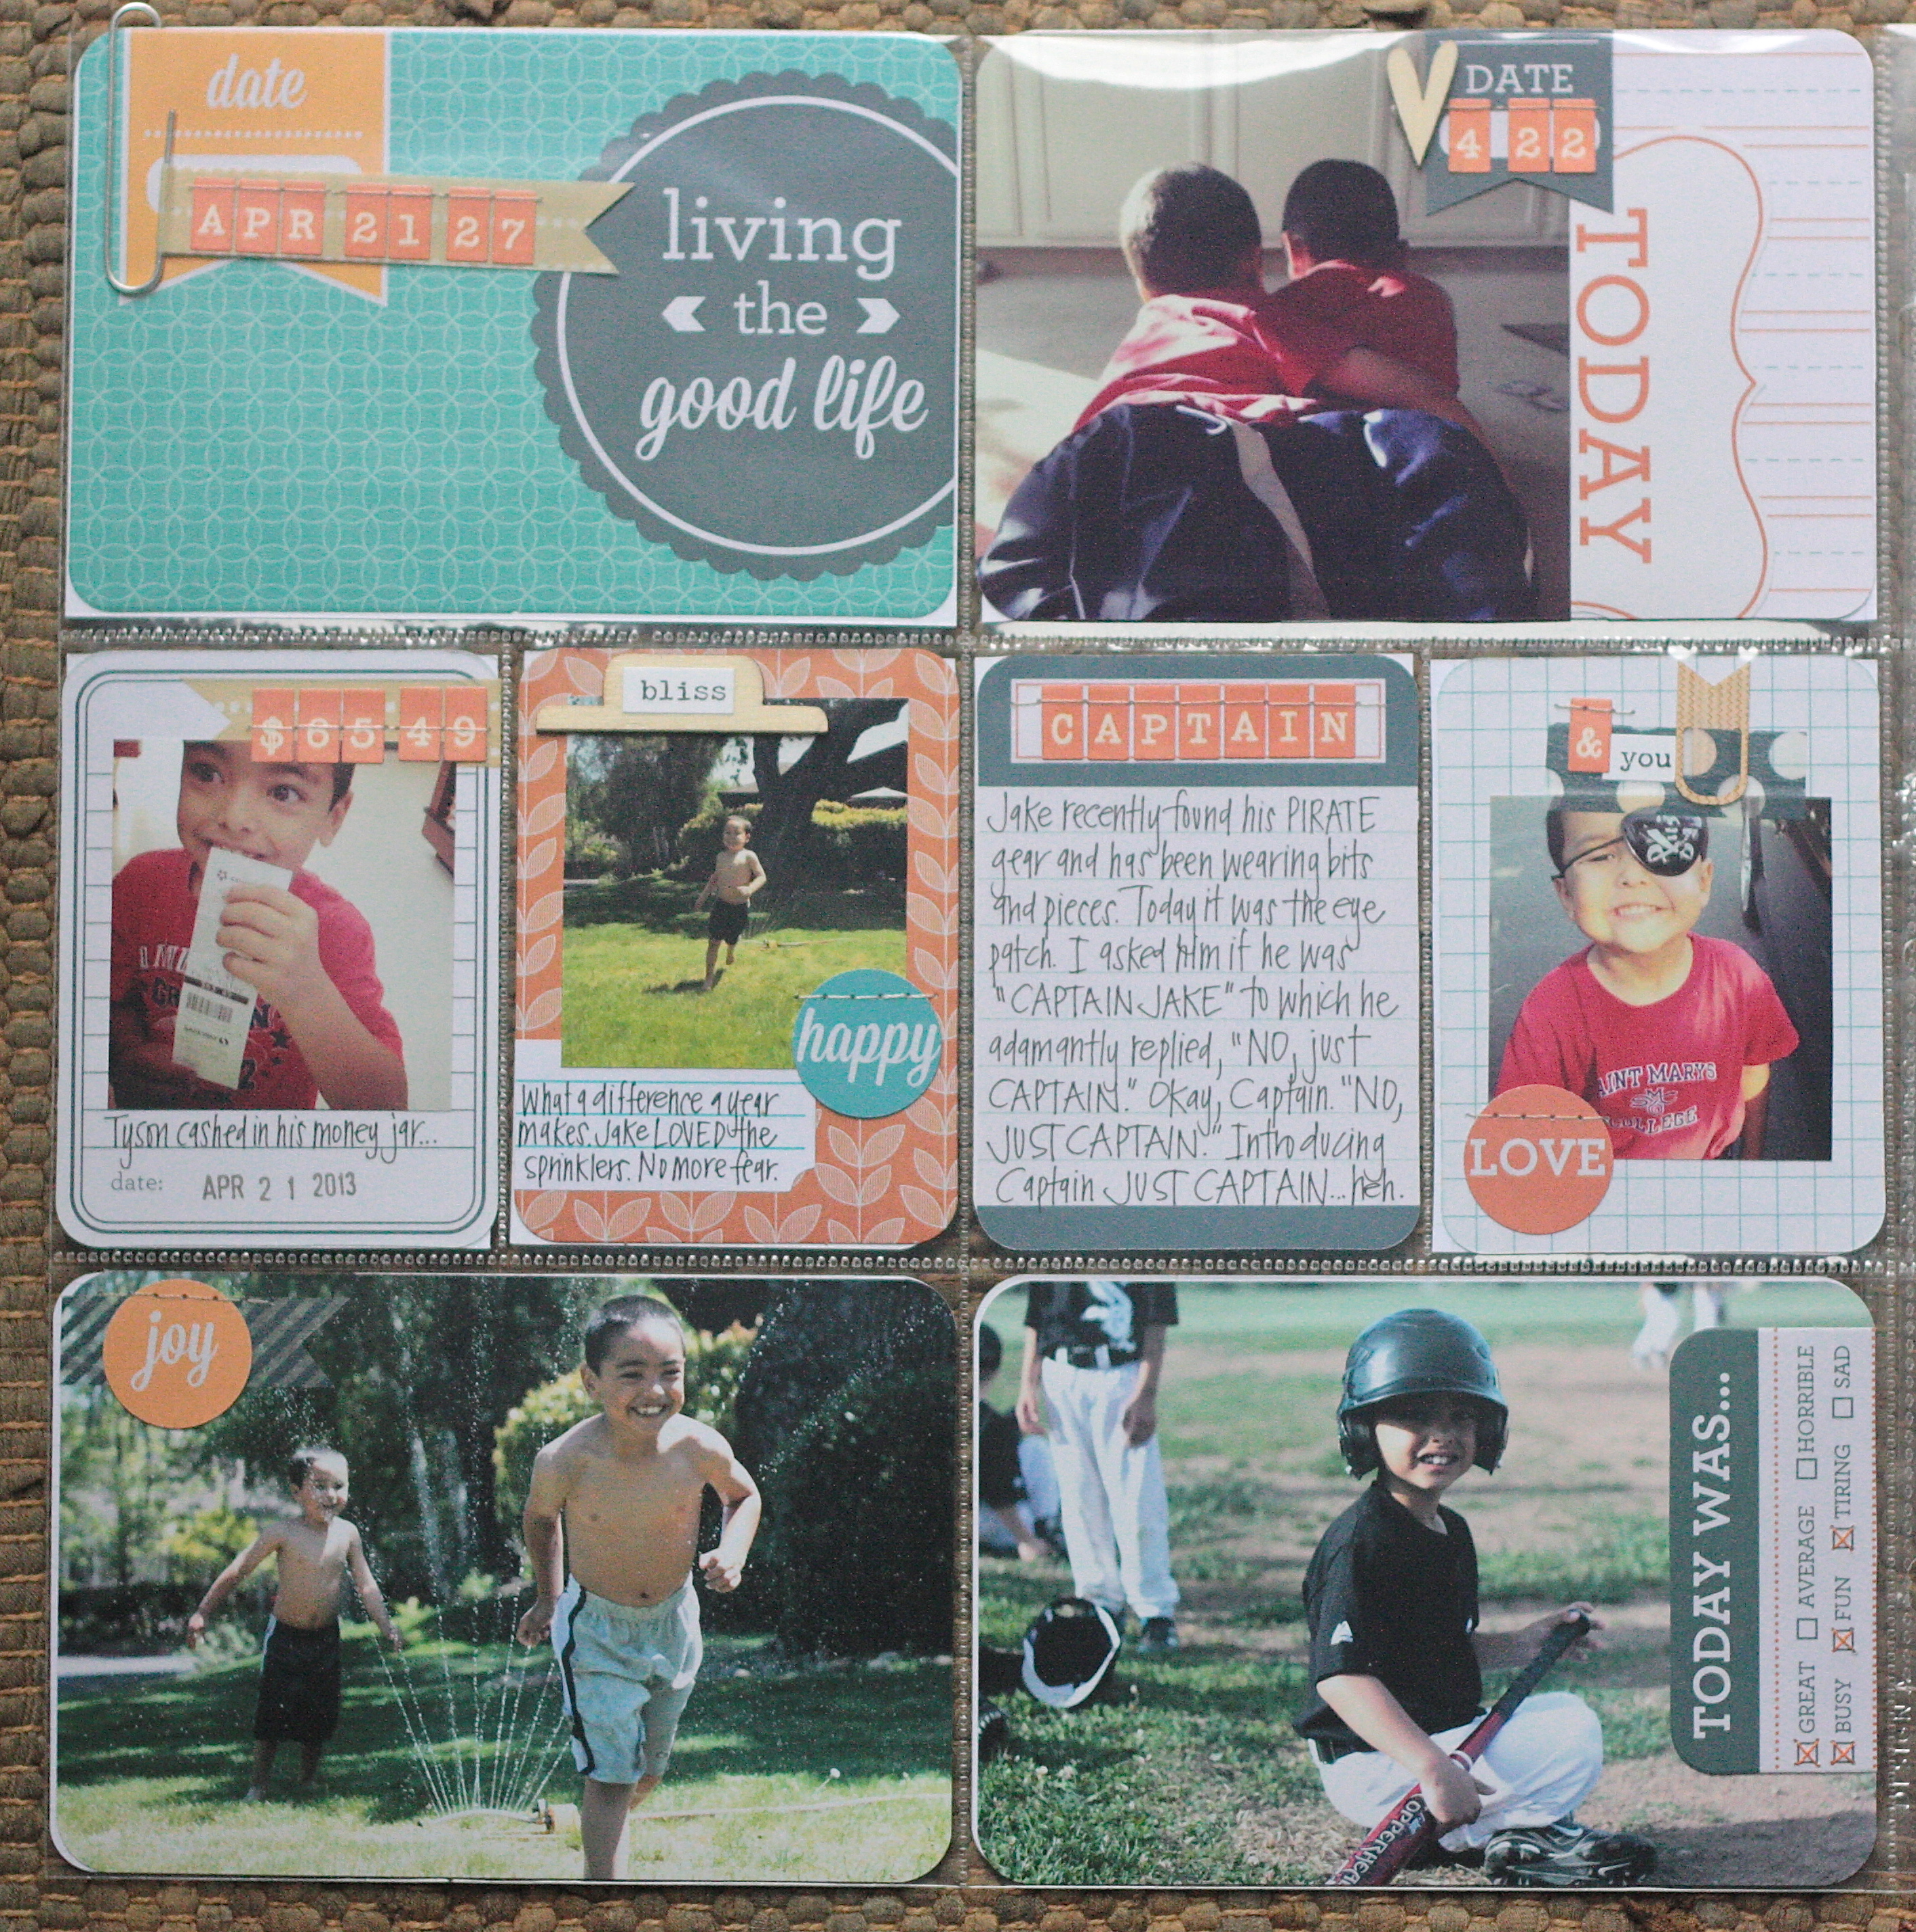
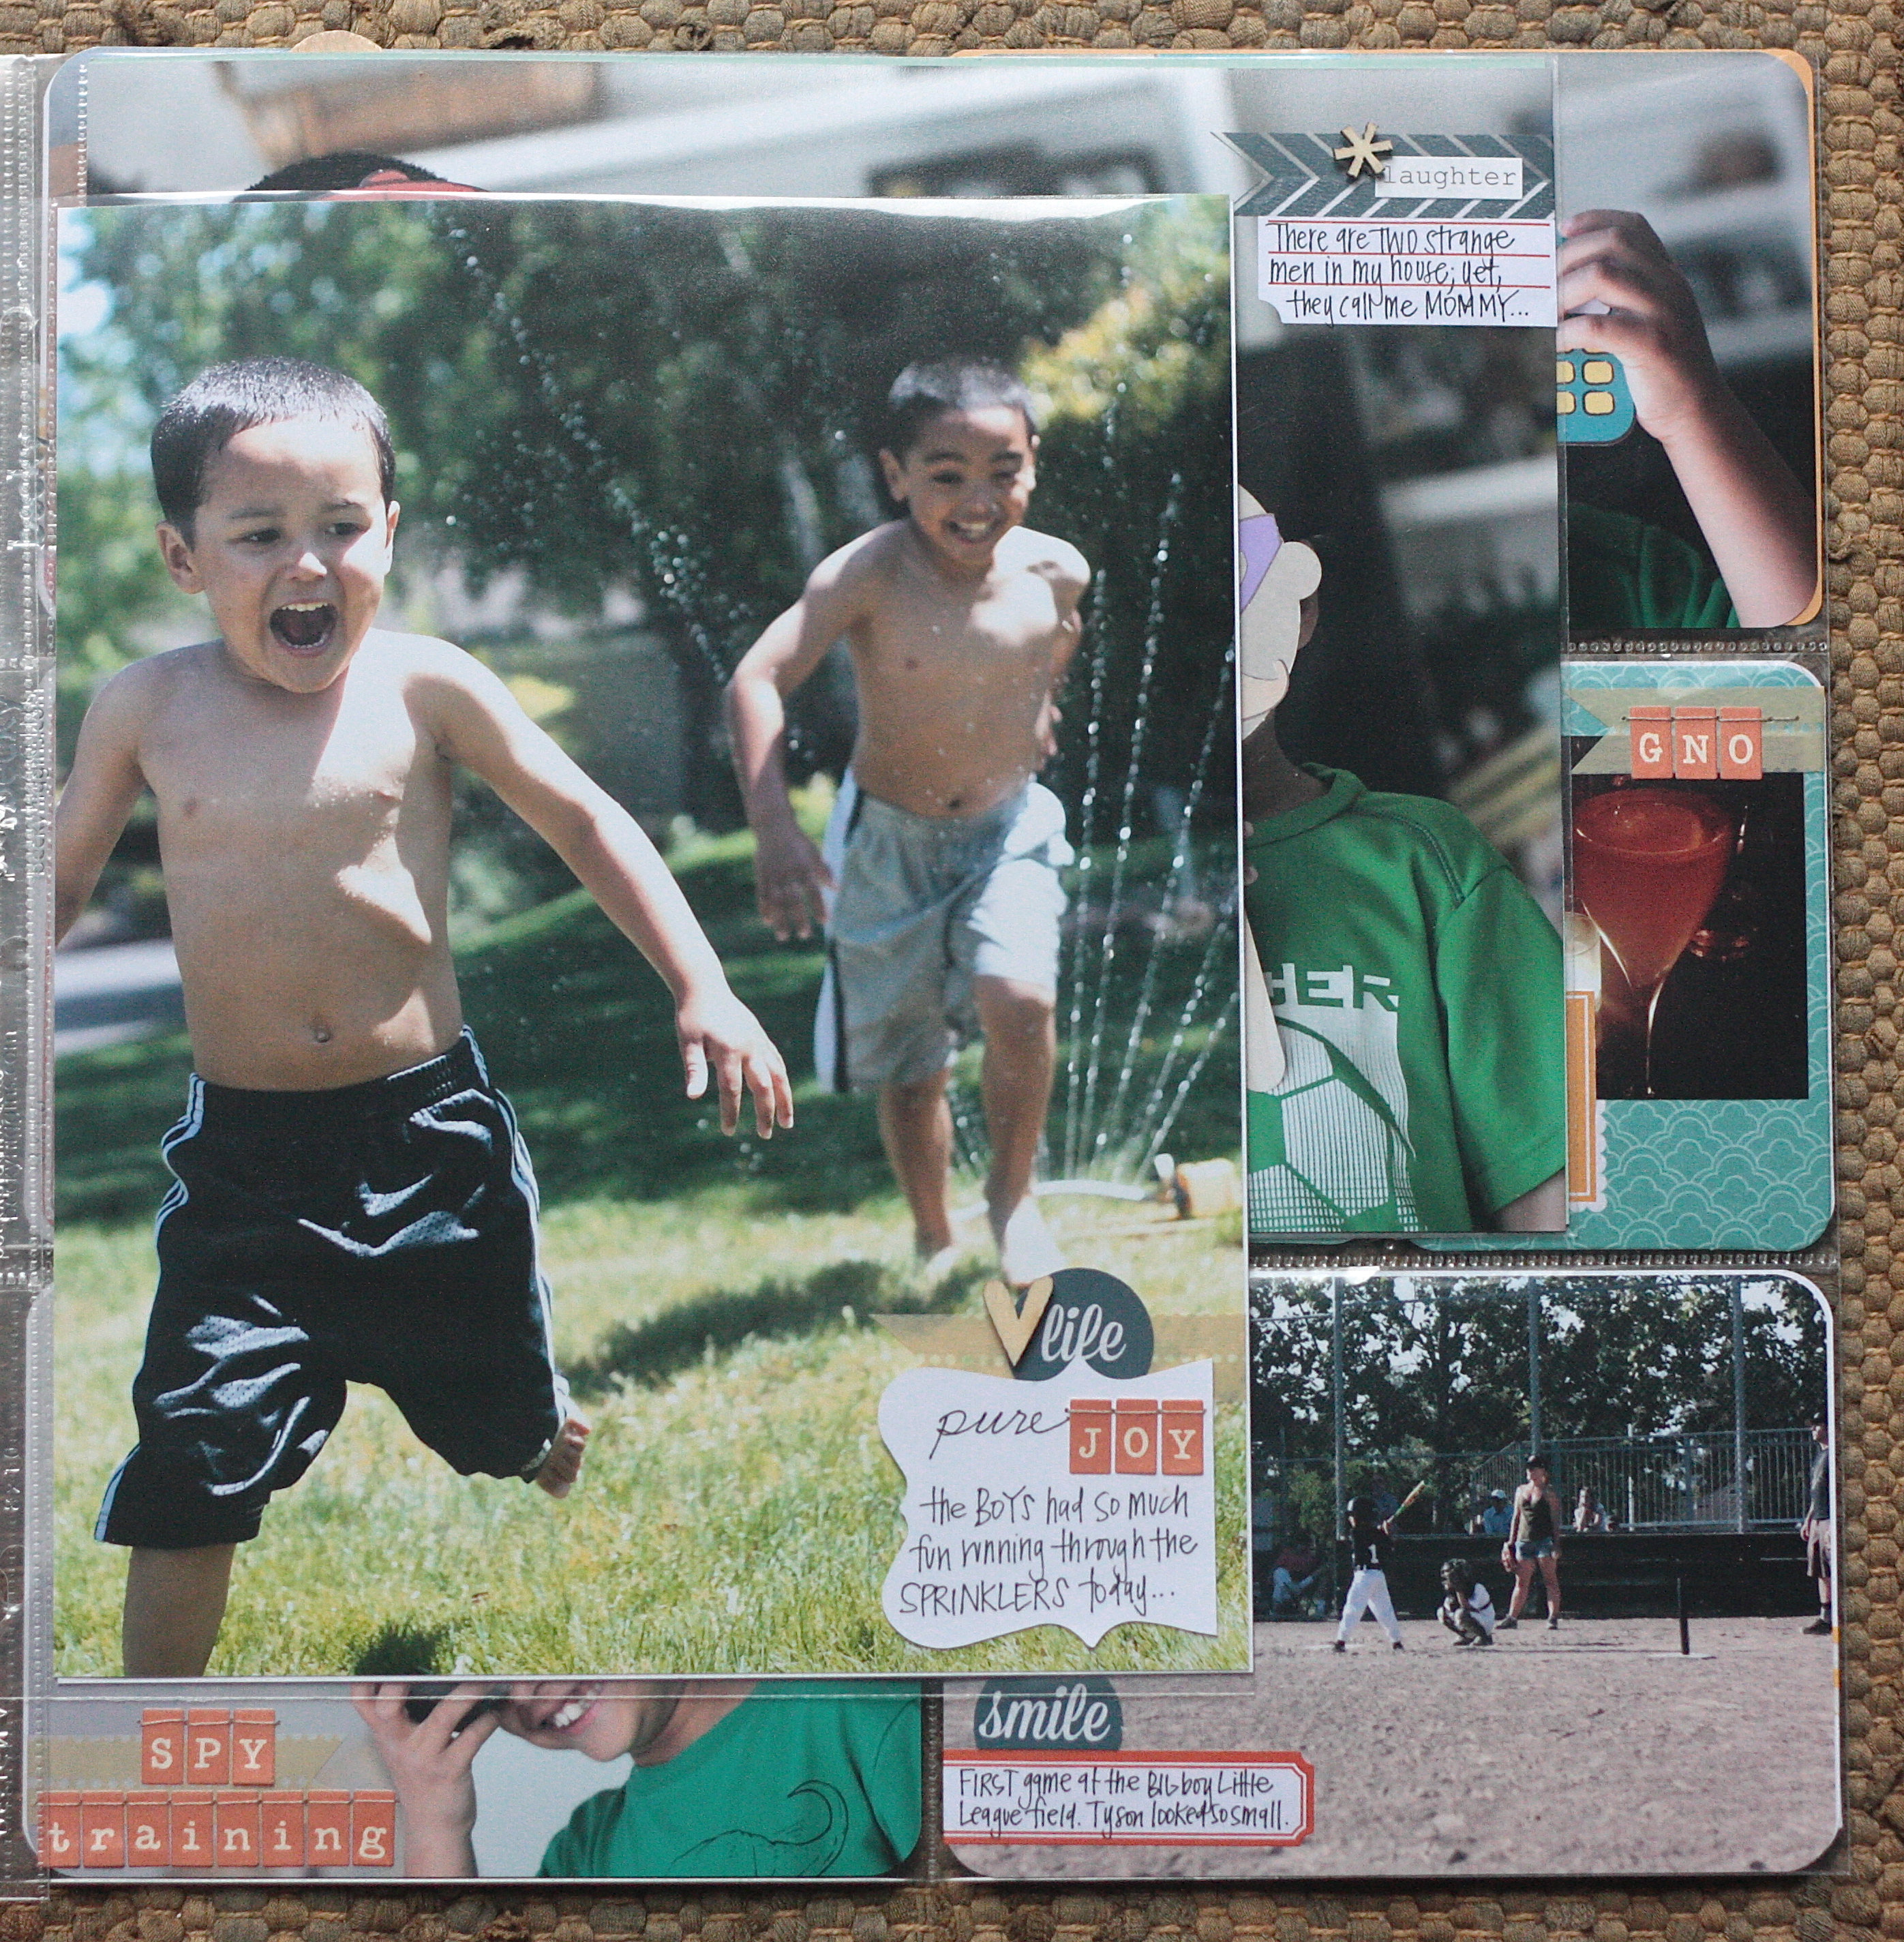
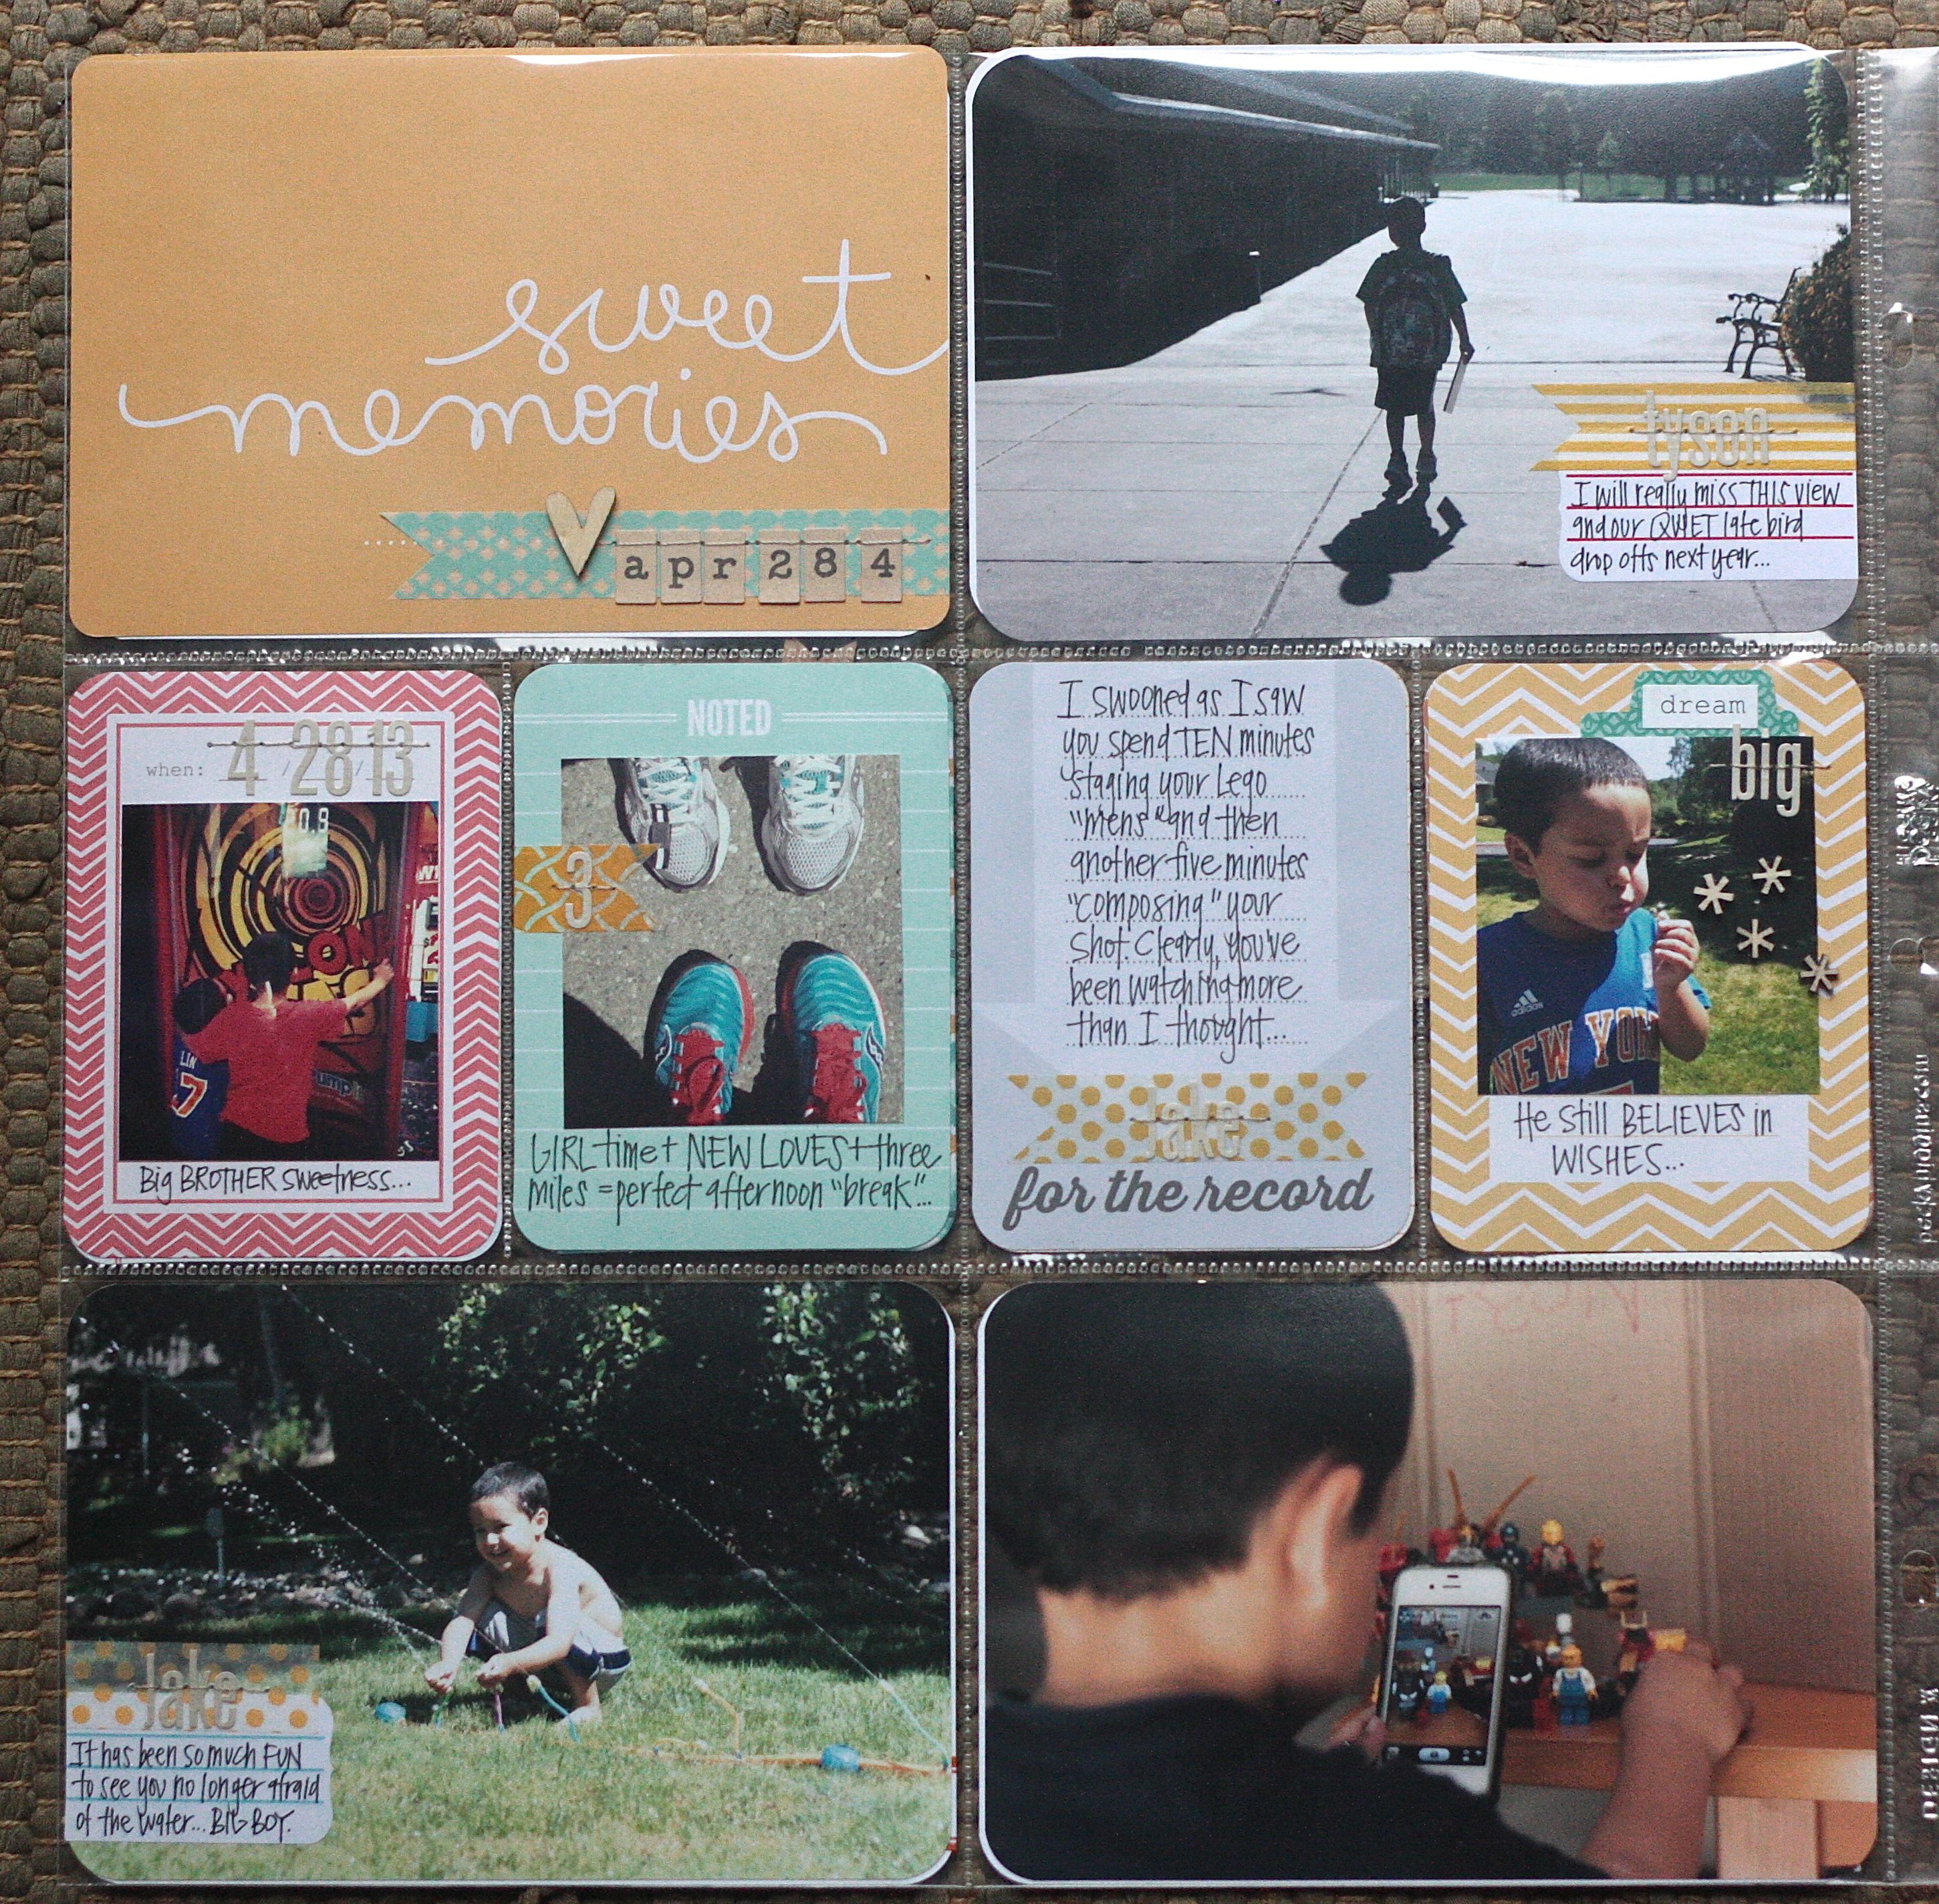
Posted: March 19, 2014 Filed under: Project Life, Scrapbooking 1 CommentEvery year on each of the boy’s birthdays, I try to do a layout all about them. What they are loving, what they are doing…how they write their names. Little pieces of them. Their marks on the page, the stray pen lines…my favorite keepsakes. This year, I vowed to tell more of my story. I was inspired by the prompts on the me & my BIG ideas cards and had a lot of fun with this one…

I often start with a card or color, gather all the cards I can find, any possible embellishments, and the set the cards out on an empty pocket page. I have the photos I want to use near by and start mixing and matching, moving things around…it is all a very informal process for me. But there is always a certain color or theme that brings it all together.
 My real inspiration for my page, Tyson’s page:
 Thank you for visiting!!
December Daily 2013: Part One
Posted: December 24, 2013 Filed under: December Daily, Project Life, Scrapbooking 2 CommentsI swore up and down I would absolutely NOT do December Daily this year after making it through day three last year. I will NOT BUY A December Daily Kit, I said. NO, NO, NO. And then the kits came rolling out. And it became, maybe I’ll buy ONE kit this year. JUST ONE. Heh. For the most part, I stuck to the one kit purchase. I am really hoping THIS is the year I FINISH my attempts at a Daily December album. Hold it to me people.
COVER Page:
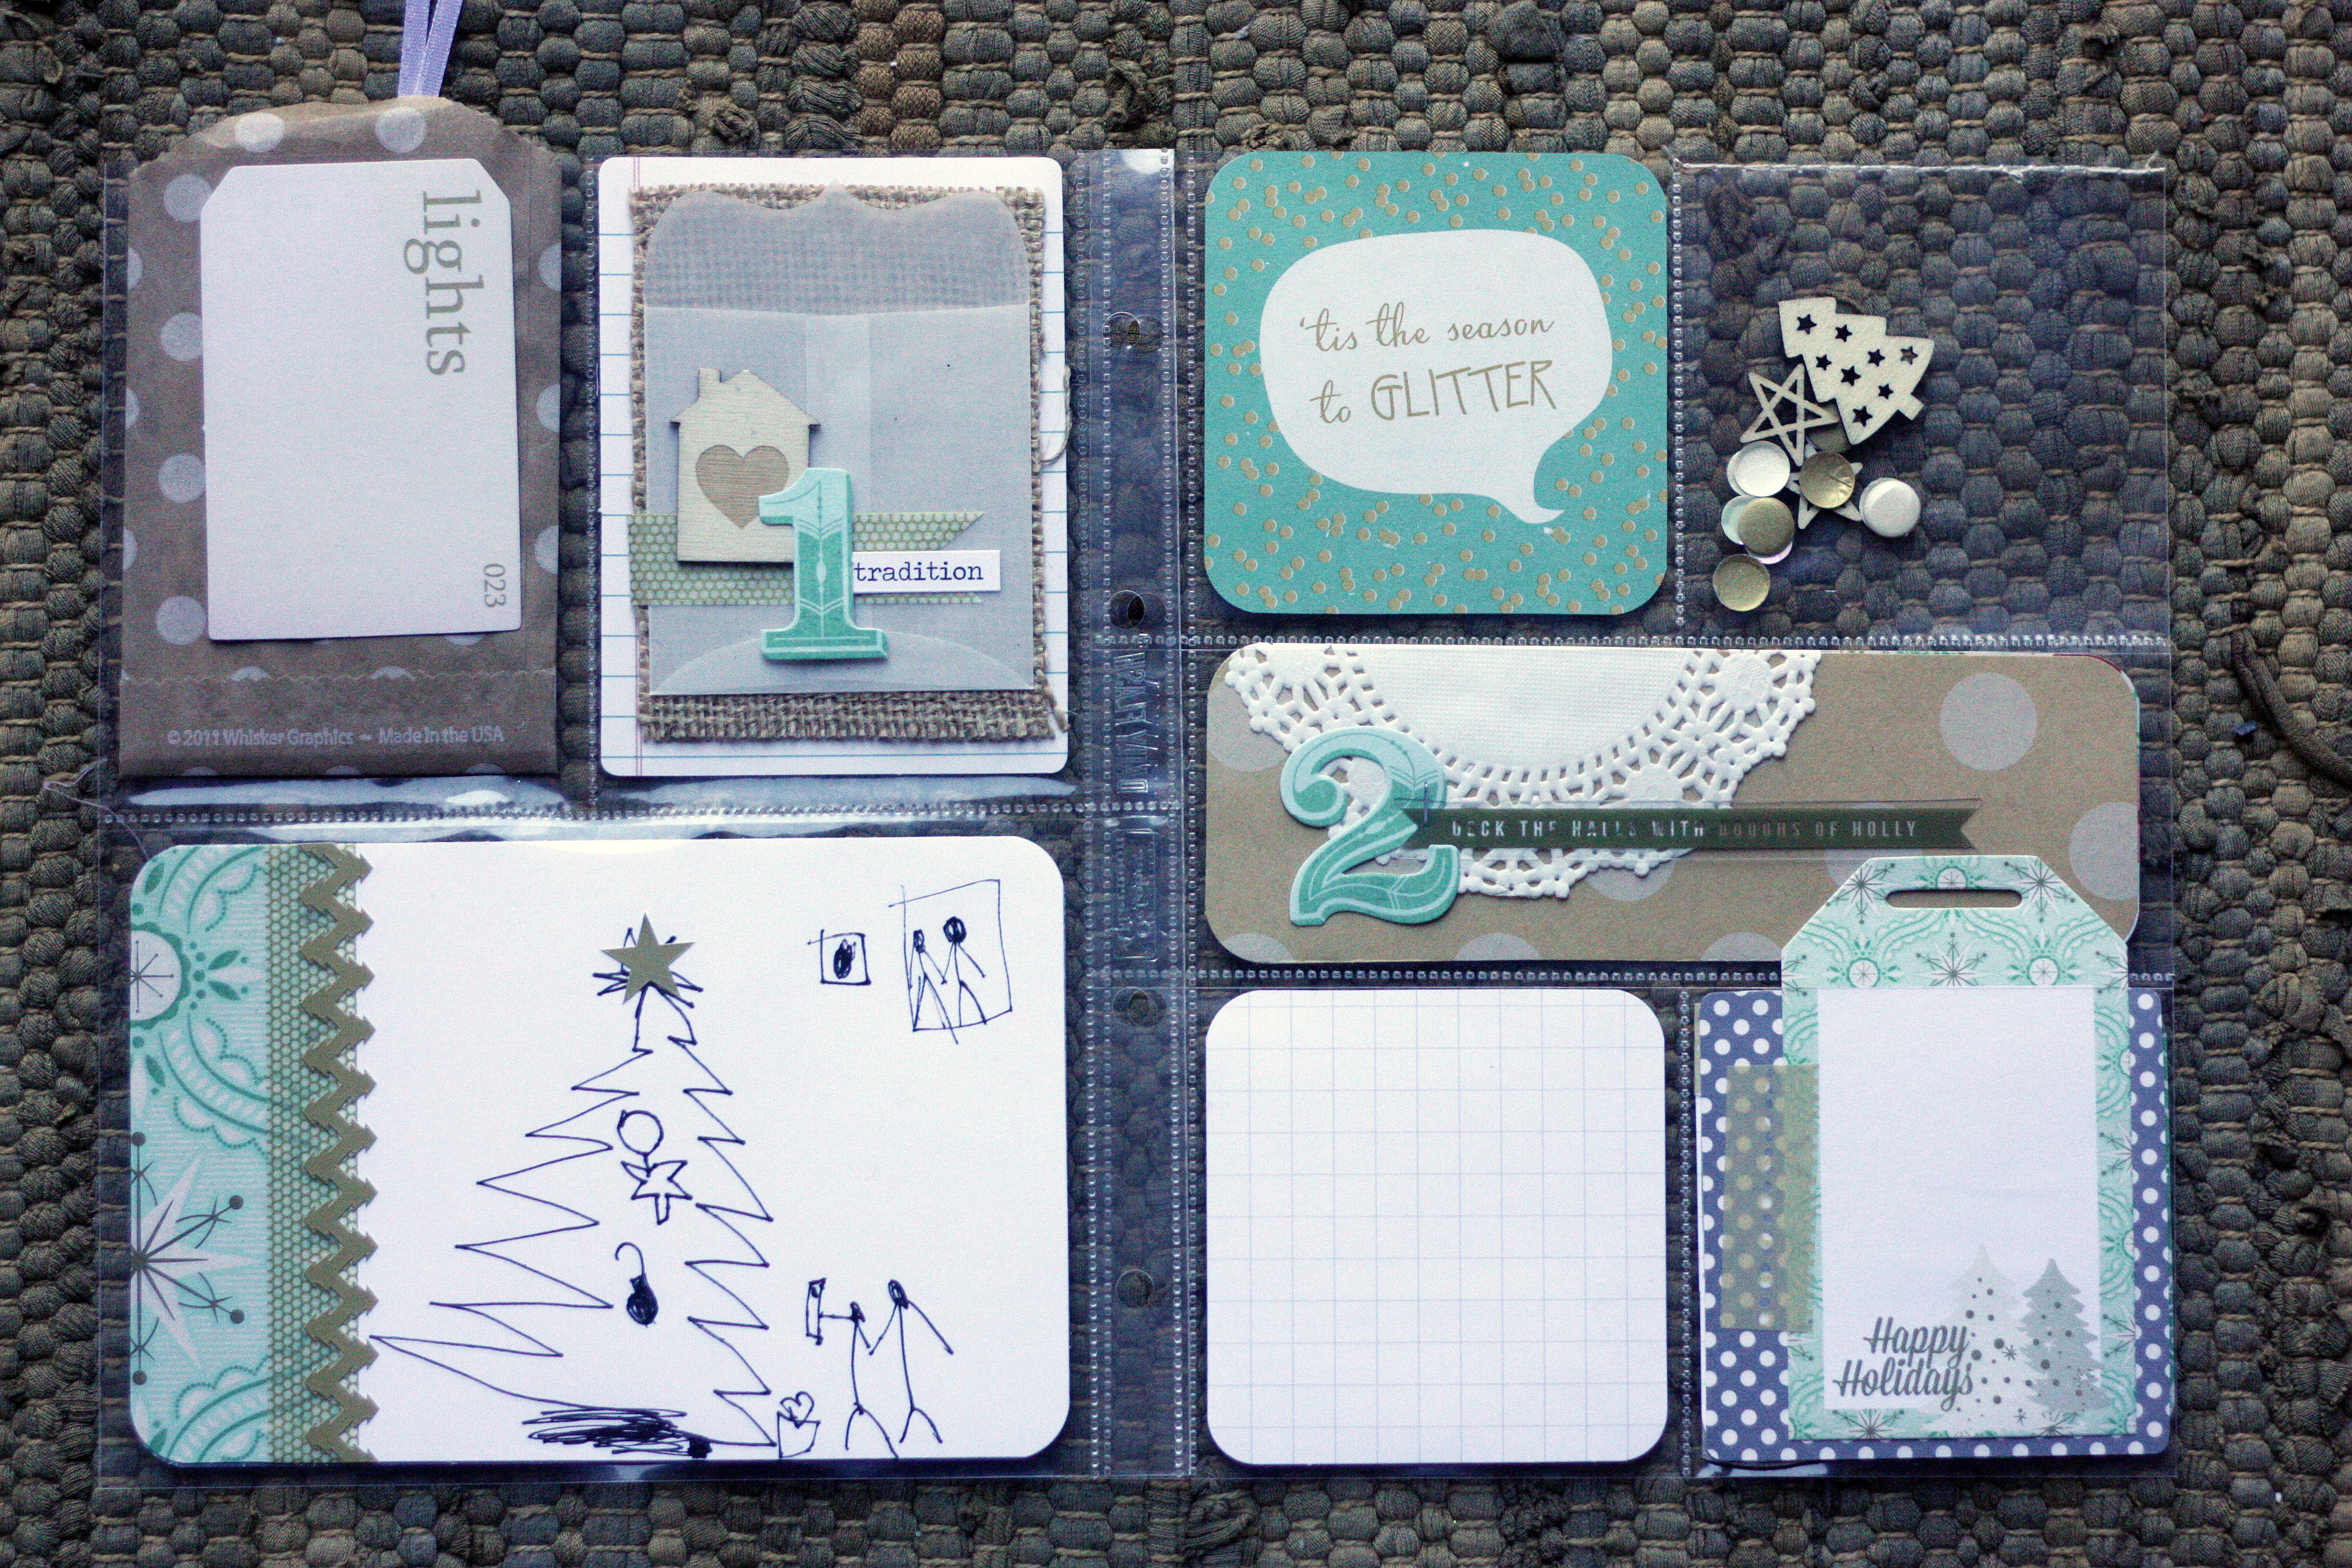
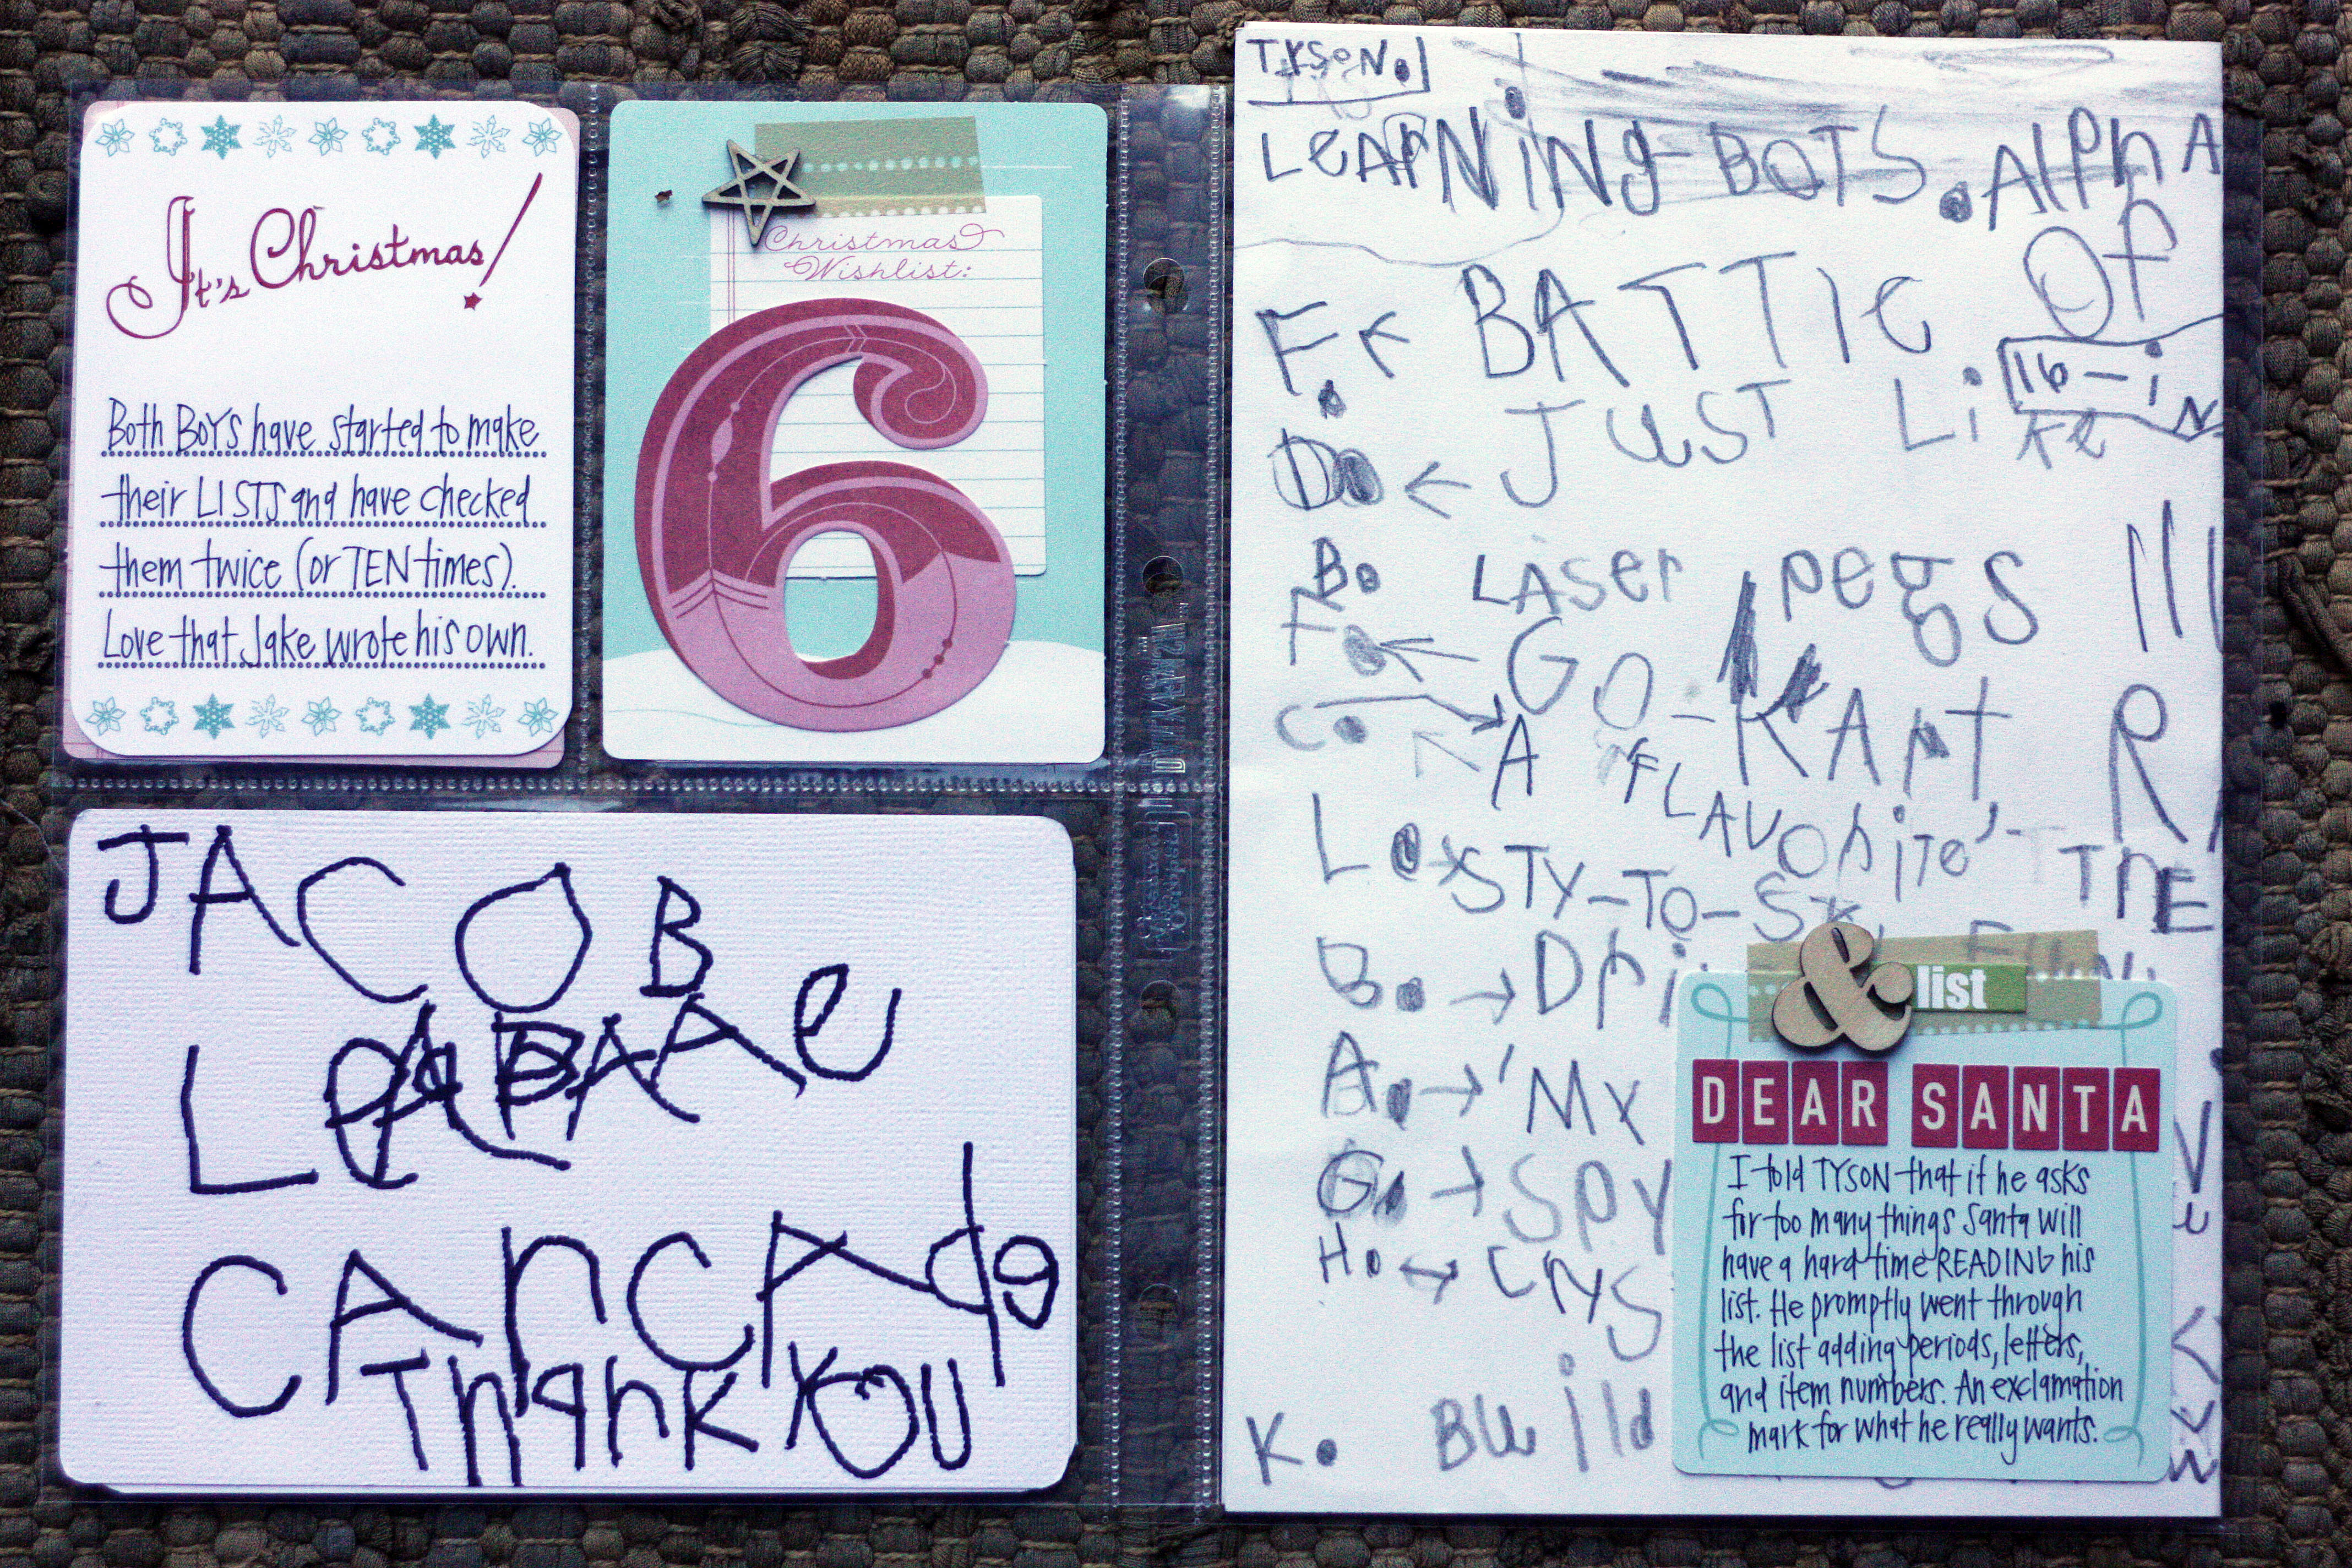
 Day 1: I am more or less keepsaking moments versus days. In the little bag, I had the boys write down their hopes for the season, and I did the same. Having completely dropped the ball on family photos this year, I had Jake draw a family portrait. I kind of love it more than an actual photo…
 Day 2: I lost an envelope of pictures somewhere. I have no idea where they are. I have ordered second copies and am waiting for them to finish this page…
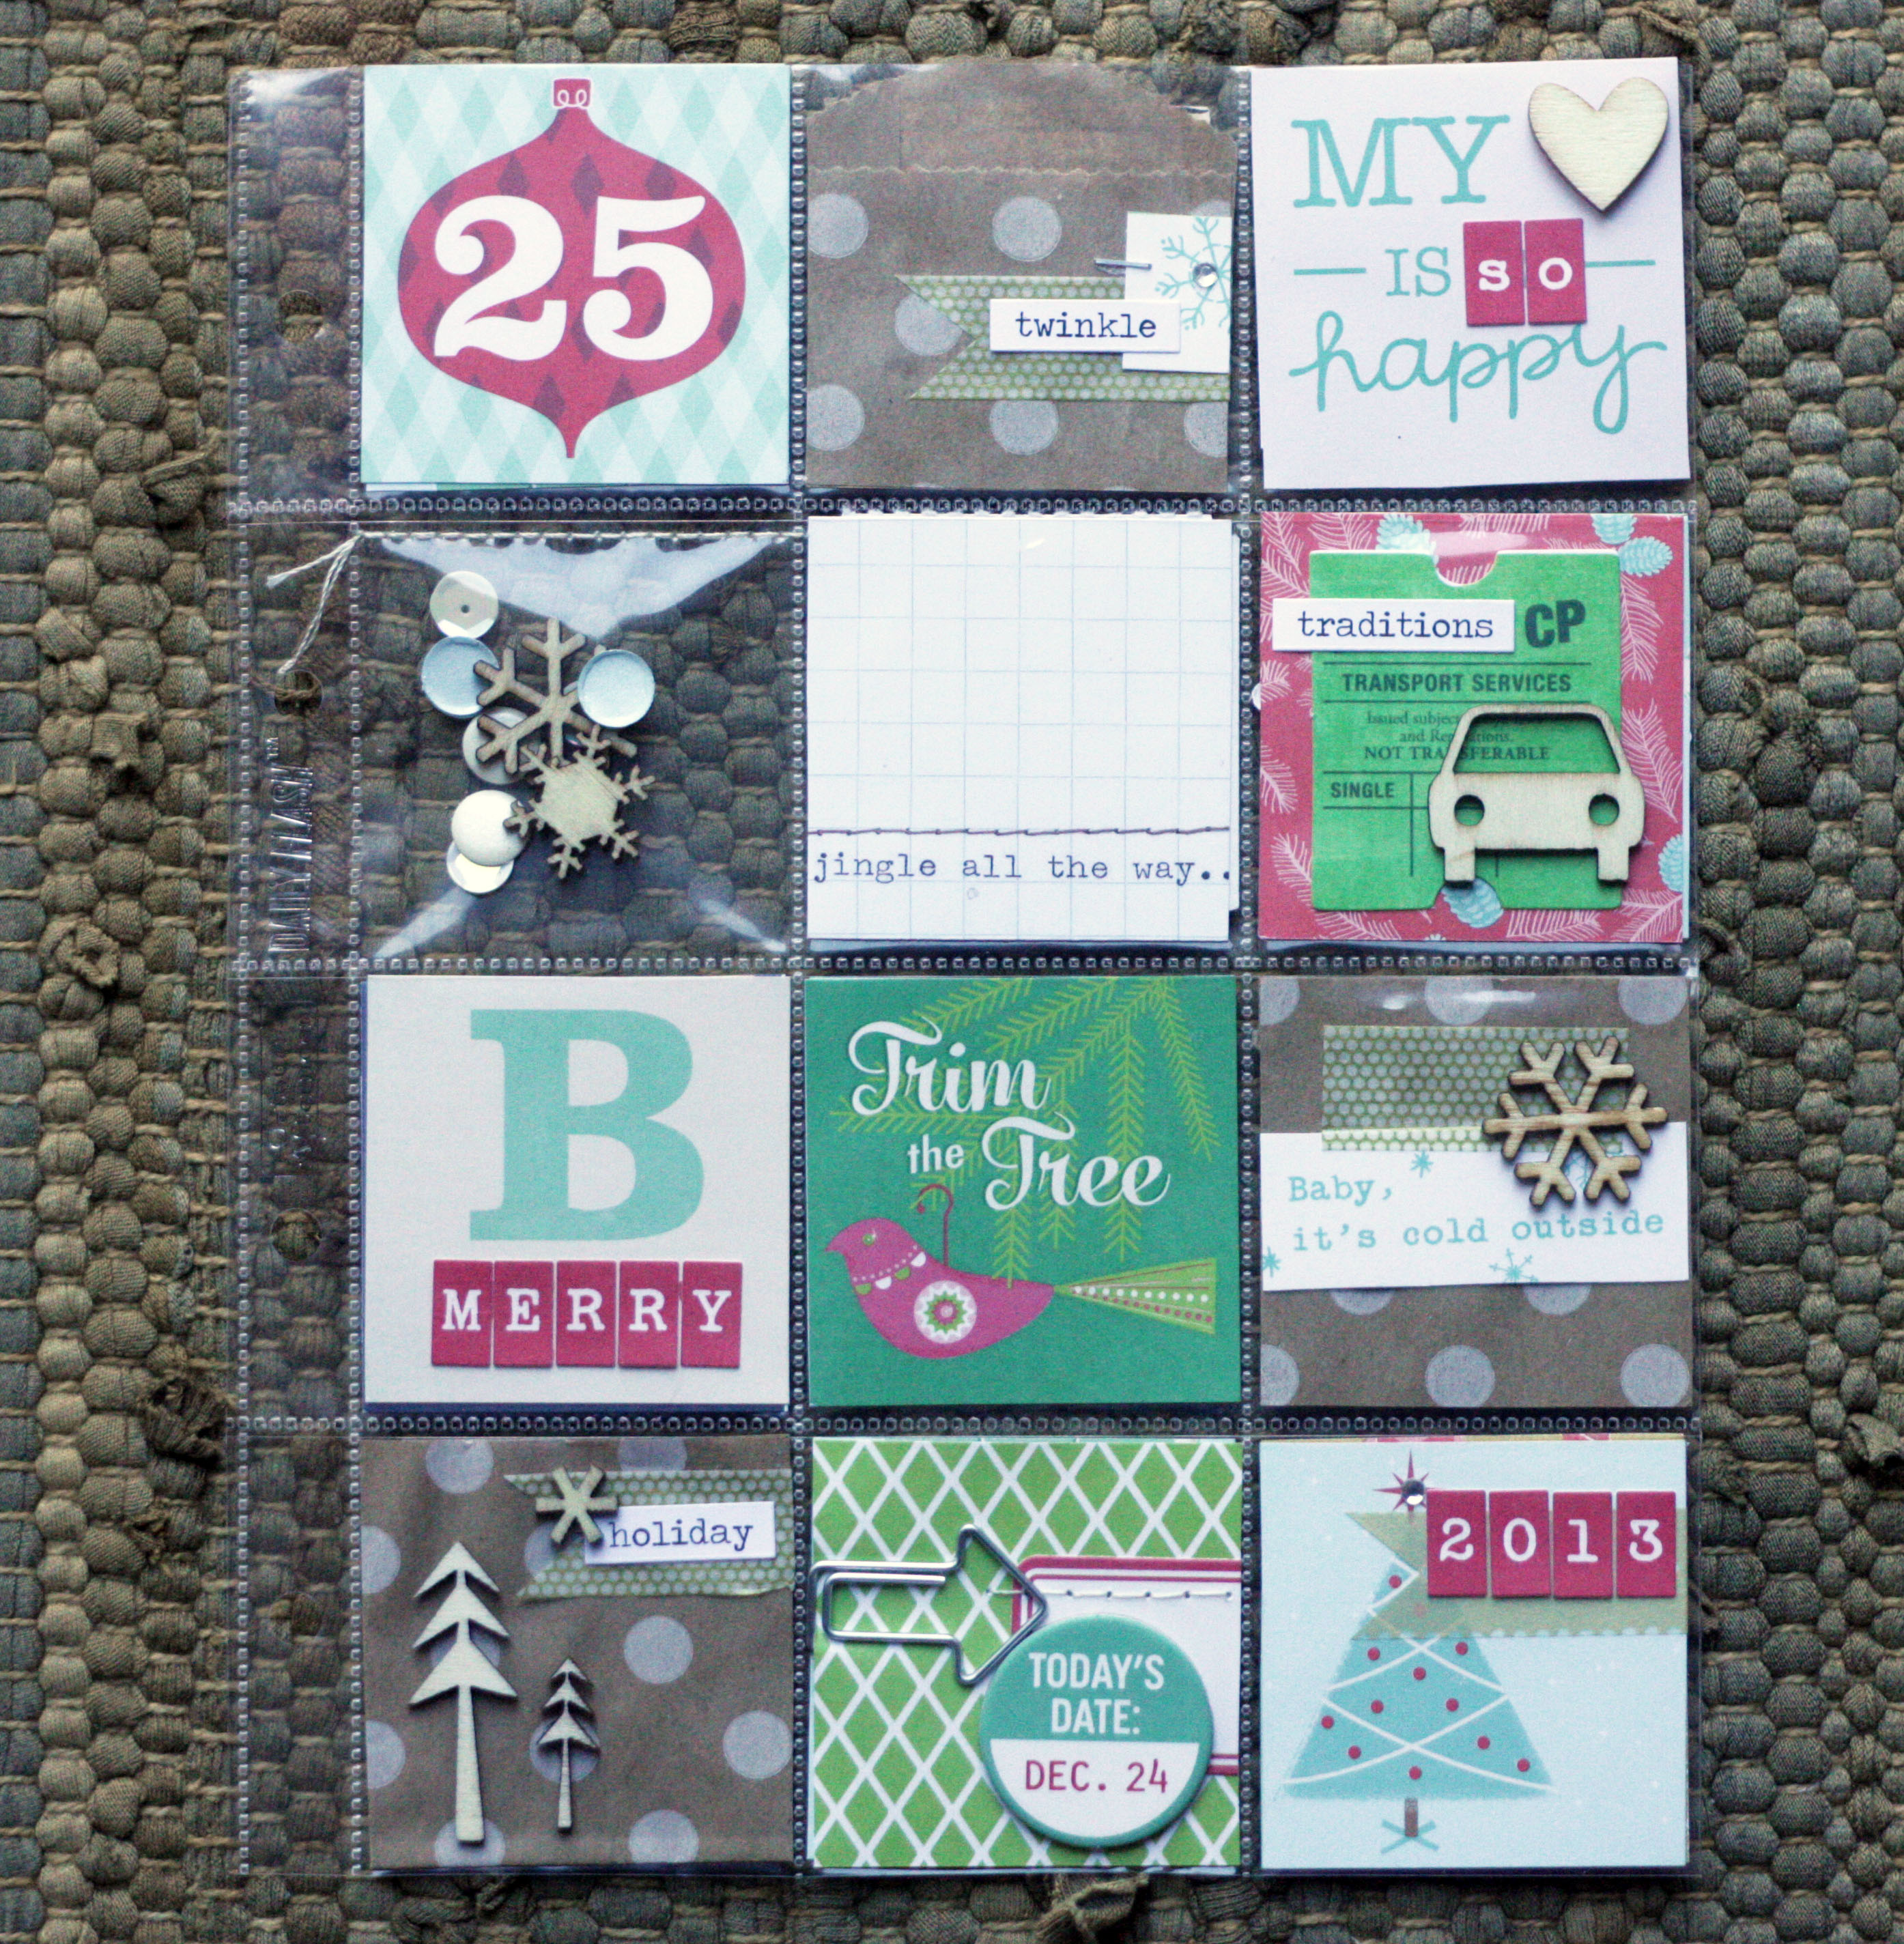
 Day 3: Decorating our tree…
 Day 4: A Thanksgiving Break tradition, our third year doing it, making our Salt Dough Advent Calendar. The boys did most of the work this year. These ornaments are always my FAVORITE.
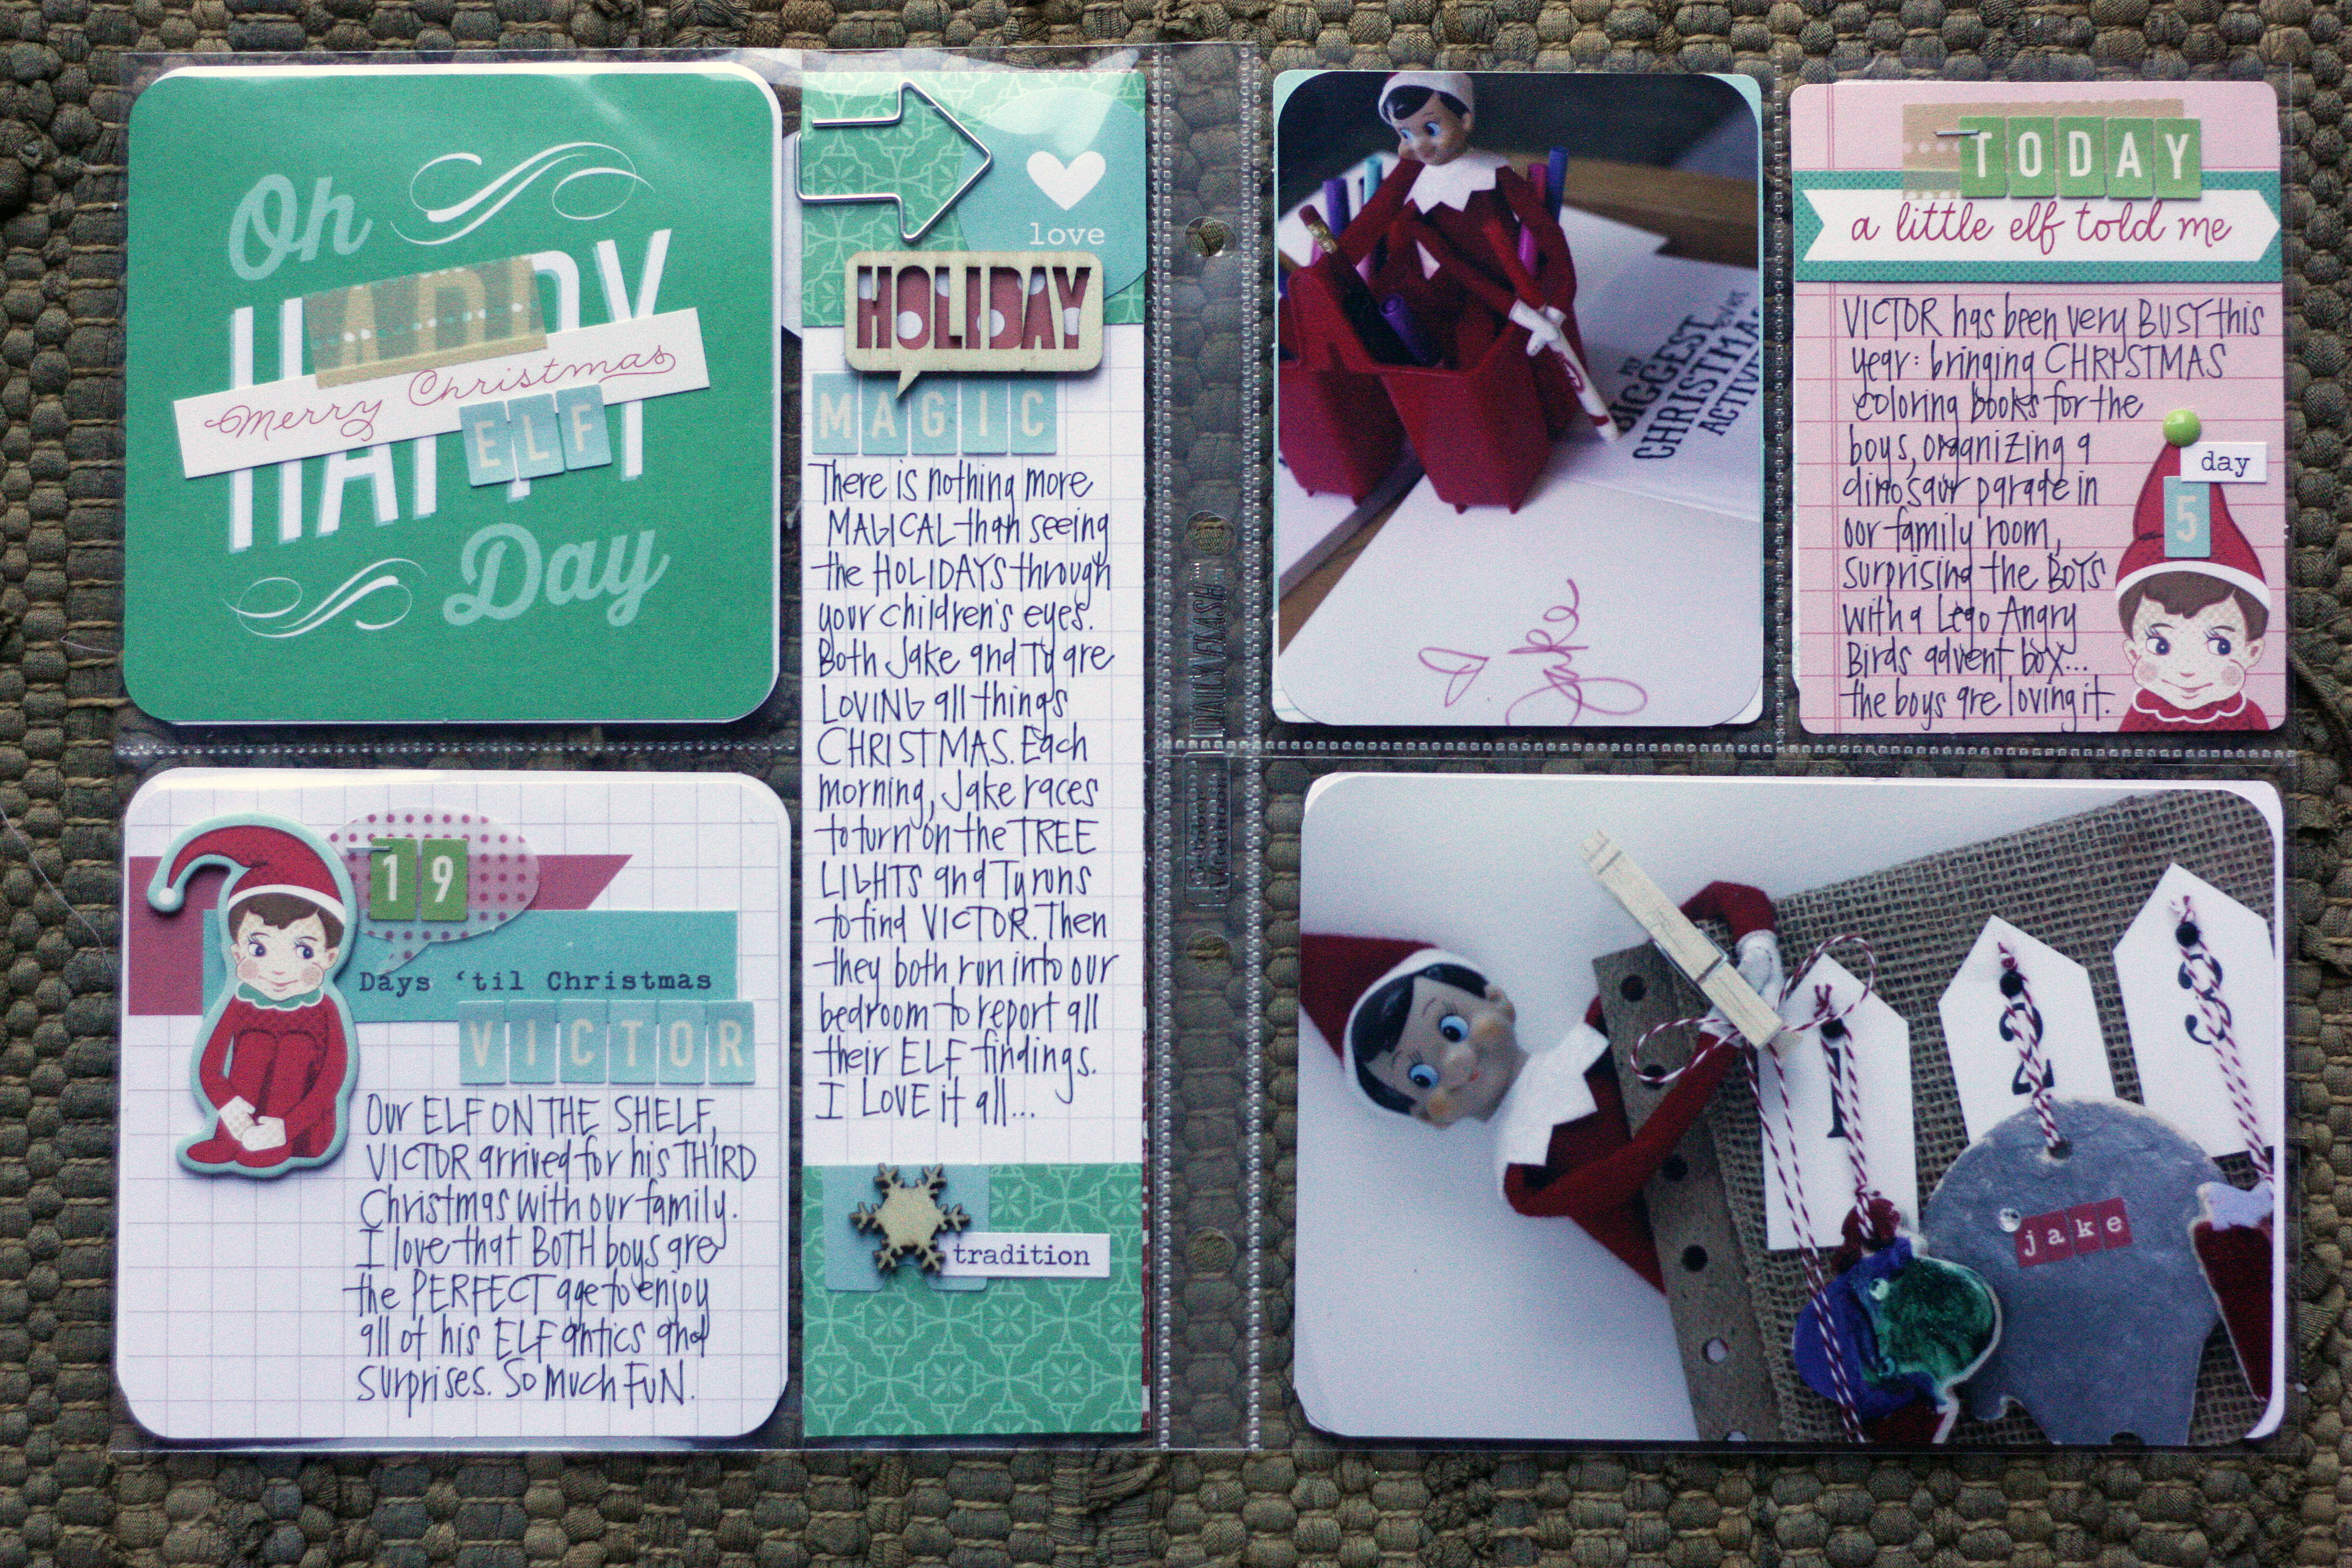
 Day 5: Our Elf on the Shelf made his annual appearance. Magic for the boys, many EARLY MORNING panicked wake ups for ME- did I move the elf??!!
 Day 6: The beginning of the boys’ Christmas Lists. As of today, Christmas Eve, they’ve penned about five different versions of their list…
 Day 7: First real season of basketball for Tyson. So much fun. So different watching him play a sport where he is truly SELF motivated…
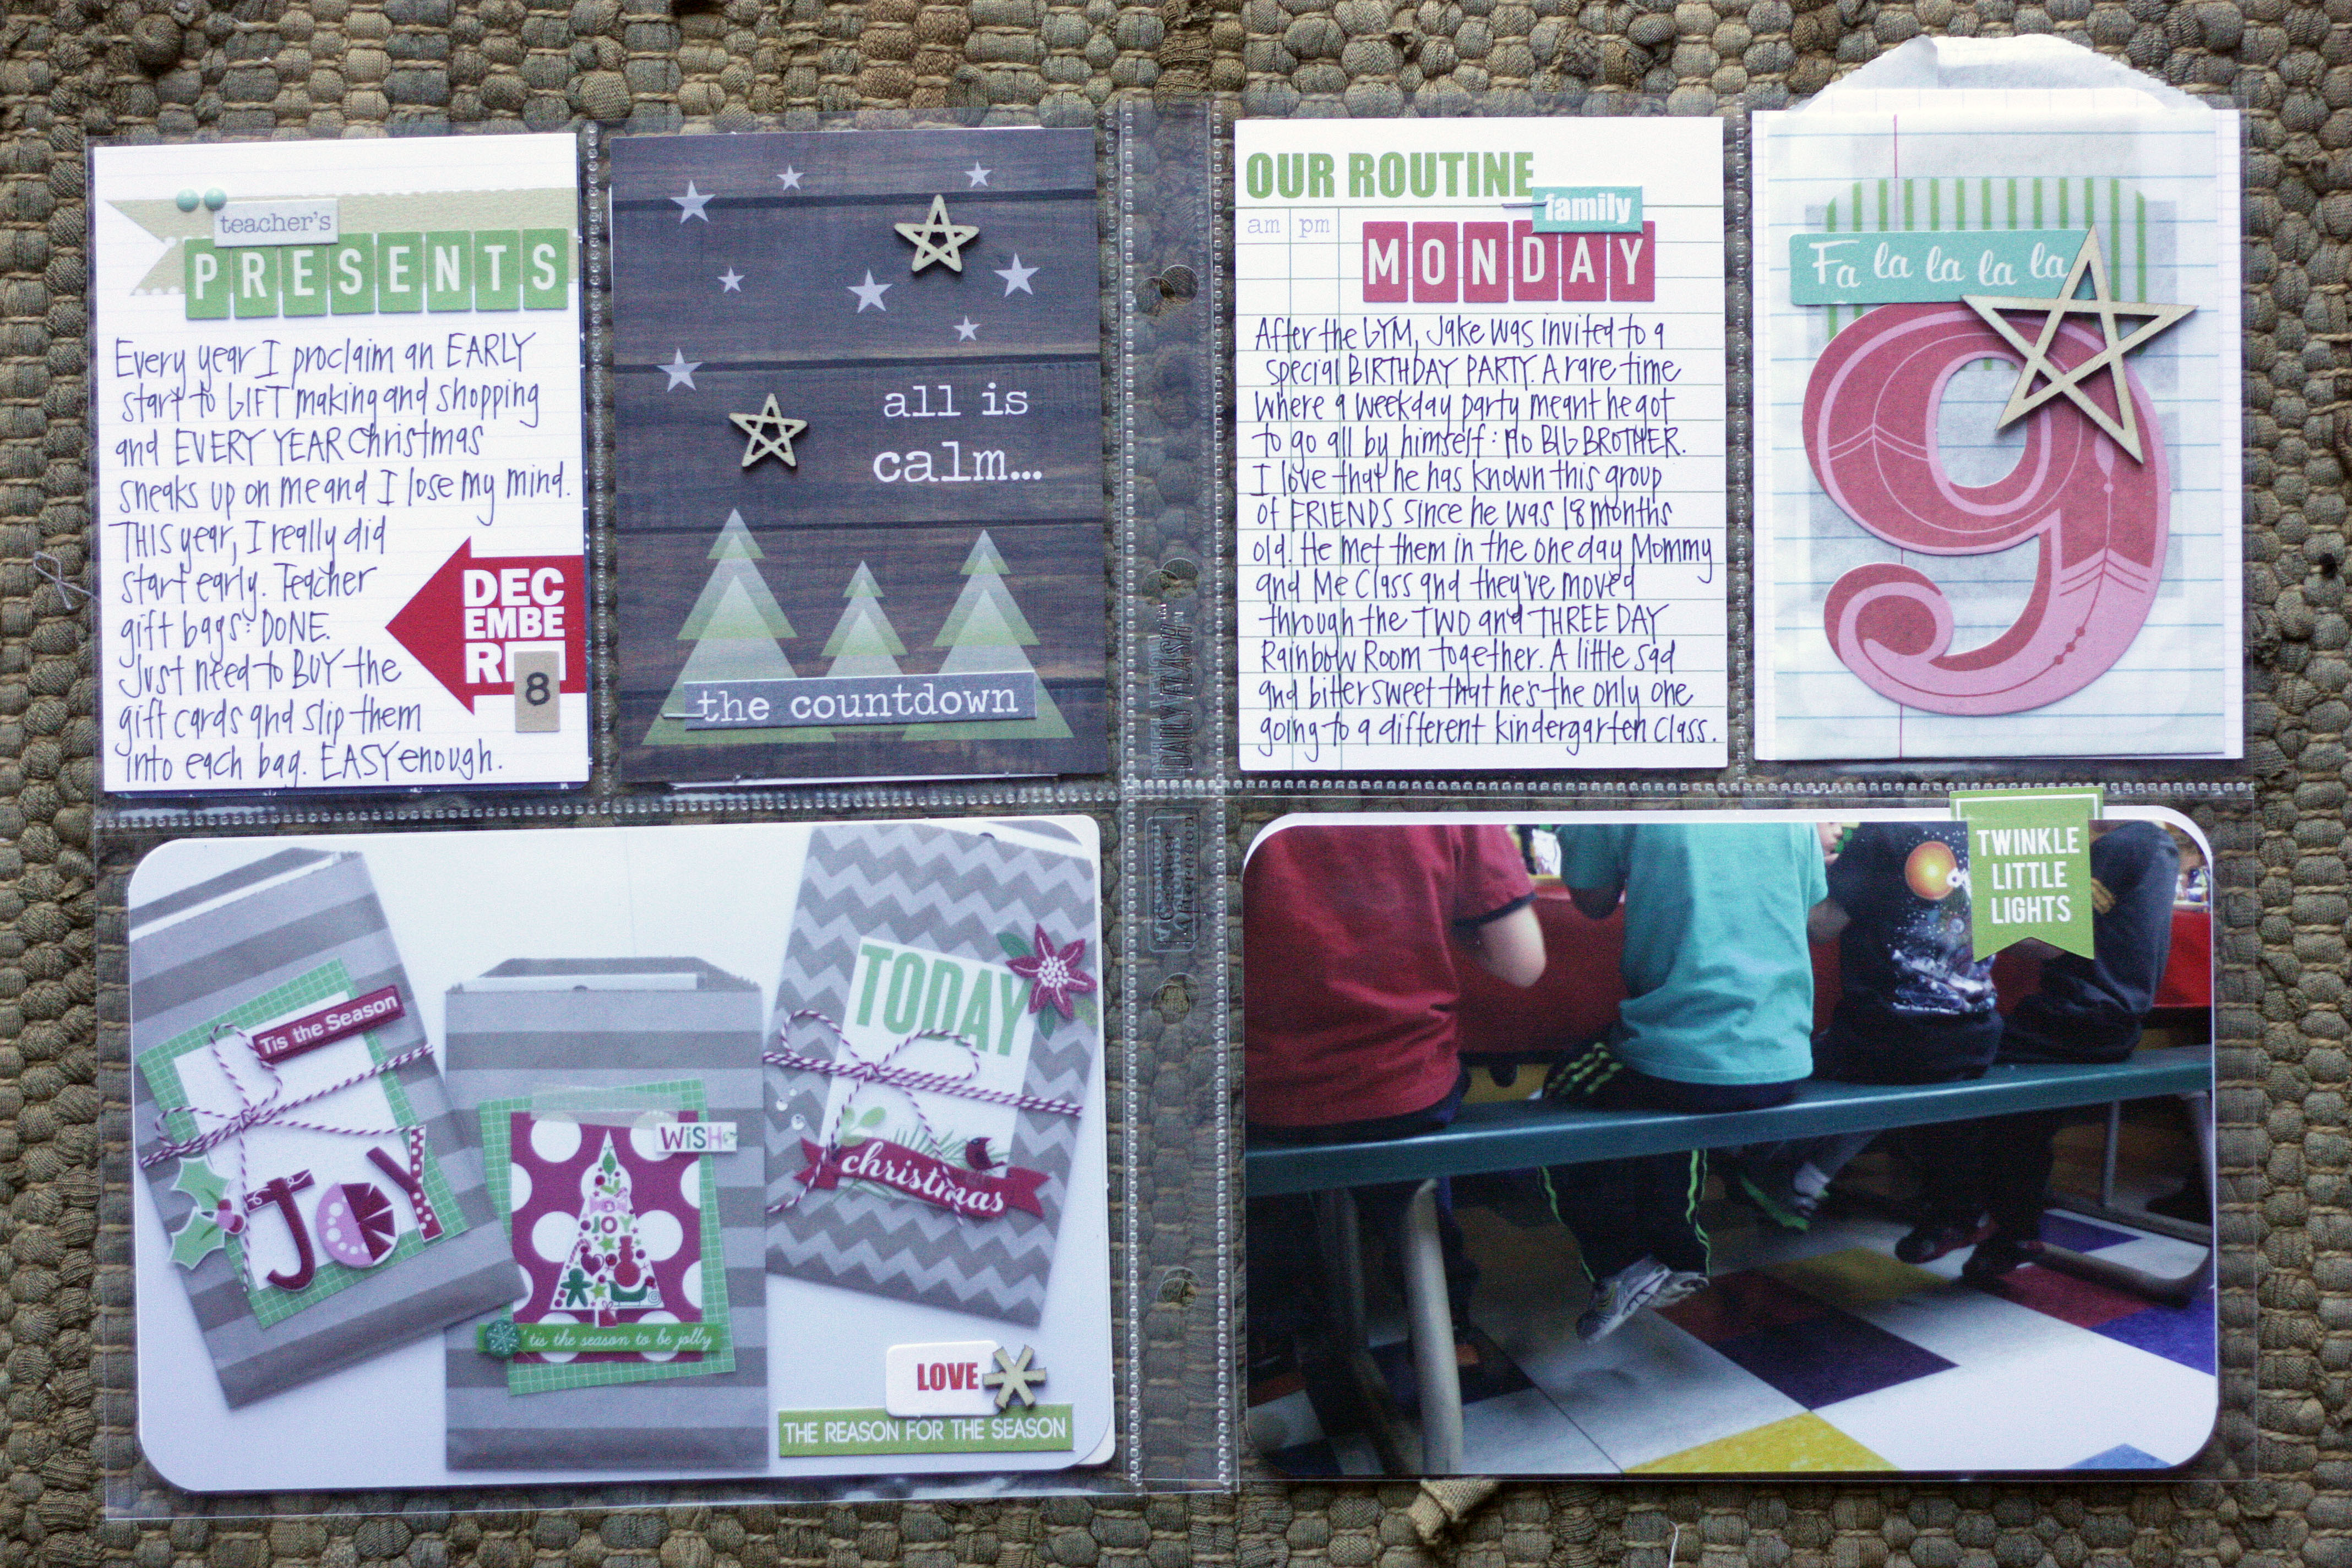
 Days 8 and 9: The calm before the December Crazy storm. Trying my best to stay ahead of the game. And a fun, mid-week birthday party…
 Days 10 and 11: More fun with Victor, our elf, and an ice skating adventure with my boys…
 Days 12 and 13: Will trim black and white photos to place in the cut out letters of “favorite” and I had to keep Tyson’s last list. I know that all too soon his list will no longer reflect little boy wishes…sigh.

Half way there!! Chugging along…
Christmas Goodie/Gift Bags
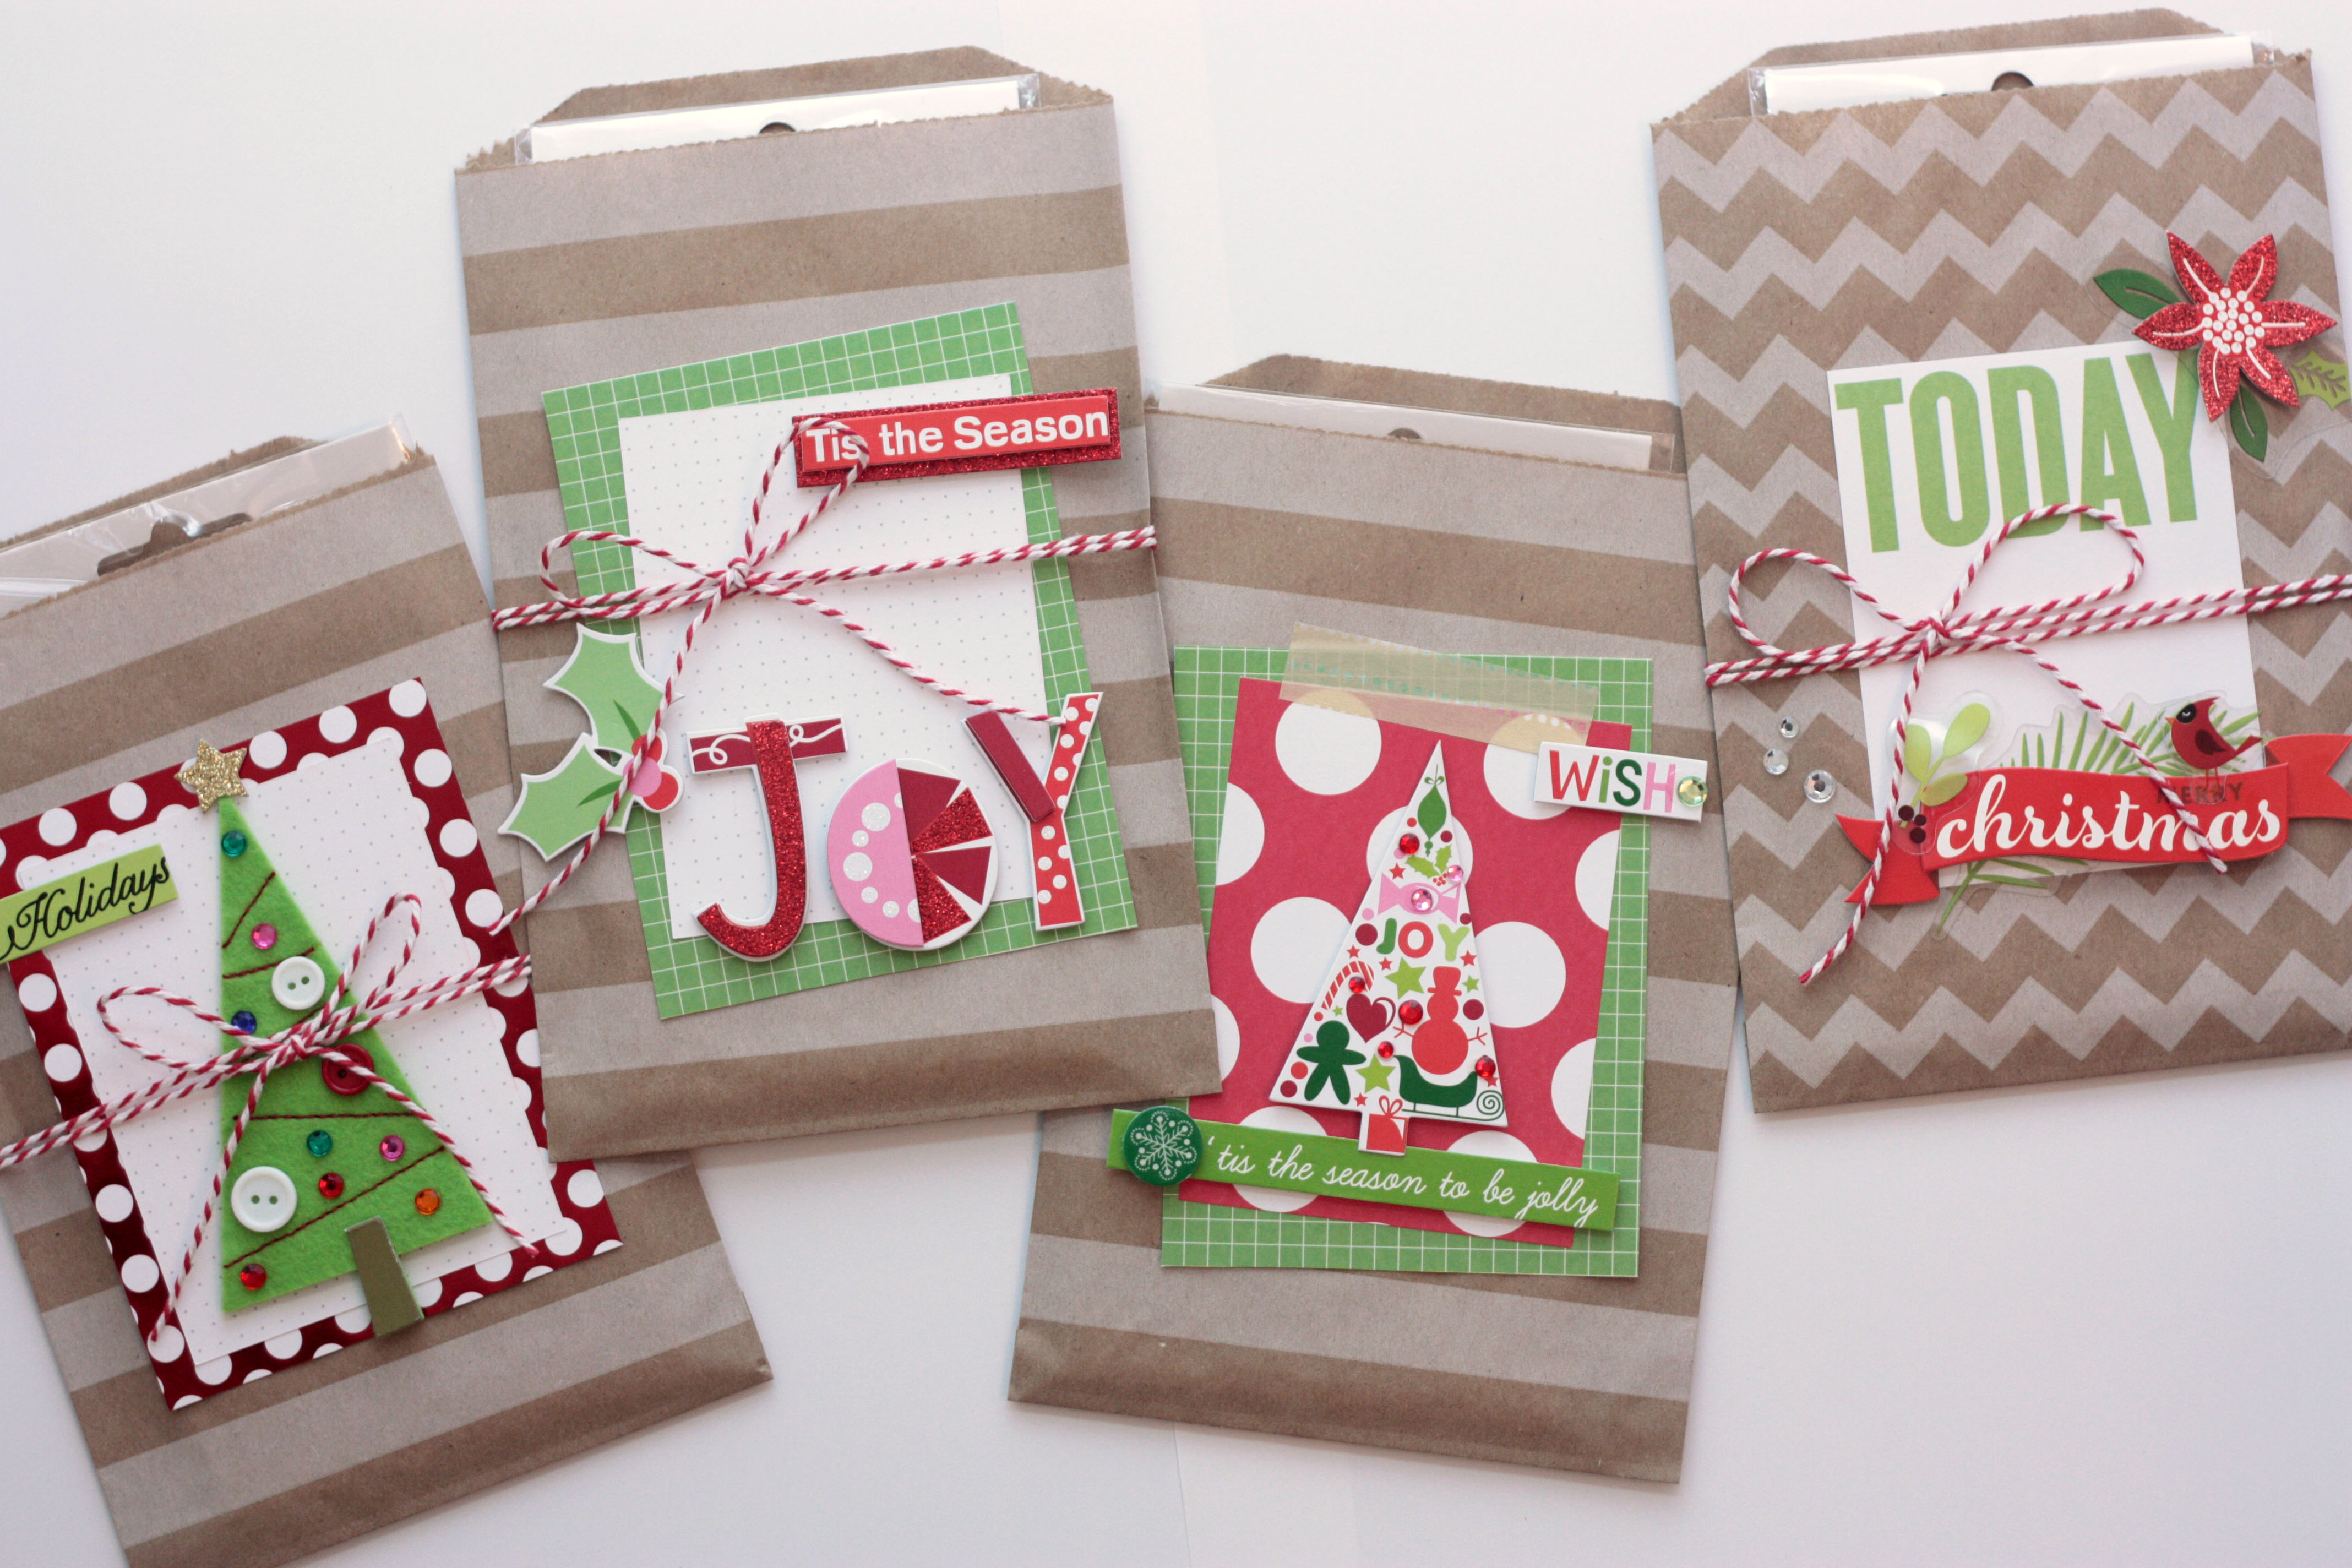
Posted: November 16, 2013 Filed under: Holidays, Scrapbooking Leave a commentEvery year, come the week before Winter Break, I find myself scrambling for teacher gifts for the boys’ teachers. This year, I am determined to help alleviate some of the December Craziness by attempting to get things done early. I immediately fell in love with the me & my BIG ideas Christmas stickers the second I saw them. I grabbed a few Pocket Pages cards, a piece of green card stock, a couple of Whisker Graphics bags and started to shuffle things around. Within in minutes, I had things organized for the makings of four gift bags:
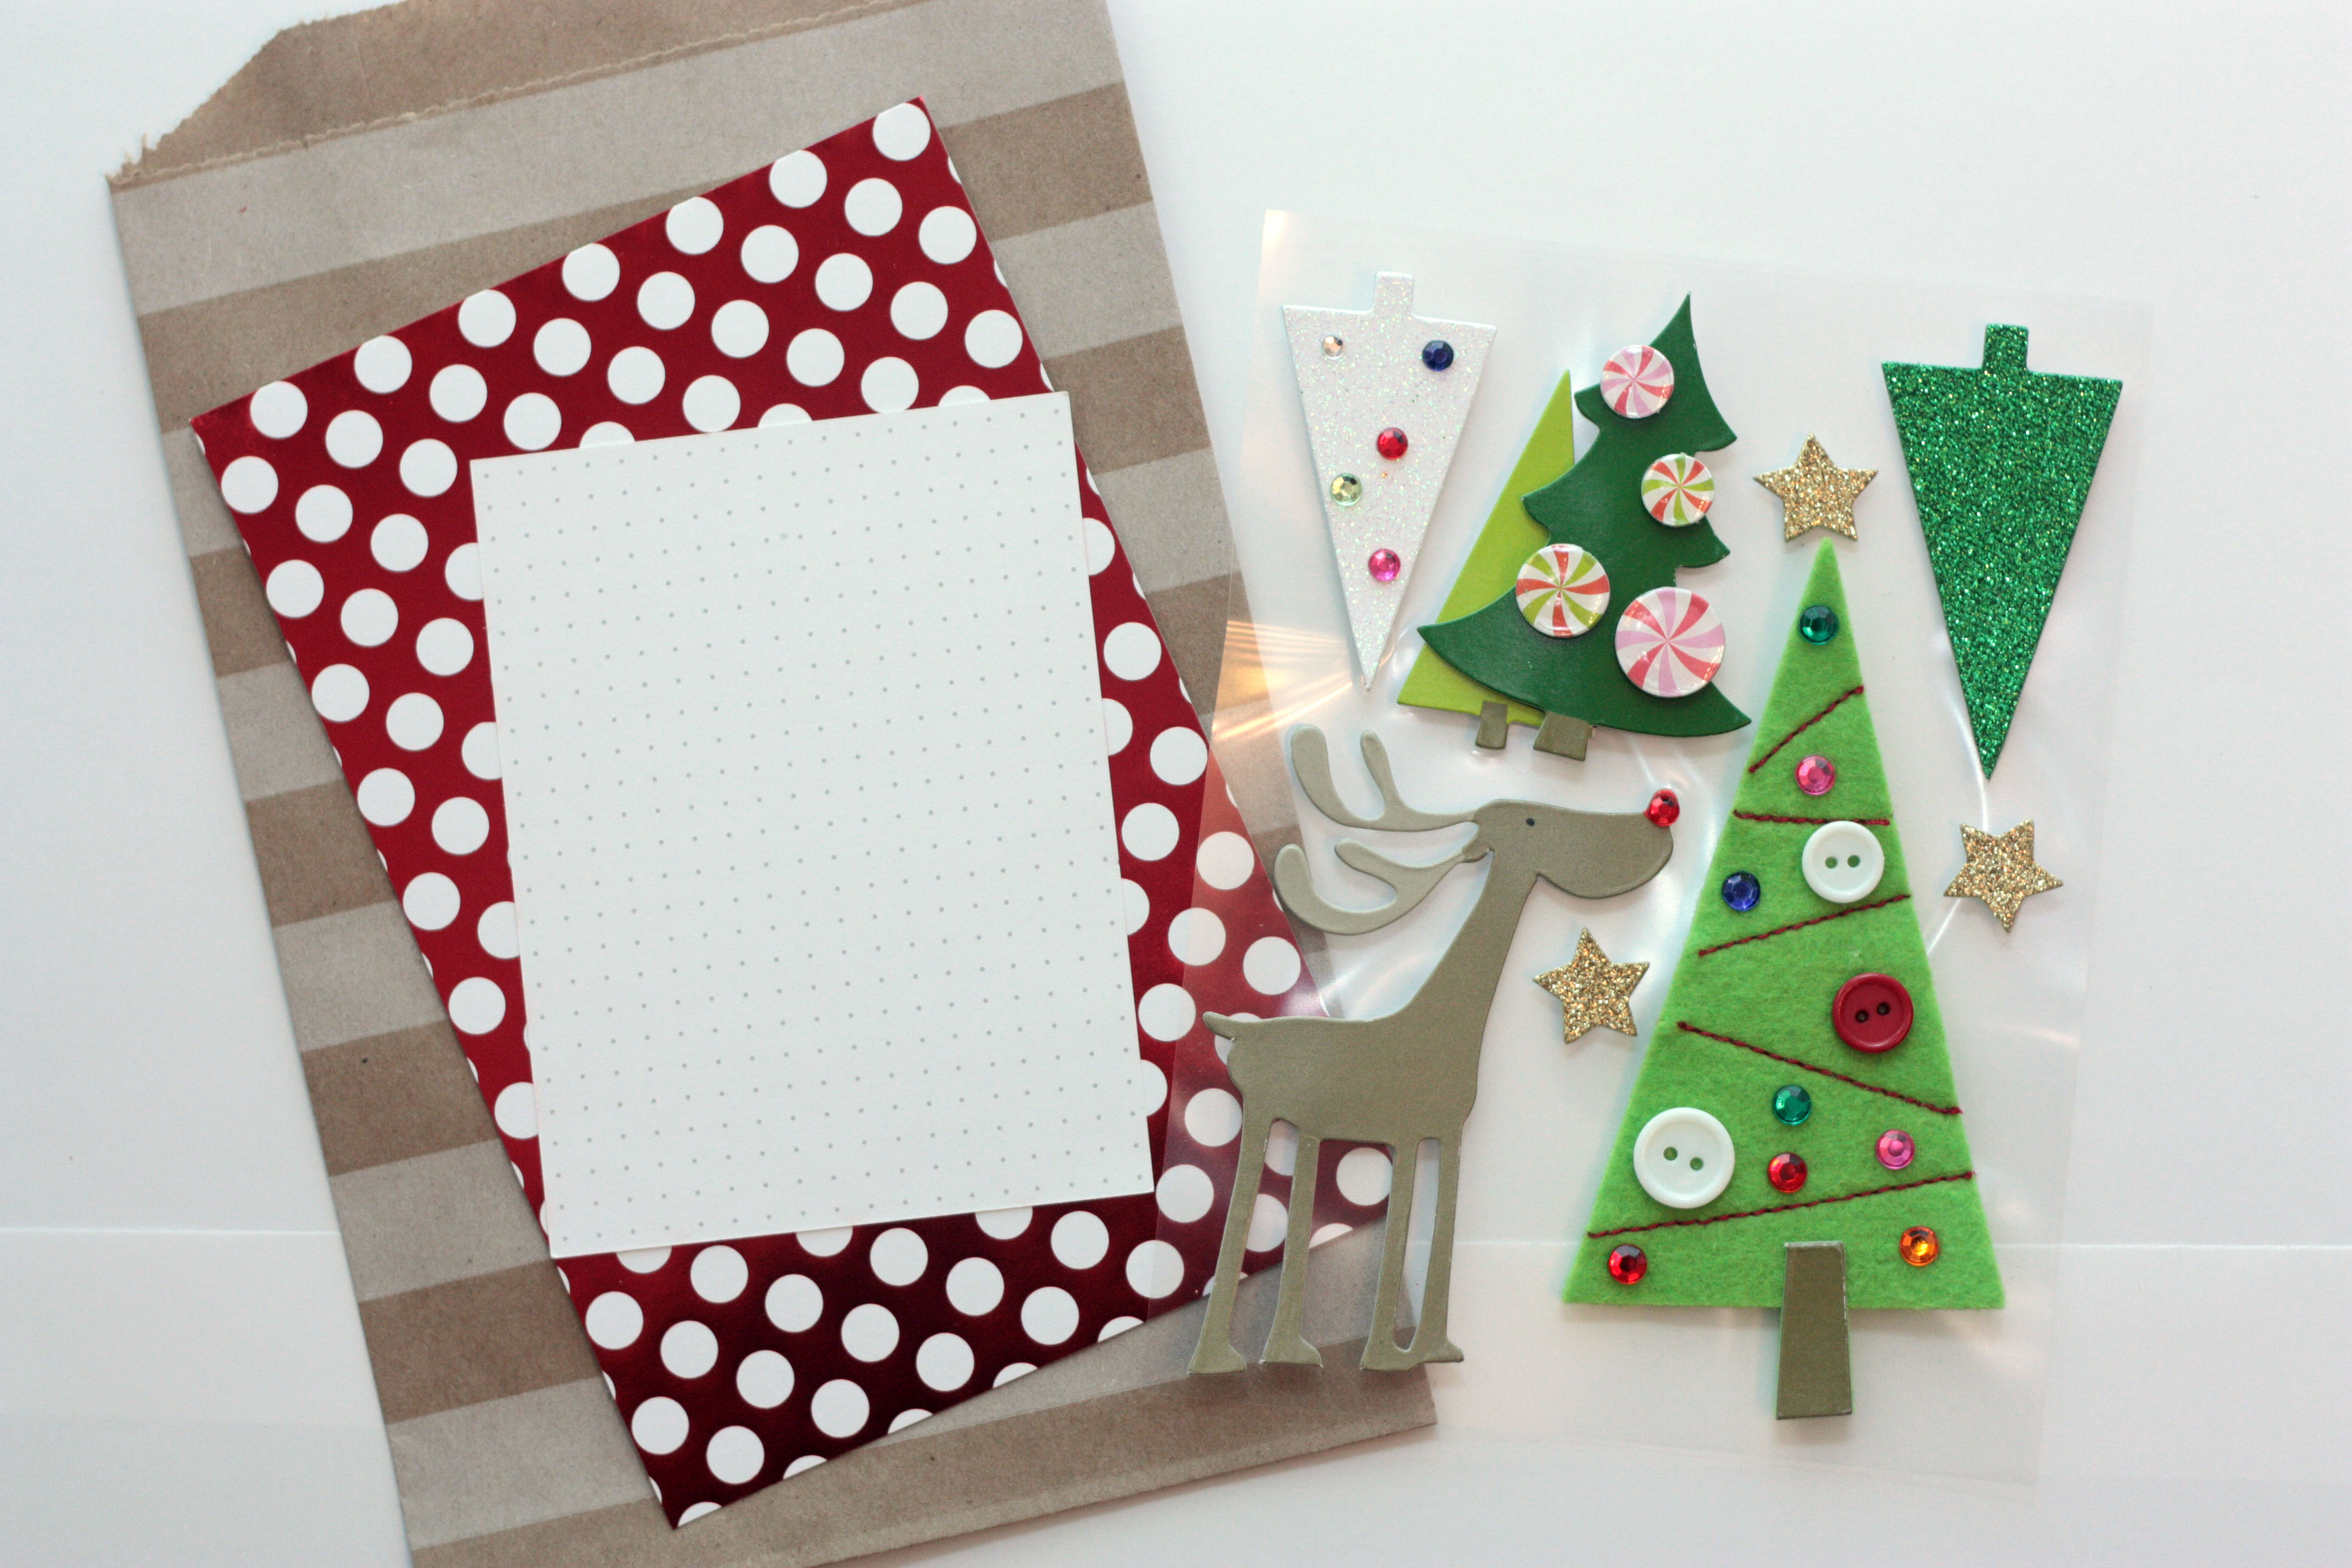
 A little bit of the process: I like to always get all my goods out to see what I have to work with. I grab all the things I think will coordinate or might work:
 I narrow down the pieces I want to use. I had my eye on the felt Christmas tree. For these bags, I kept is super simple. One colored piece of card stock + one Pocket Page journal card = 2 layers, with the exception of the one “TODAY” card where the word itself served as a fun layer.
 Adhere background piece, adhere journal card to top. Stick tree on. Star sticker on top. Word sticker on side for some added dimension. Tie twine. Done.
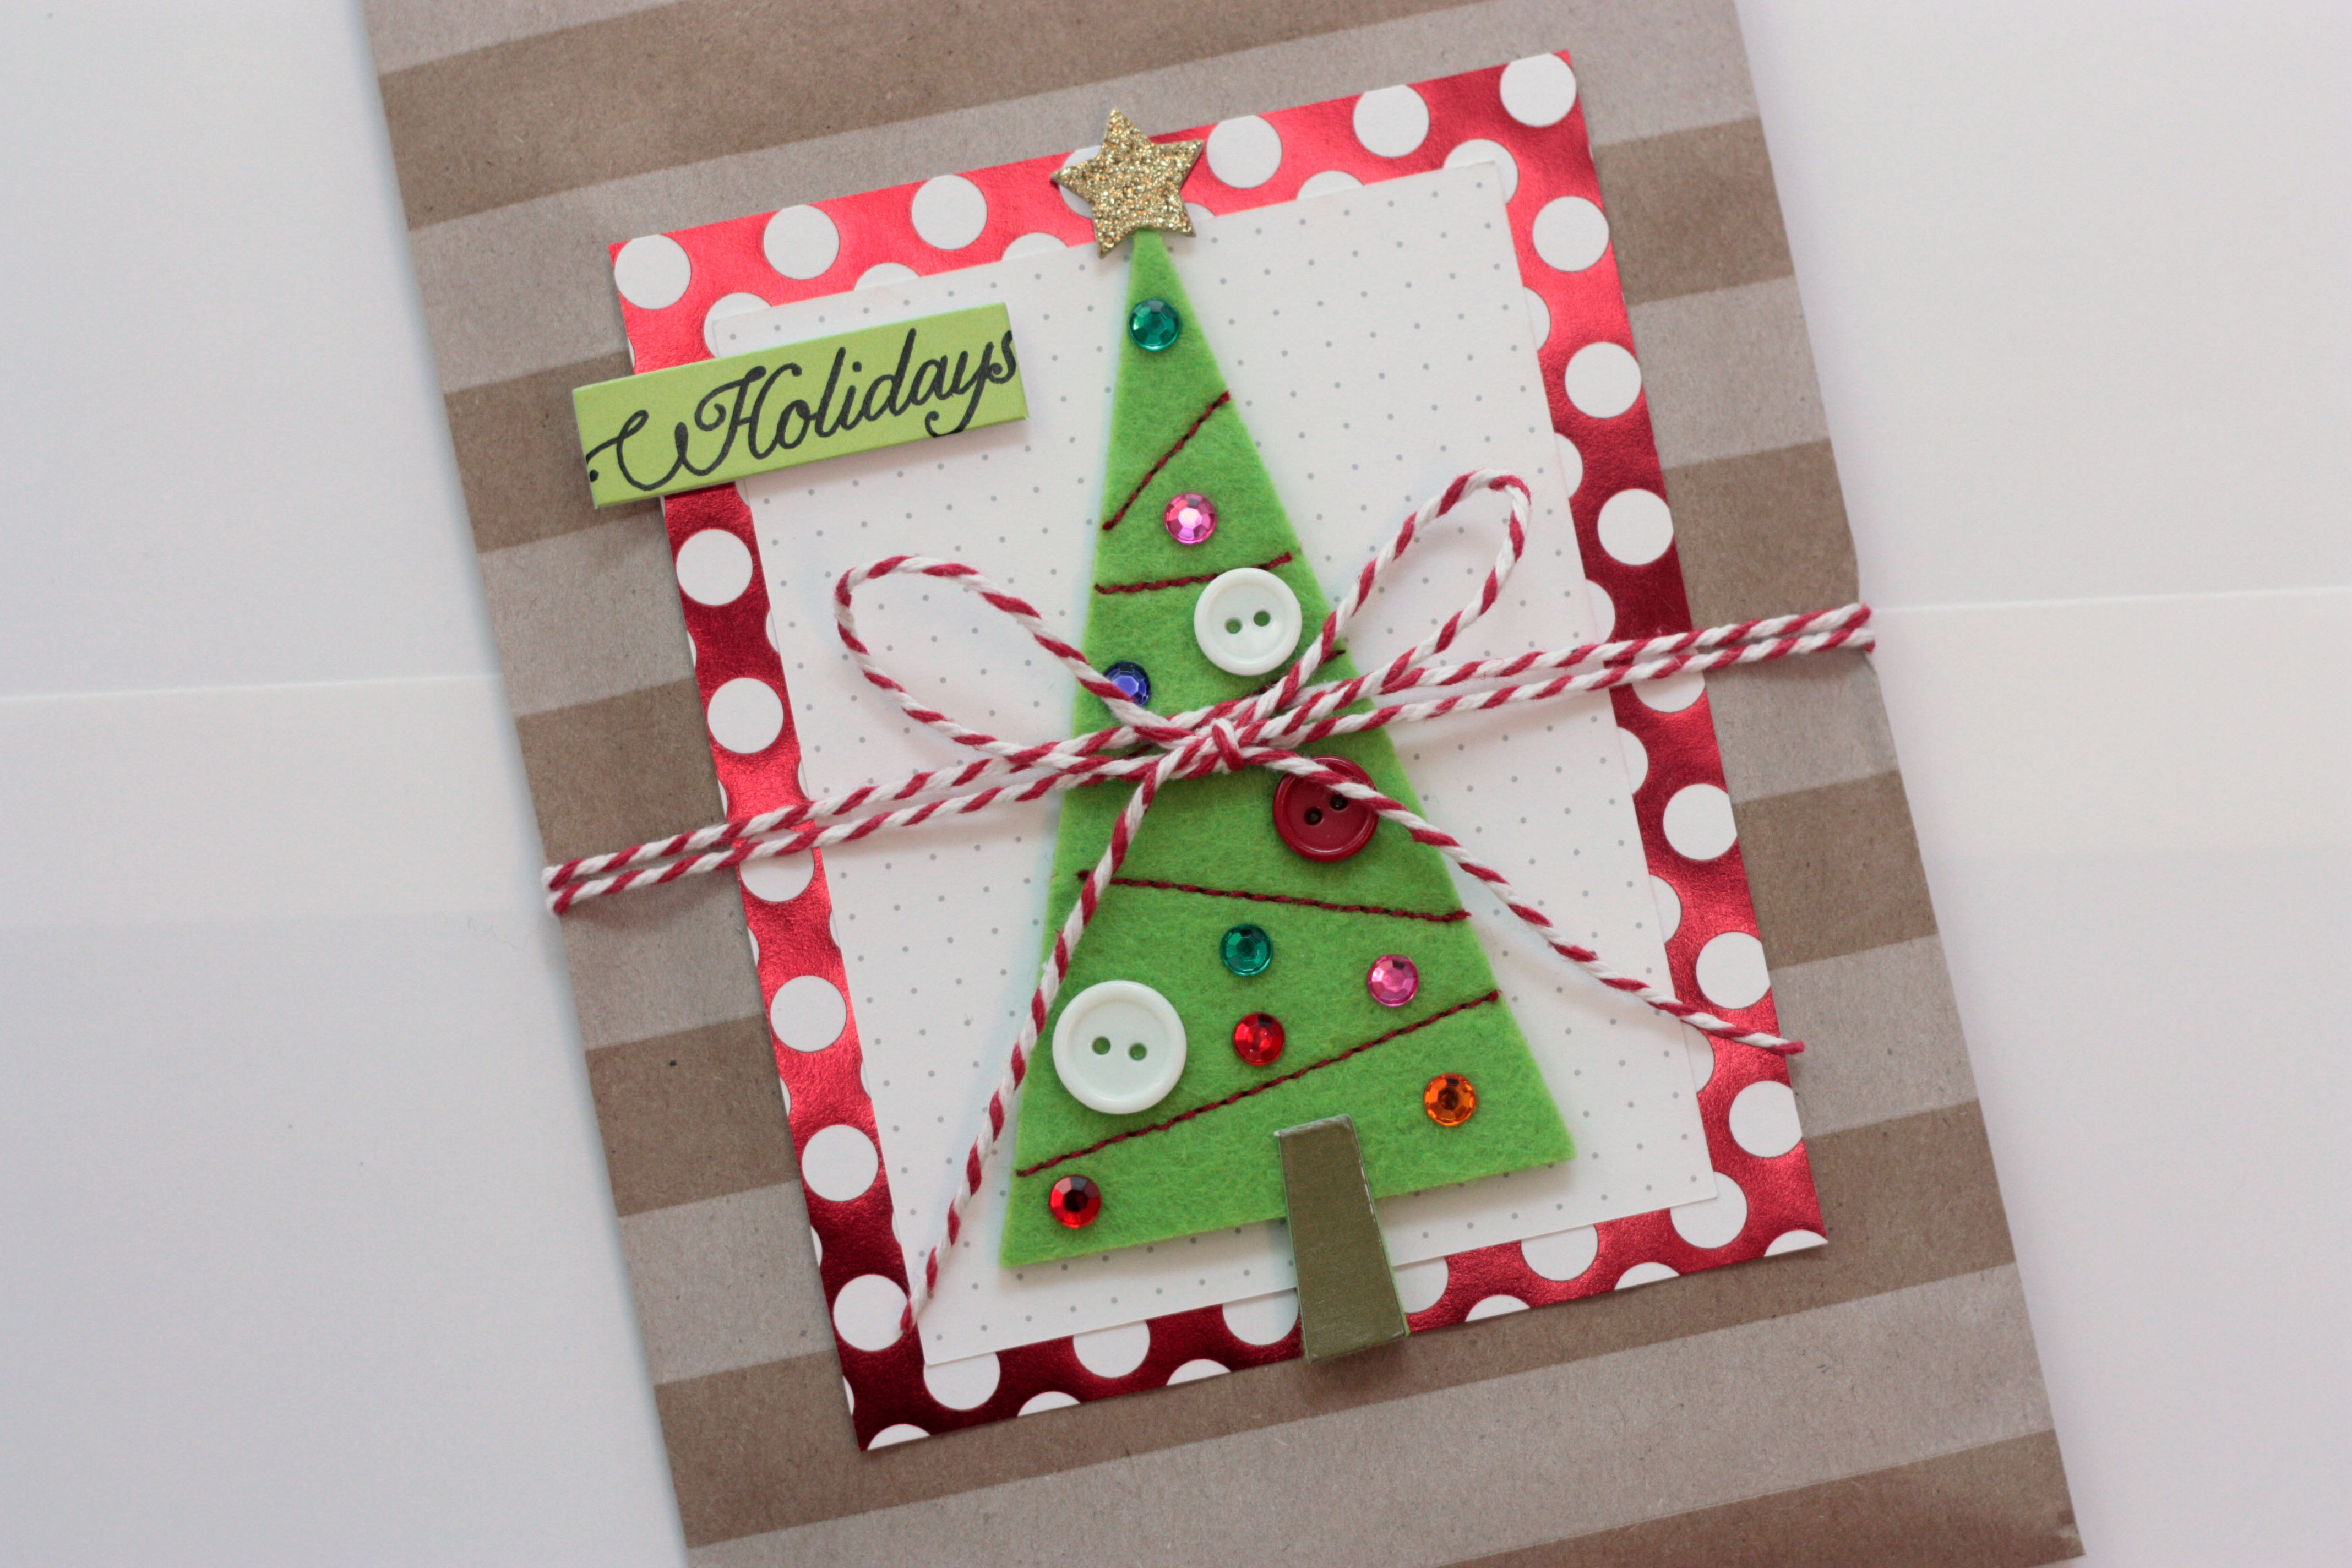 Four completed Christmas gift bags in less than an hour. If only the gift buying were as easy.
 Thank you for visiting!!
Halloween Fun: me & my BIG ideas
Posted: October 28, 2013 Filed under: Scrapbooking 1 Comment

So, this layout only took me 2 years. And 10 minutes. Heh. I immediately fell in love with the me & my BIG ideas Halloween pocket pages cards the second I saw them at Michaels. I intended to use them for this year’s Halloween spread; however, I have a box of photos I have wanted to scrap for years and the cards provided the perfect inspiration.
 Cut out one card, sanded the edge, layered with a foam dot + layered two of the pocket page cards + bat chipboard stickers = done in 10 minutes.
 Punched out a fancy tab + chipboard sticker + bats = first completed 12 x 12 page in over two years.
 Miss those chubby cheeks. Still uncooperative photo subjects.
Project Life 2013: Weeks 17, 18, 19, and Day in the Life
Posted: May 28, 2013 Filed under: Project Life, Scrapbooking 1 CommentWEEK 17
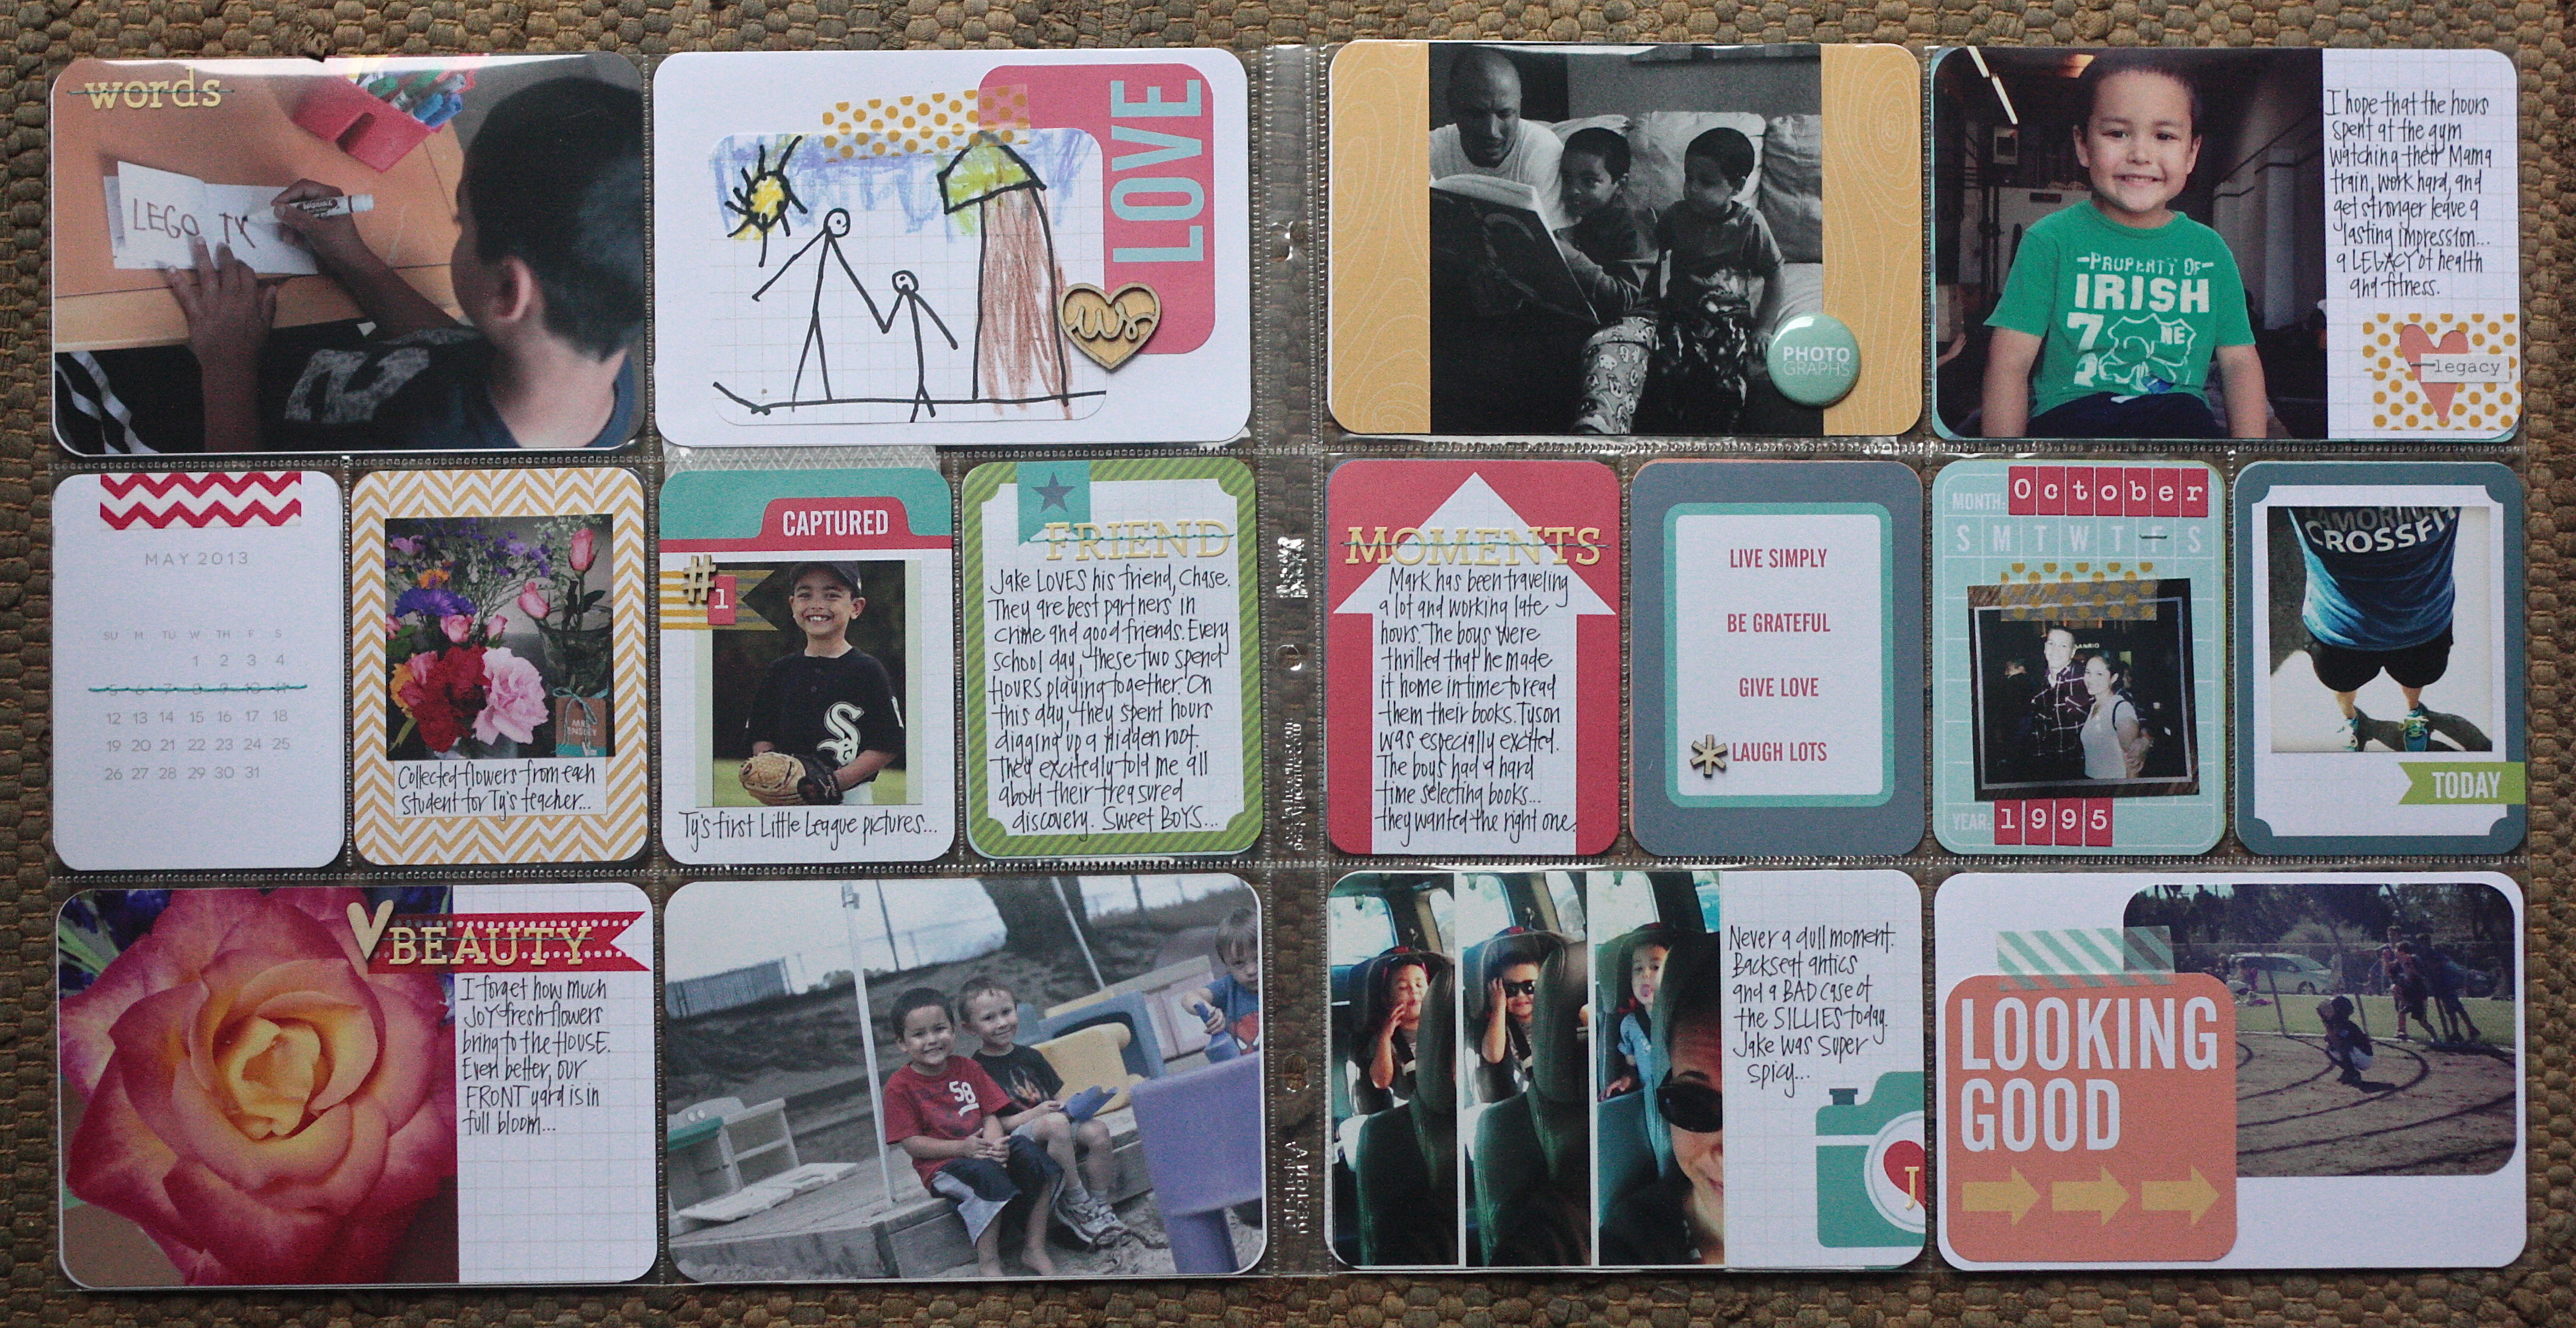
 Had fun experimenting with the We R Memory Keepers Tangerine journal cards this week. LOVE the color combinations…
 A rare week with multiple inserts. I happen to have two photos that I really loved this week, I enlarged them and included them in simple sleeves. I had planned to cut them down and have them included in the weekly layout’s journal slots, but they didn’t fit.
 I absolutely LOVE this polaroid frame wood veneer, it is a custom order from HERE. Order. You will love the product and the customer service. I promise.
 WEEK 18
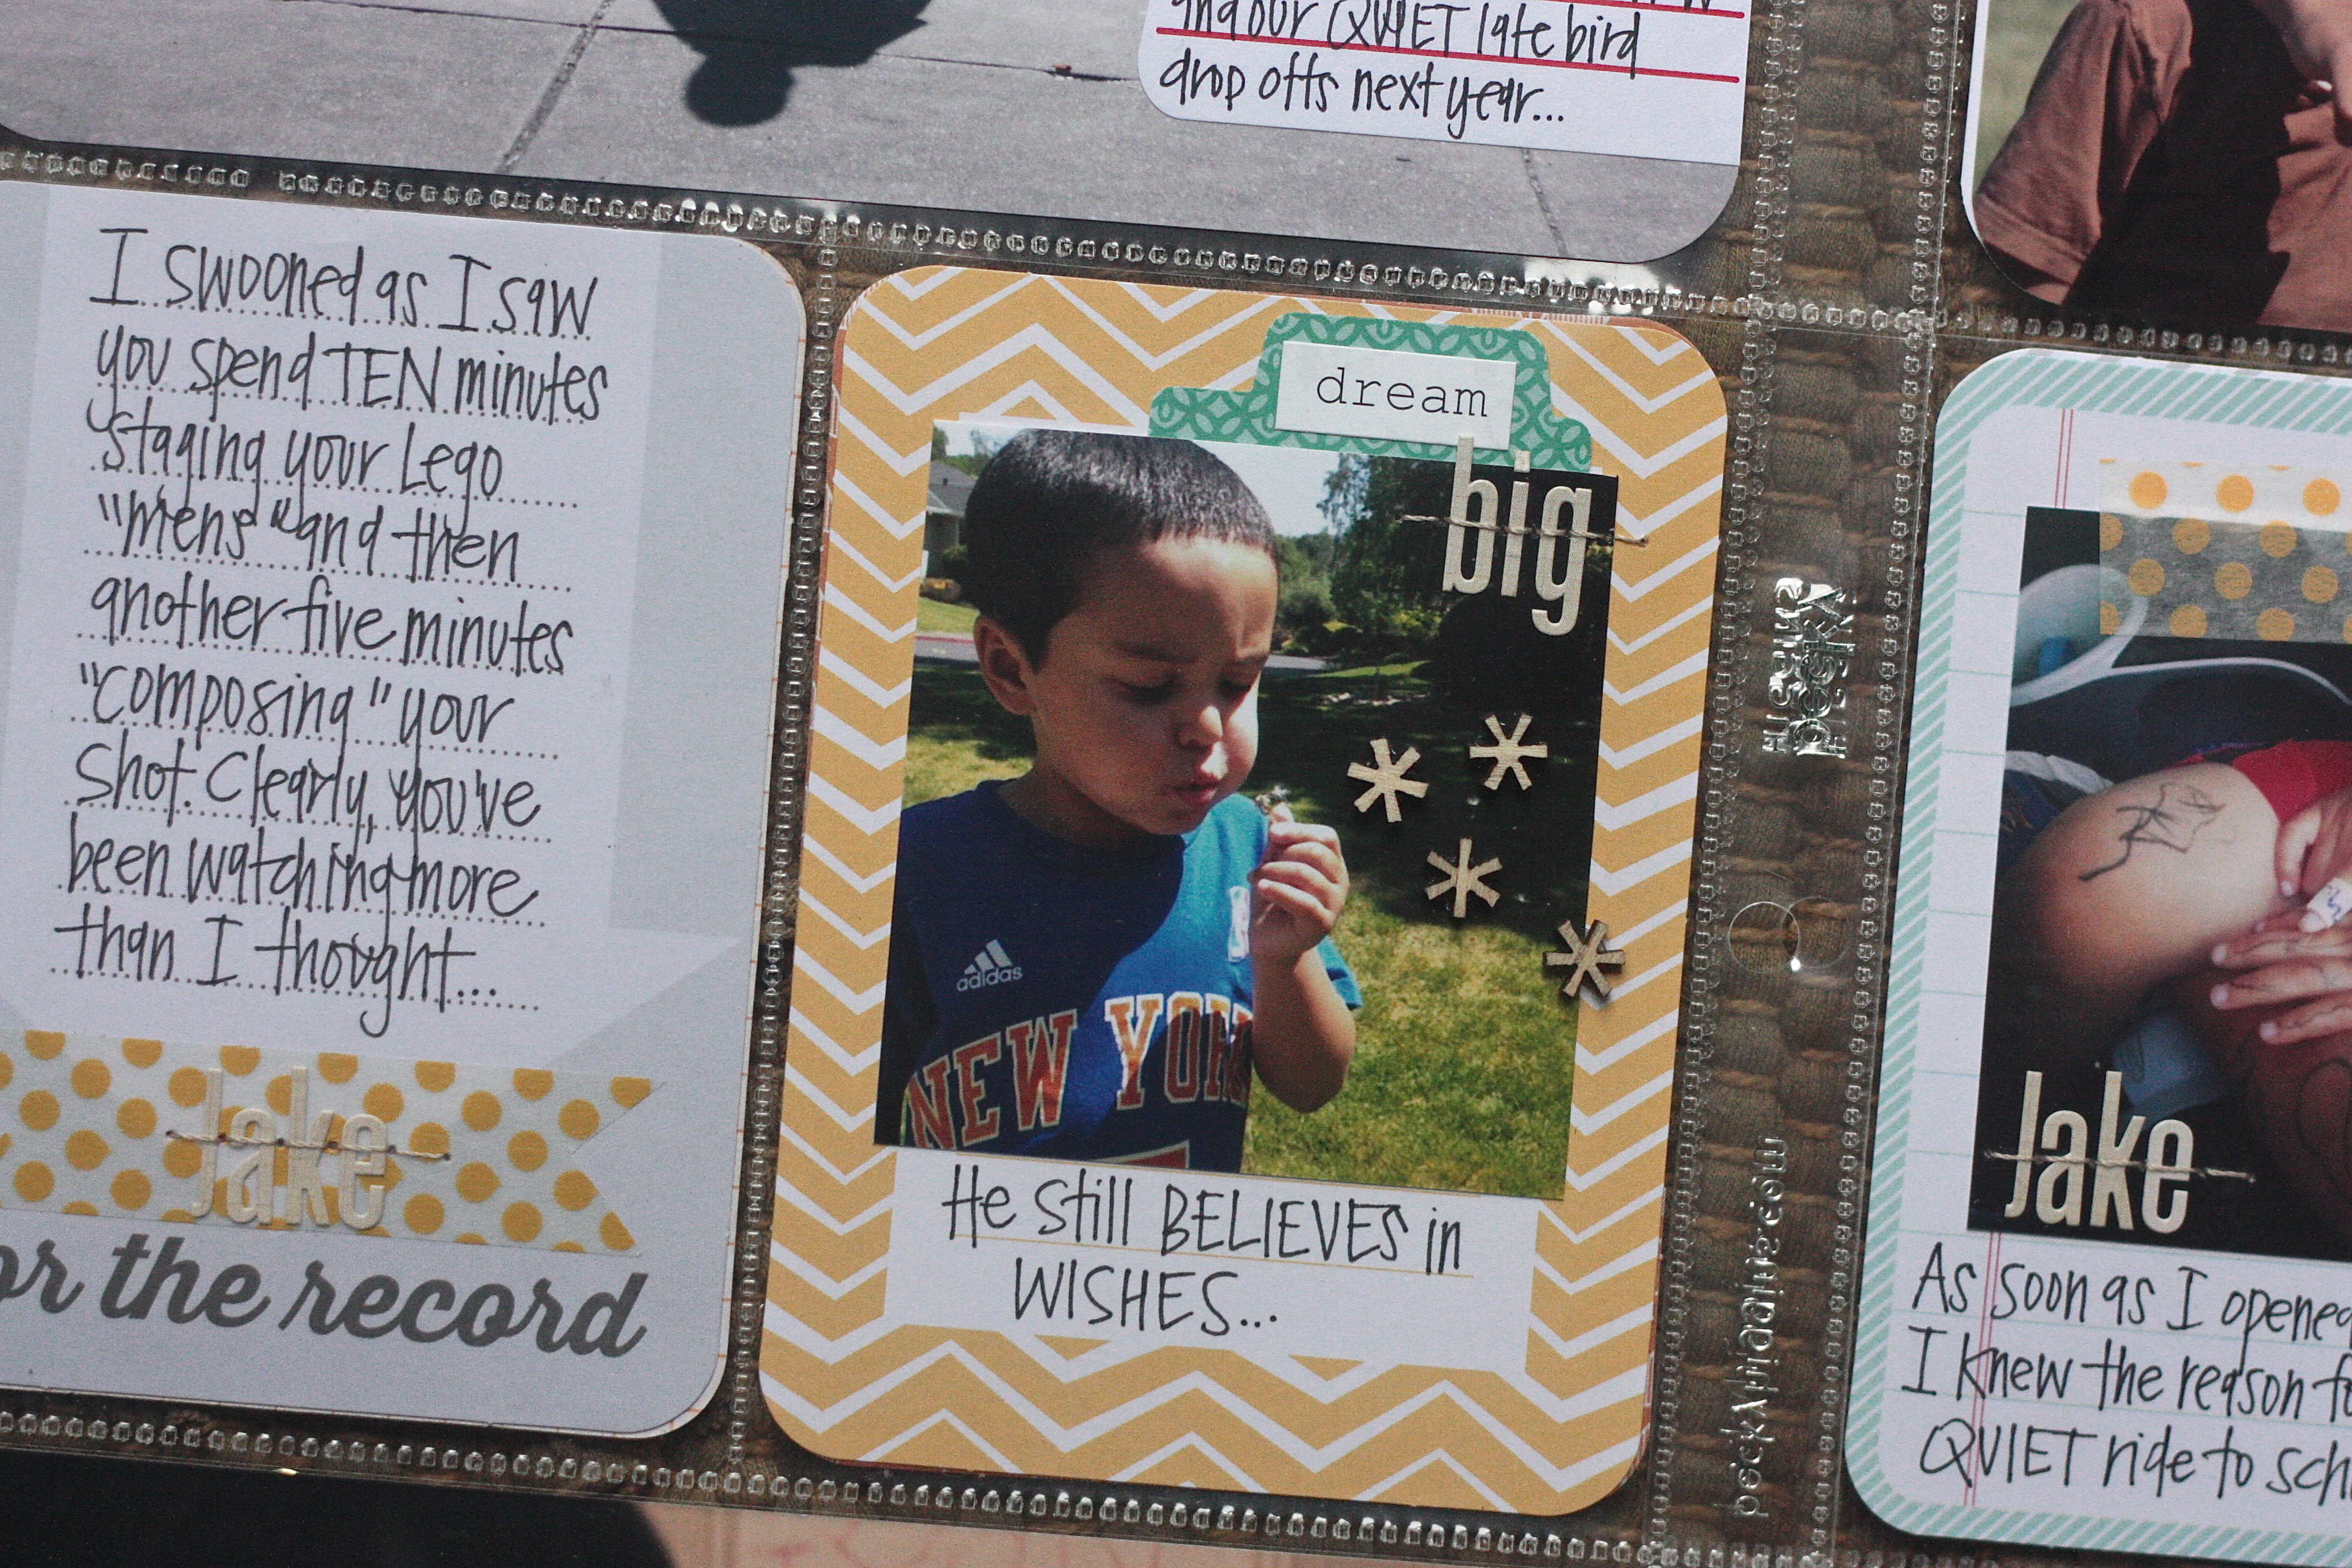
 I am still loving the jade core kit. The colors are so much fun…I especially like the way the “dream big” card came out…some weeks come together easier than others.
 I need more of the little star wood veneers…
 DAY IN THE LIFE
I have put this off for years. It has been almost three years since I last took on the “Day in the Life” challenge. I wanted to include the photos in some way in my Project Life. After seeing this months Studio Calico PL Kit, the journal cards made it easy. I printed out all the photos from the day. My plan was to include a few in this week’s layout and then use the rest as fillers if need be (as they represent things we do almost daily). I kept the actual layout very simple:


 The entirety of the photos were turned into photo books via Shutterfly’s Project Life templates (which are completely awesome and so easy to use). I am kicking myself for not doing this project last year and the year before. I am, however, enjoying looking at both books and seeing just how much things have changed between 2010 and now…
 Mainly, how much our MORNING routine has changed…
 And how much the boys have grown…
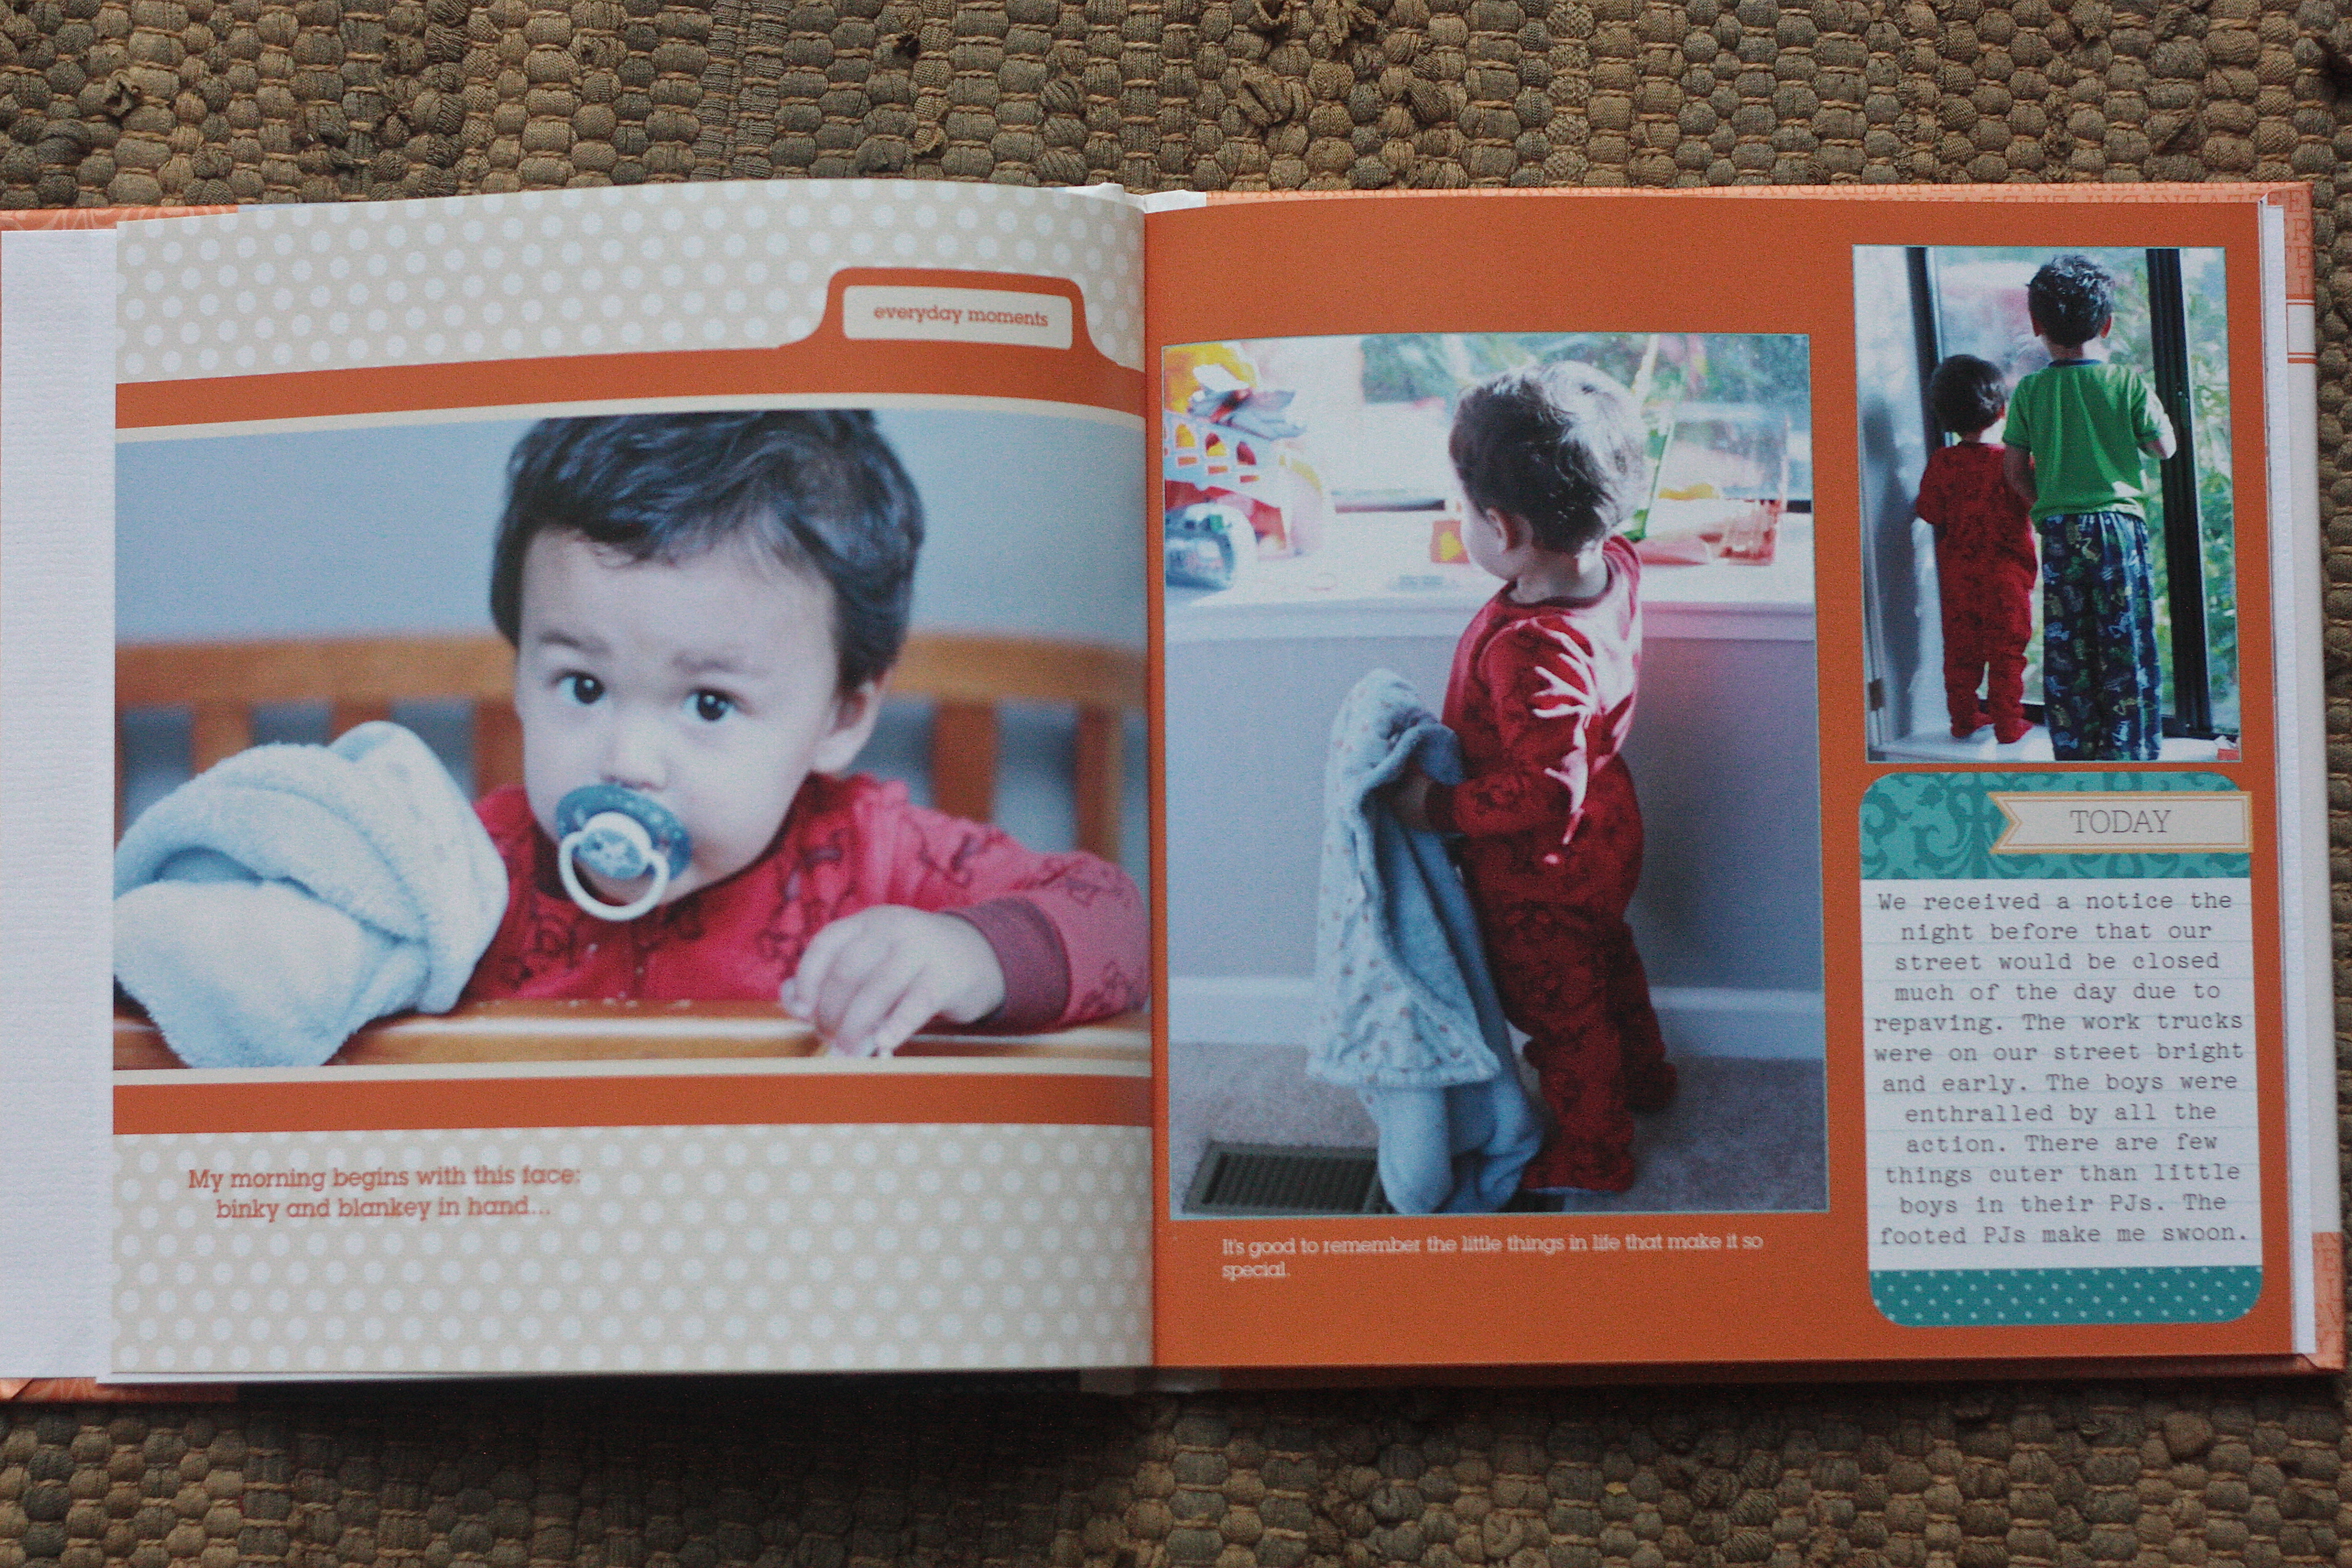 No more bink. No more baby Jakey…
 WEEK 19
And then I fell head over heels in love with Honey. I have an admitted core kit buying problem. And now officially have ten lifetime’s worth of journal cards…
 I even used the pink *gasp*…and kinda love it.

 WEEK 20 Progress: I can’t get over how HAPPY the Honey kit is…the colors, the images, the sayings…
 And my new favorite card to date…it all just came together. Another custom wood veneer. And the cutest sleeping four-year old…I still can’t figure out how he fell asleep like that, I am just glad I grabbed my phone.

Thank you for visiting!! Linking up with The Mom Creative…
Project Life: DIY Washi Speech Bubble Journal Card
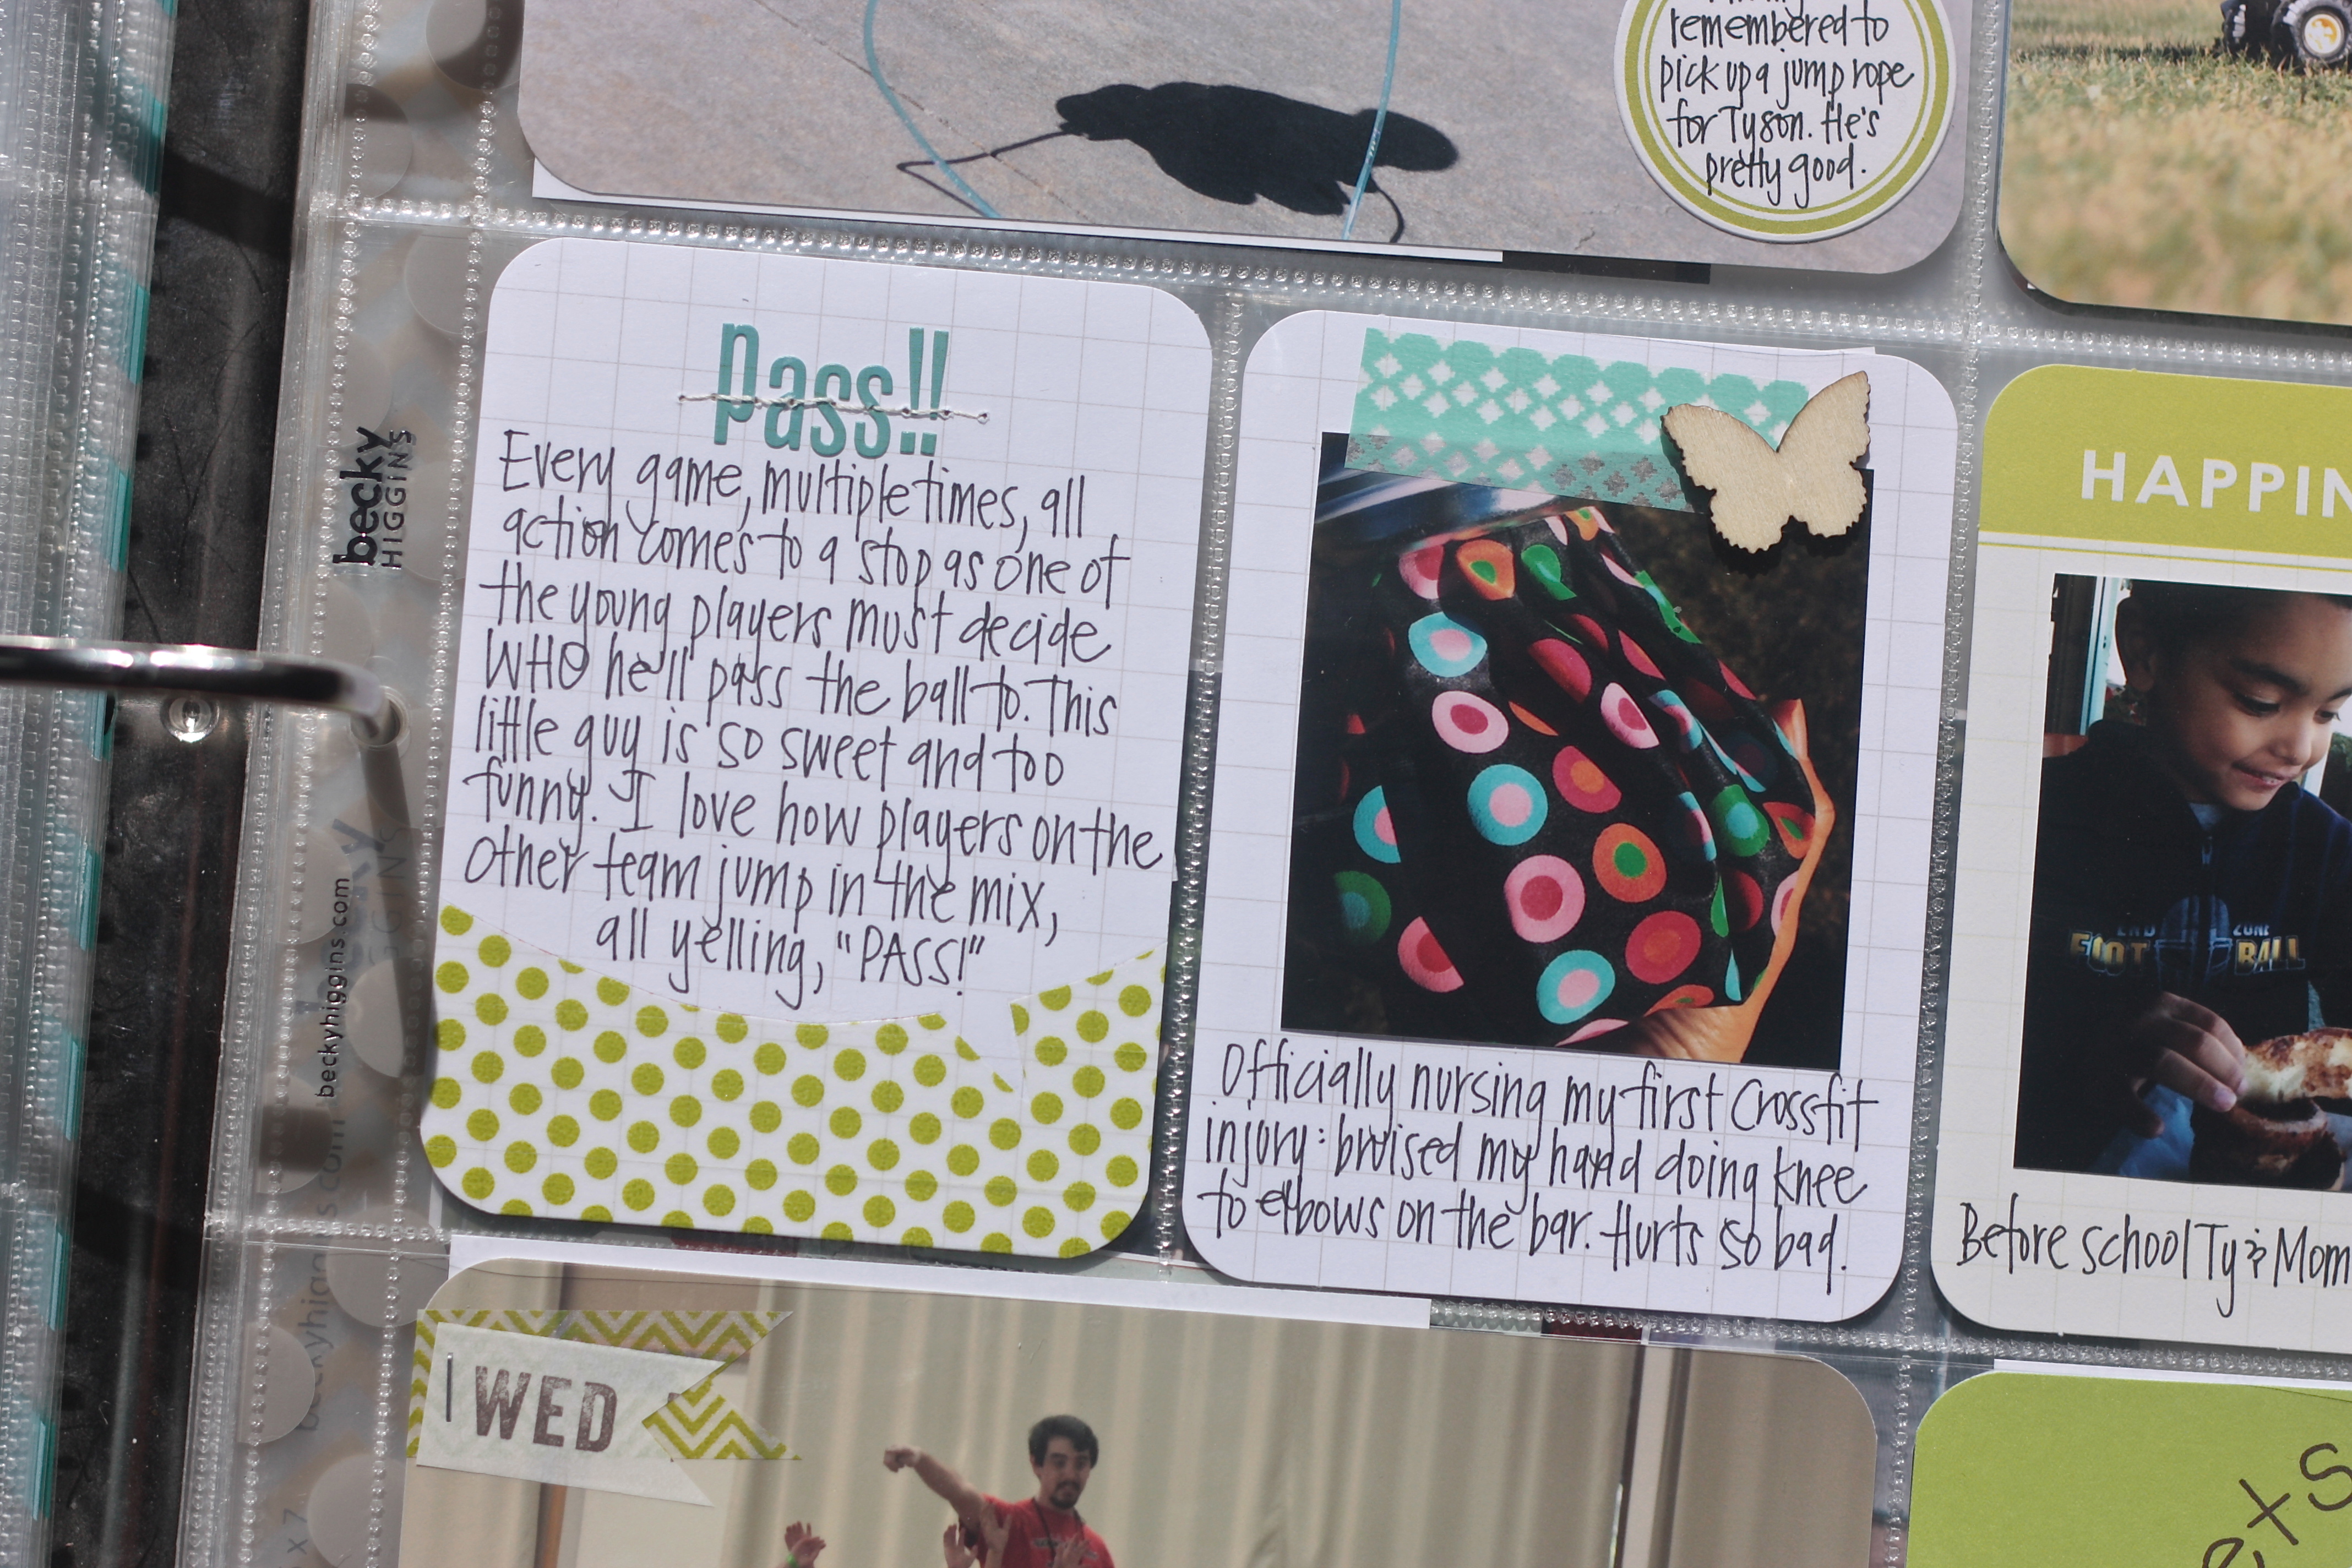
Posted: March 12, 2013 Filed under: Project Life, Scrapbooking 16 CommentsI have been slightly obsessed with speech bubble journal cards. I love using them to keep track of the funny things the boys say…but, I am extremely picky about colors and color schemes. I like to have an overall theme or color that runs throughout each weekly layout. I was having a hard time finding the right color speech bubble cards for certain weeks. After altering one of the Studio Calico cards with washi tape, I figured I’d try to make my own…
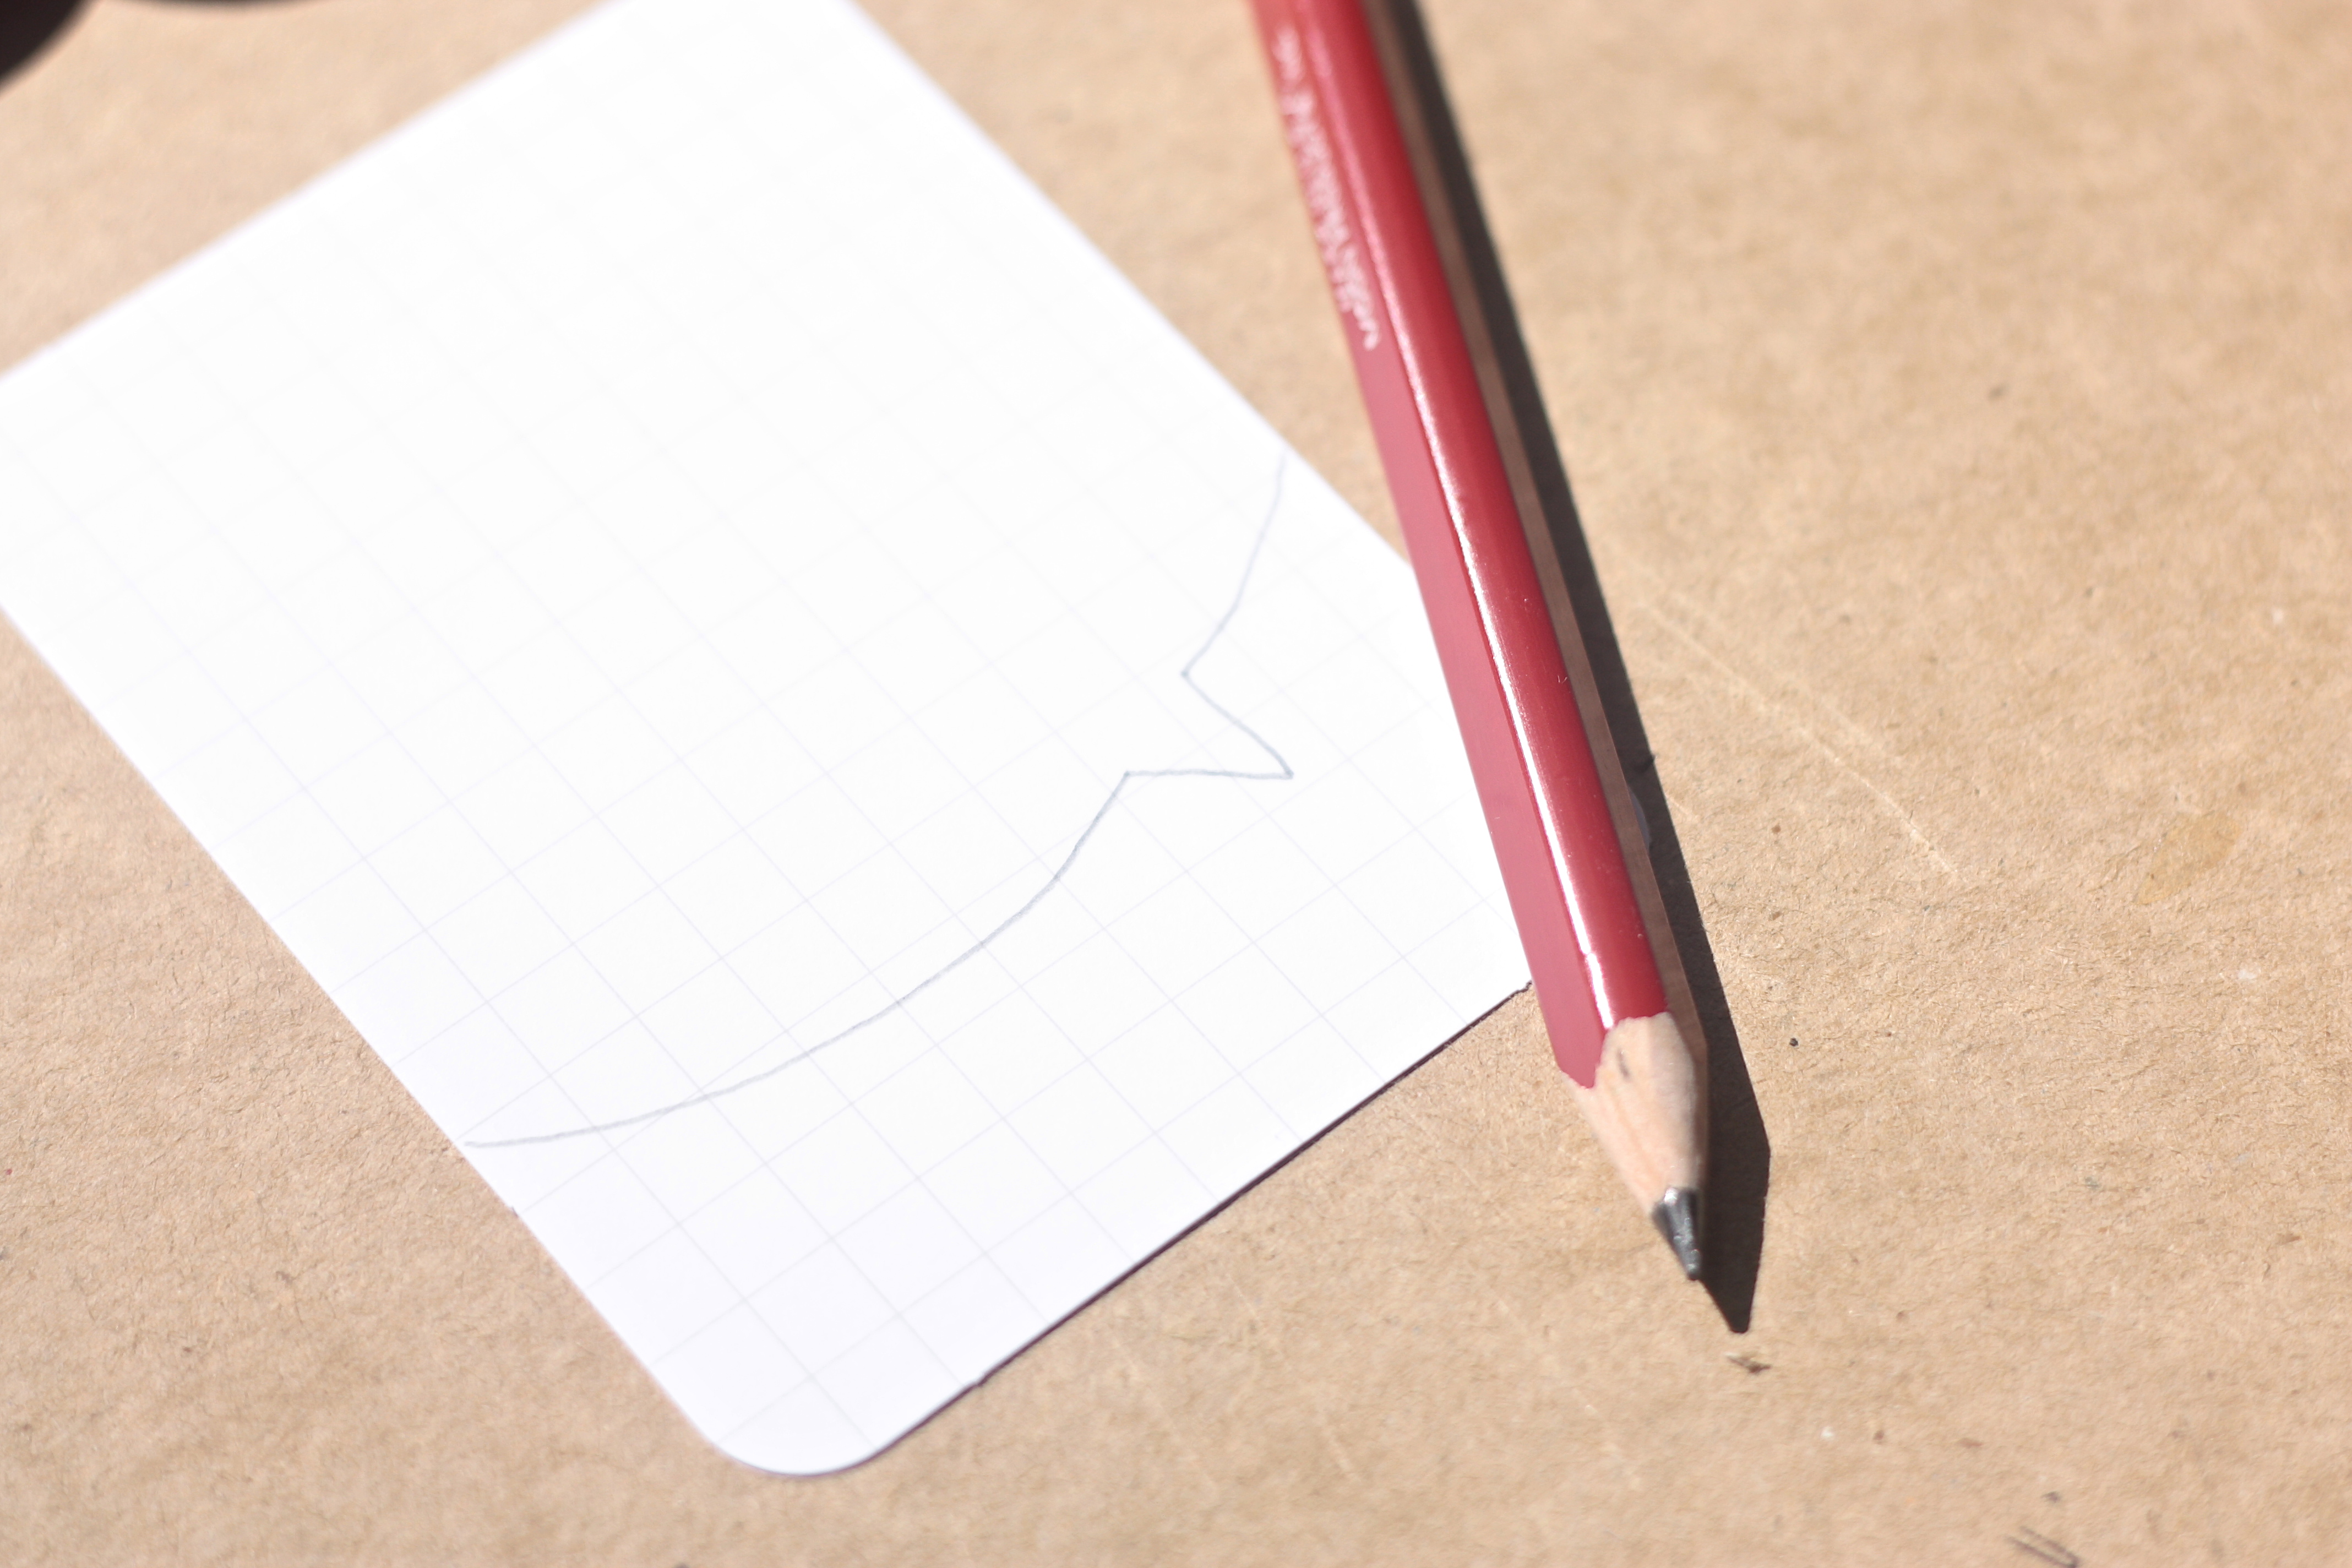
And soon learned that it is SO SO easy. And fun. And justifies my “washi collection” that seems to be growing constantly. All you need: pencil, washi tape, grid cards or card stock cut to 3 x 4, exacto knife, and scissors.

Draw a speech bubble line freehand. Light enough to be erased if need be, but dark enough to show through the washi:
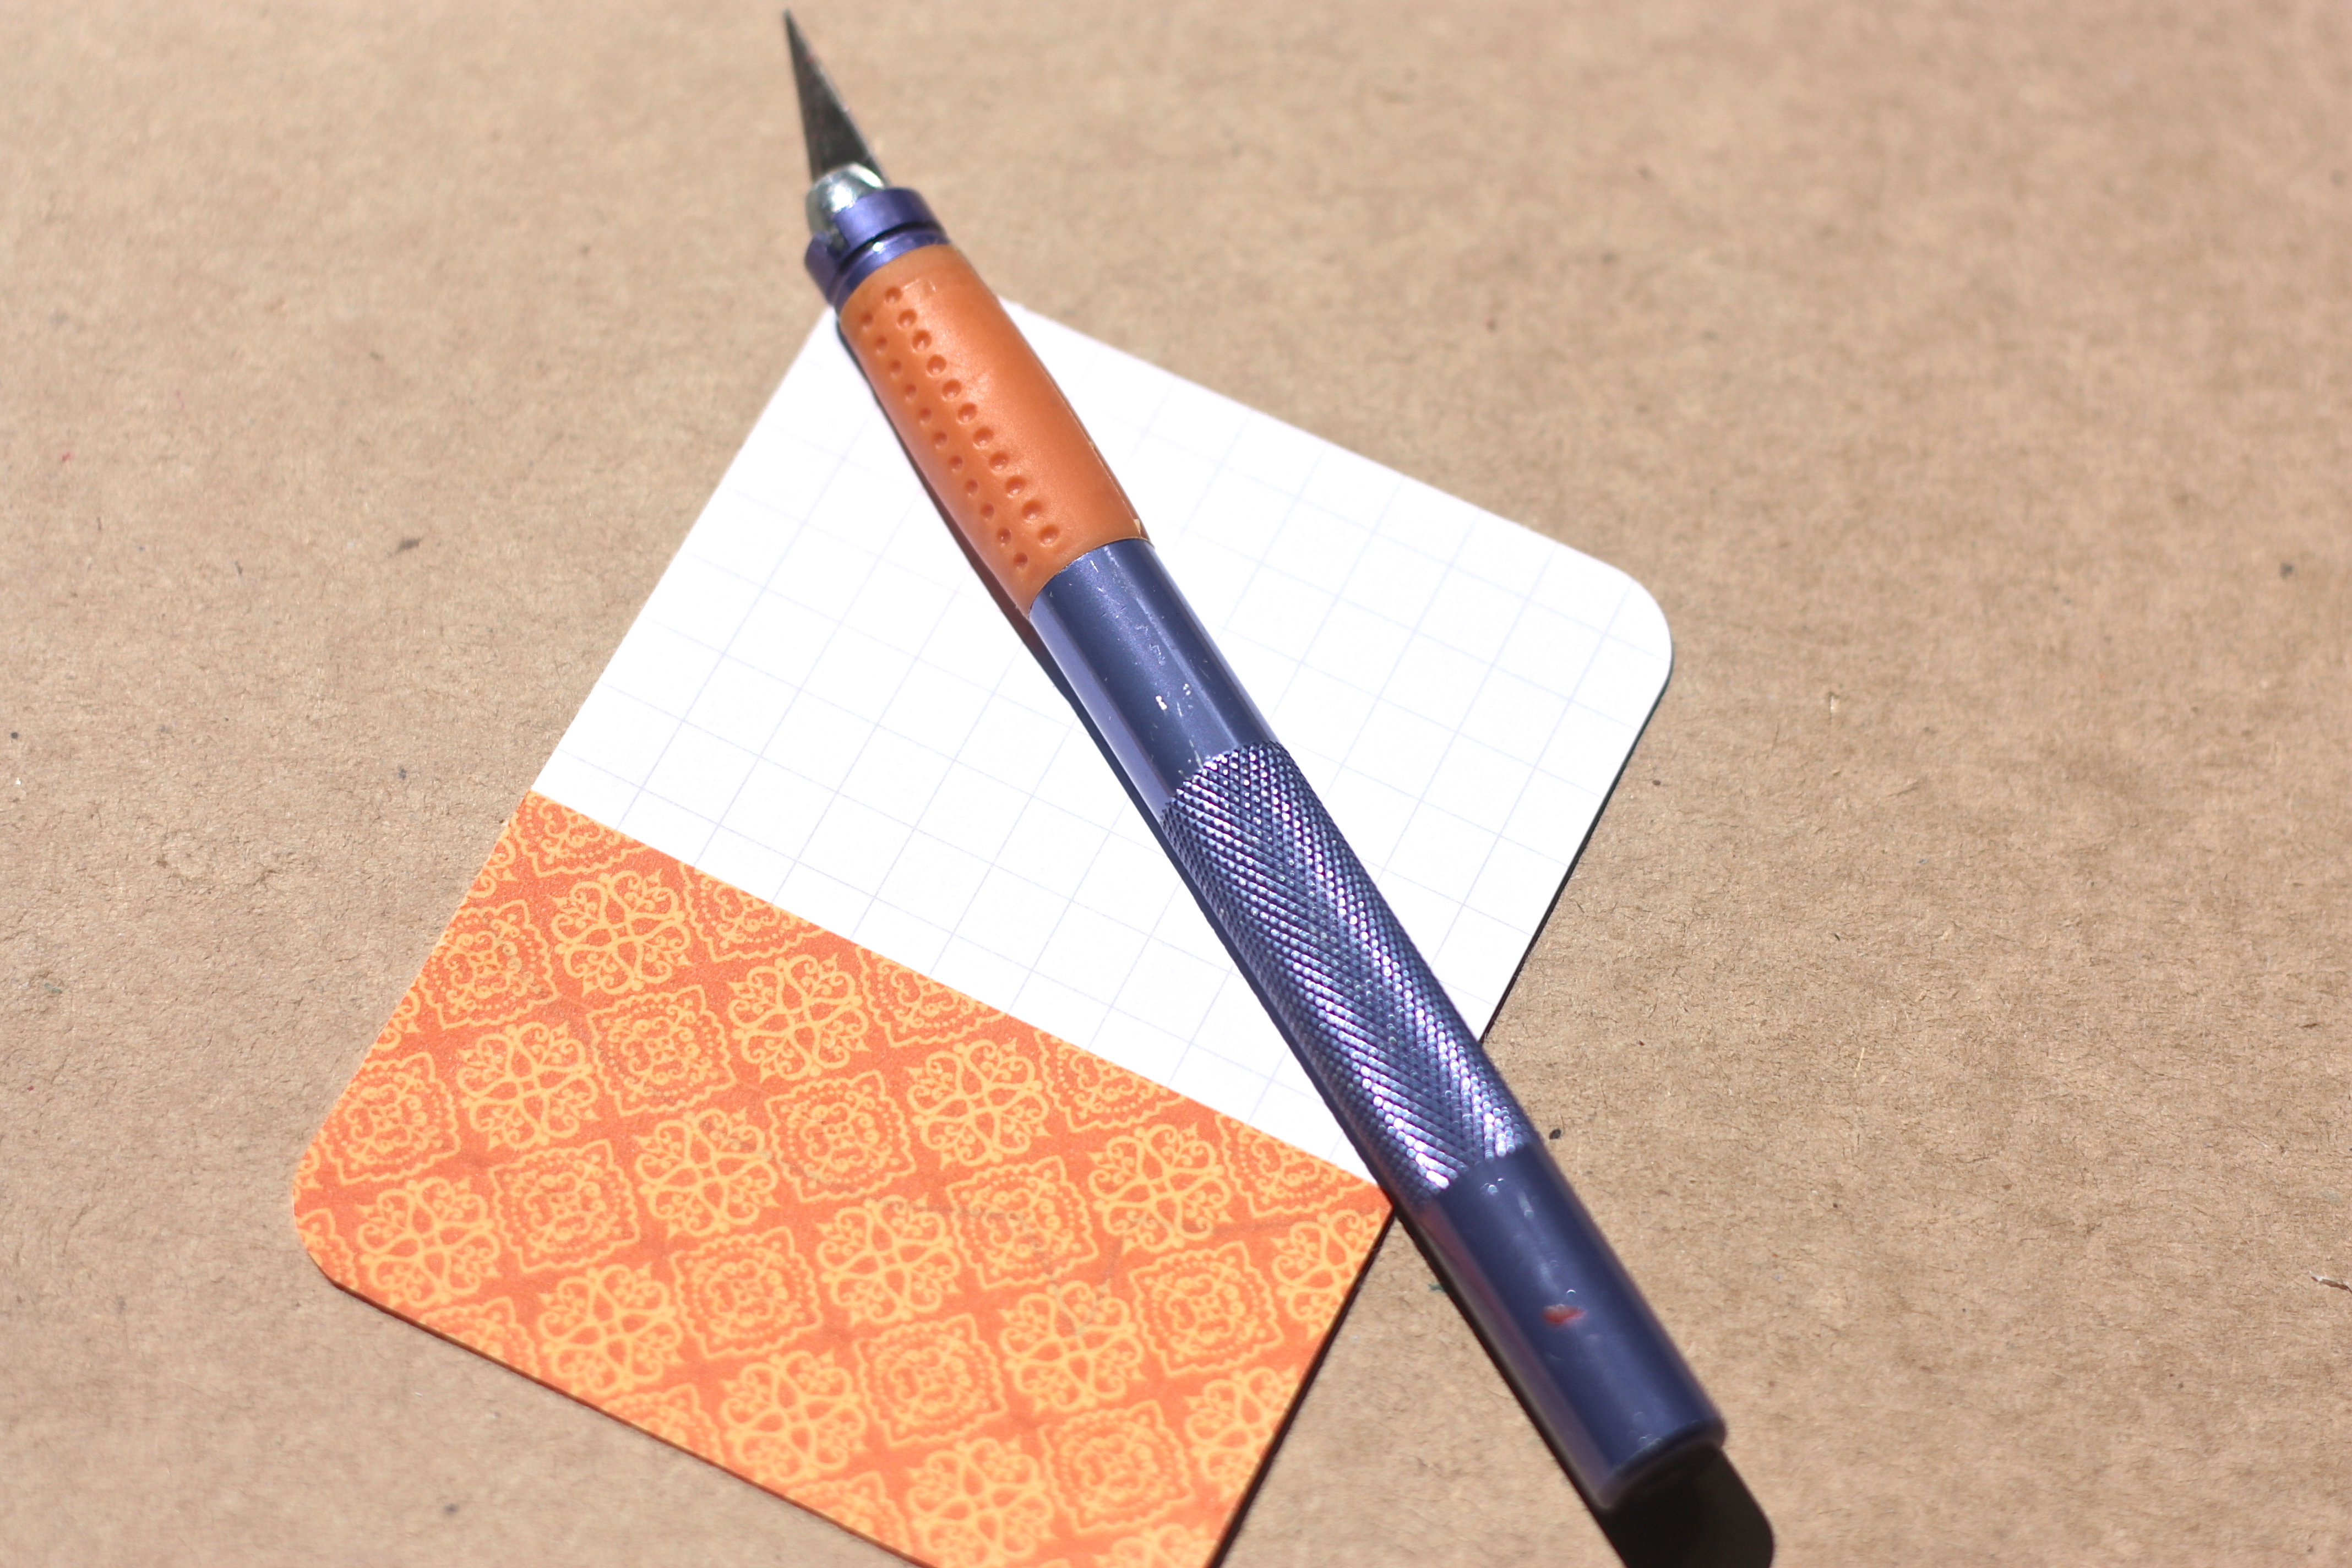
Layer on the washi tape:

If you look closely enough, you can see the pencil outline. Cut along the line using the exacto knife:
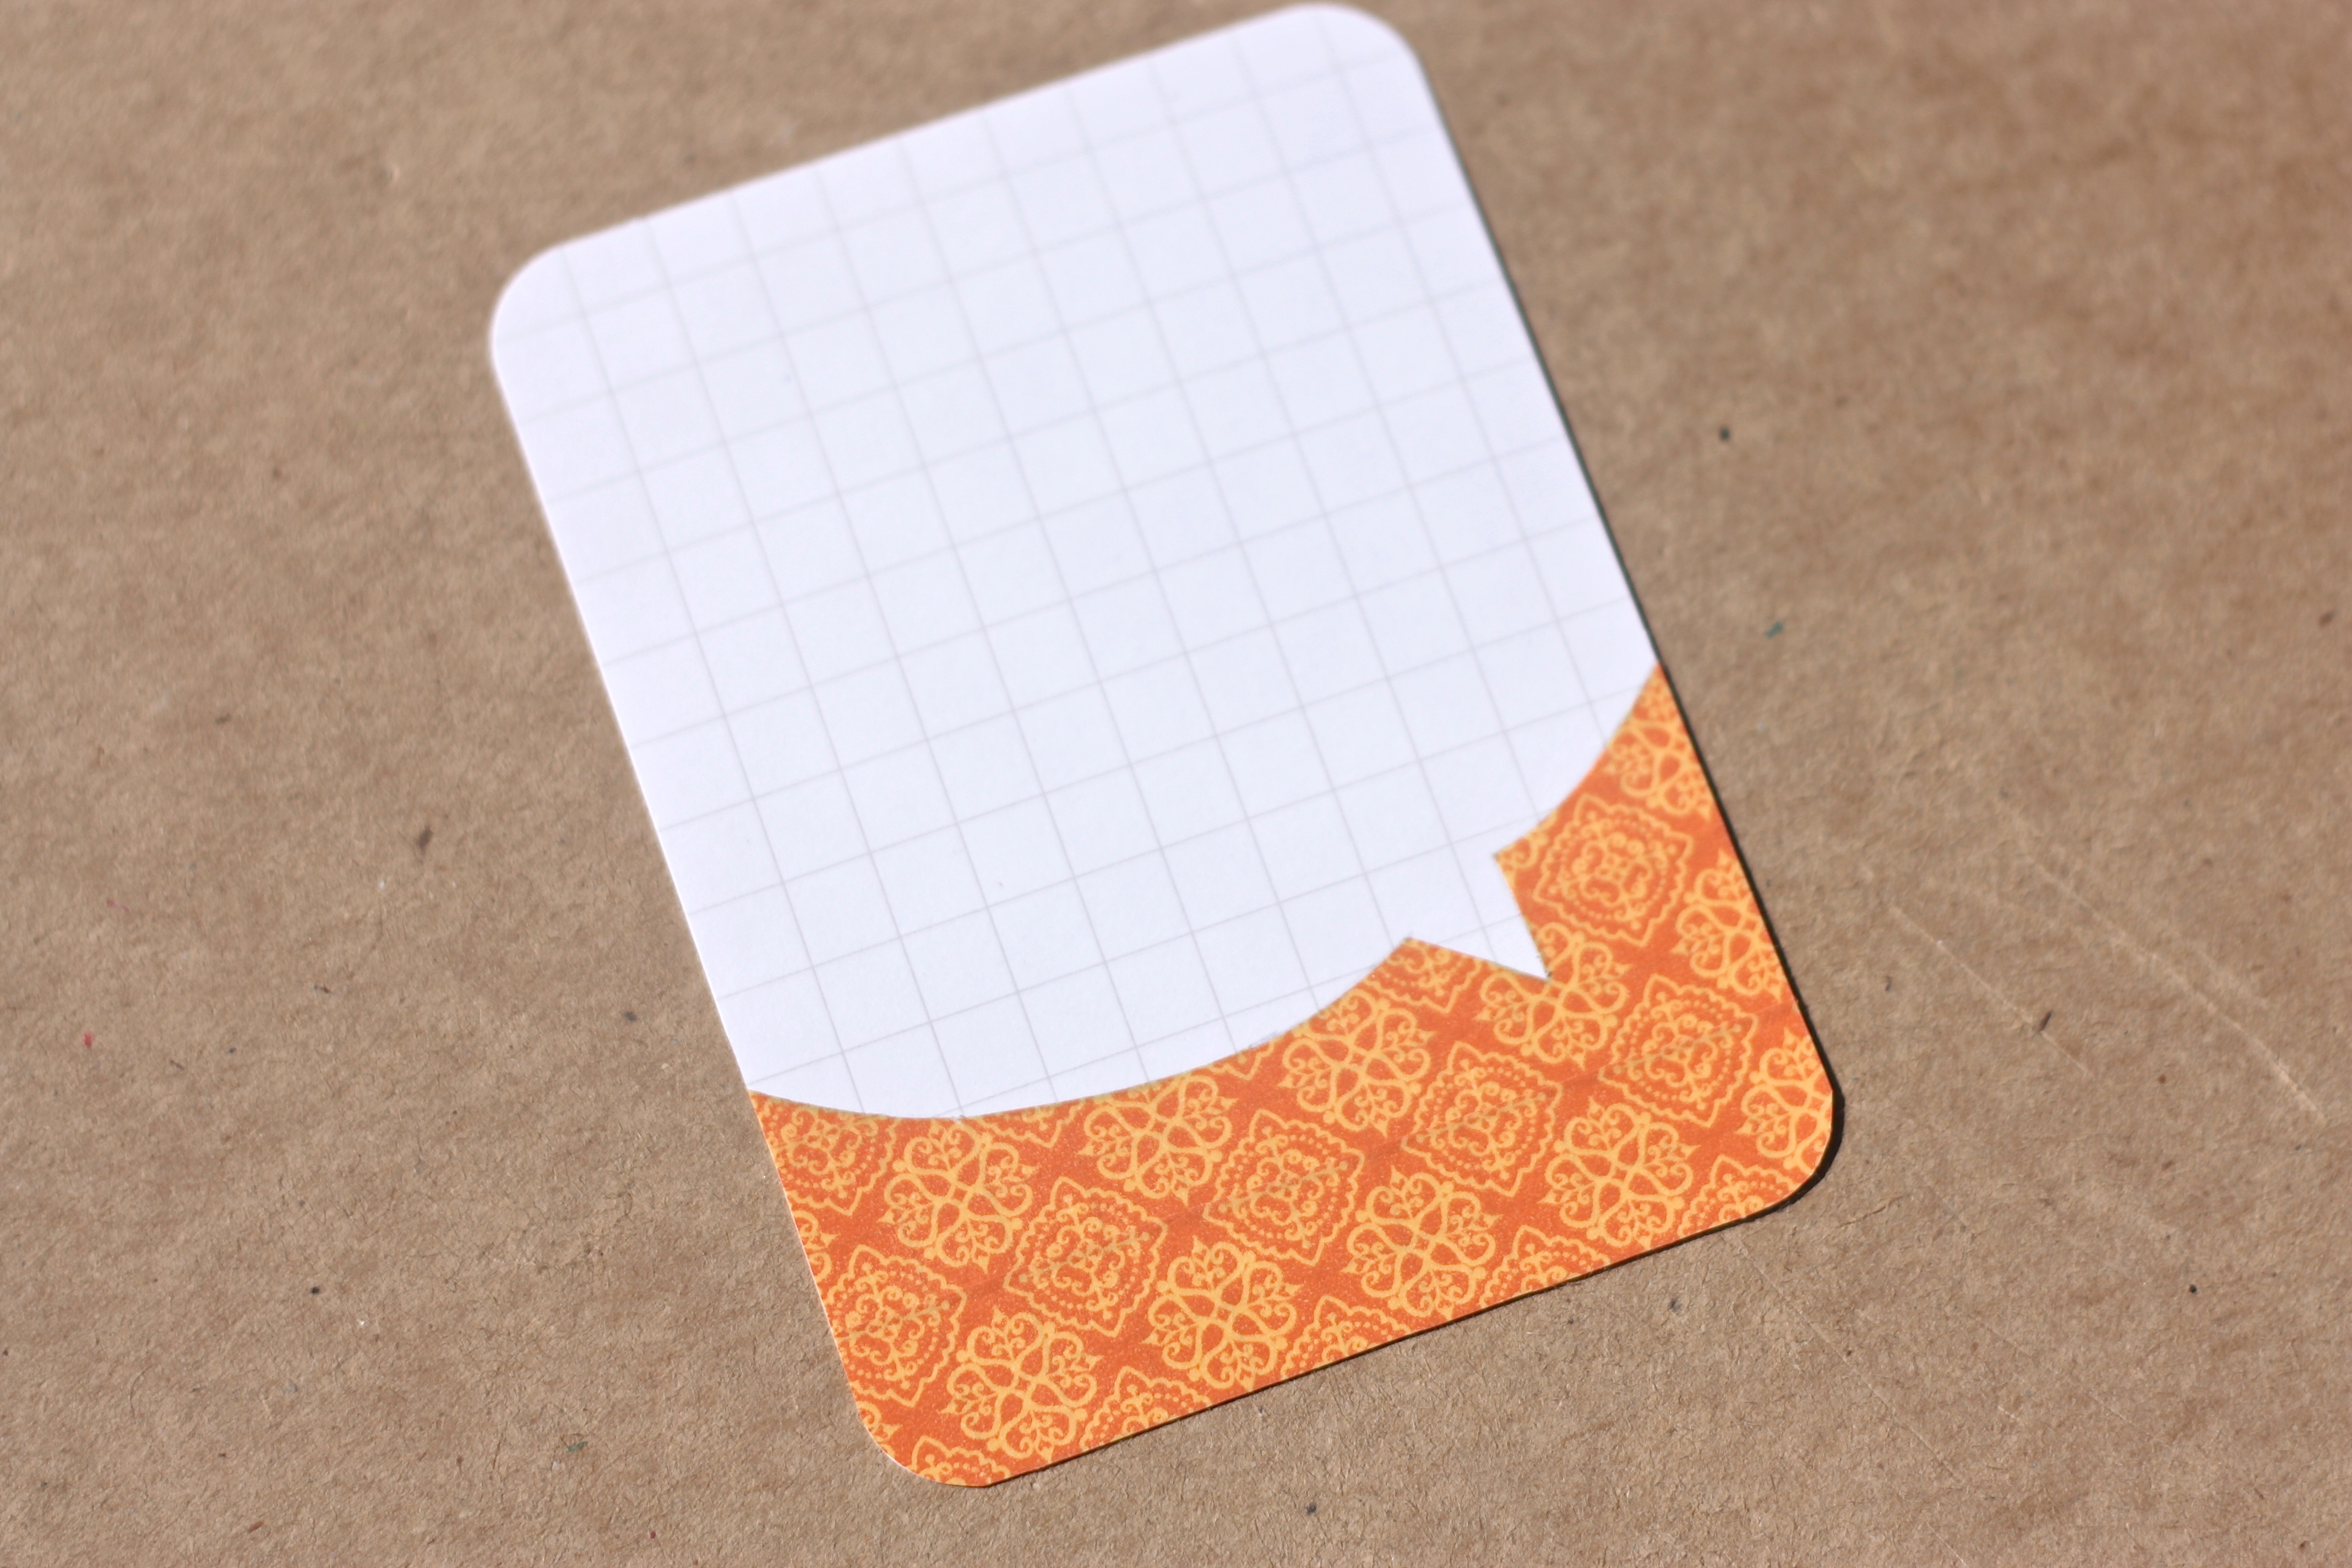
Peel back washi tape on top, erase pencil lines if needed:

Done. Finished product:
December Daily: Moments 1 and 2
Posted: December 2, 2012 Filed under: December Daily, Scrapbooking 2 CommentsThe cover came together…

Back side. Even though it says, “December Daily”, I have decided to focus on 25 moments/memories instead of daily happenings:

1. Salt Dough Advent Calendar


Upside down heart + OA “l” mini alpha = Christmas tree:

2. Disneyland


December Daily 2012
Posted: November 29, 2012 Filed under: December Daily, Scrapbooking 2 CommentsI finally sat down and started my 2012 December Daily album. I have had it unpacked and sitting on the craft table for a little over a week but found the idea of it entirely overwhelming. Having finally started, I am feeling a lot better about it and am excited to watch it all unfold…

Trying to keep it simple, as simple will get done:

I haven’t quite decided how I want to format the actual pages but am liking the title page. I plan to staple the first two pages together once I get the backside completed. However, the little christmas tree clip is fun and may just stay…

Have you completed a December Daily? I am really really hoping THIS is the year I follow through to the end. And not the year, I add to my Ziplocked collection of previous December Daily attempts…
DIY Washi Tape Smash Book/Journal
Posted: September 6, 2012 Filed under: Arts and Crafts, Scrapbooking 44 CommentsI recently stumbled across the most AMAZING, super cute, super easy to use Gratitude Journal app on the iPhone. One entry a day, you can easily attach a photograph, and you can set daily reminders as well…LOVE this app.

Inspired by the app and intent on ACTUALLY COMPLETING a Gratitude Journal, I wanted to make something to keep actual copies of the photographs and handwrite sentiments. Many of the composition notebooks have been marked down at Target, I found this particular notebook for .37 cents. Giddy about having the chance to finally use my embarrassingly large washi tape stash, I went to work…

I grouped the pages in threes as I wanted them sturdy and thick enough to withstand ink, tape, embellishments, etc.

Super easy. The edges are far from perfect. Just line up…

Turn the book over. Cut the corners at an angle. Fold over corner. Fold over tape. Turn book back over and fold down the remaining pieces of washi tape.

Seriously, super easy. Maybe, 15, 20 minutes…and you get a super personalized, fun smash book or journal:

The colors make me smile and the lined paper is so much easier for me to work with than the various papers included in the Smash books. I like the simple, clean look of the lined background. Looking forward to adding and working this…not bad for a .37 cent journal!!


